| –
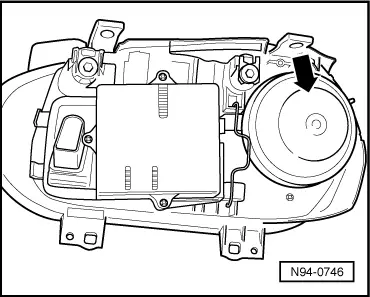
| Release connector by turning it anti-clockwise slightly and pull off. |
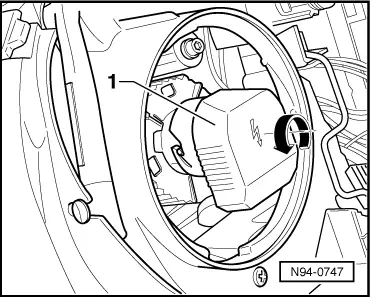
| –
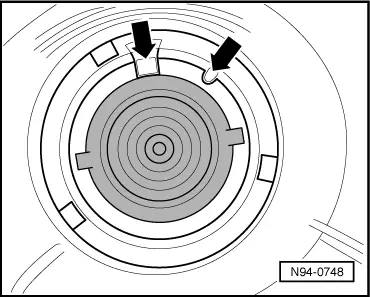
| Turn gas discharge bulb retaining ring anti-clockwise and remove. |

WARNING | Always wear eye protection and gloves when removing and installing gas discharge bulb! |
|
| Eye protection and gloves are necessary because the glass bulb of the gas discharge bulb is mechanically very sensitive and the interior of the bulb is under a pressure of 7 bar (cold) to 100 bar (warm) and the temperature around the bulb glass can reach up to 700 degrees Celsius. |
| –
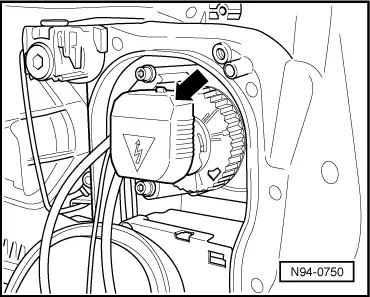
| Carefully pull gas discharge bulb out of headlight. |

Caution | Take great care when handling the gas discharge bulb (ensure the bulb is not stressed mechanically). The bulb glass is extremely fragile and has a high internal pressure. |
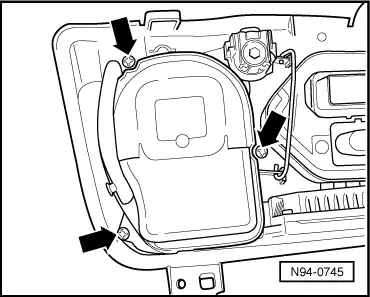
| When installing cap, ensure that it seats properly. The ingress of water will lead to permanent damage to the headlight. |
| Do not touch bulb glass when fitting gas discharge bulb. Fingers leave traces of grease on the glass, which vaporise when the bulb is switched on and cause the glass to cloud over. |
|

Note | If a headlight with automatic range control is removed, the basic setting of the headlight should always be checked when reinstalling → Booklet37. |
| Installation is carried out in the reverse order. When installing observe the following: |
|
|
|