
Golf Mk5
 Note
Note
|
 Caution
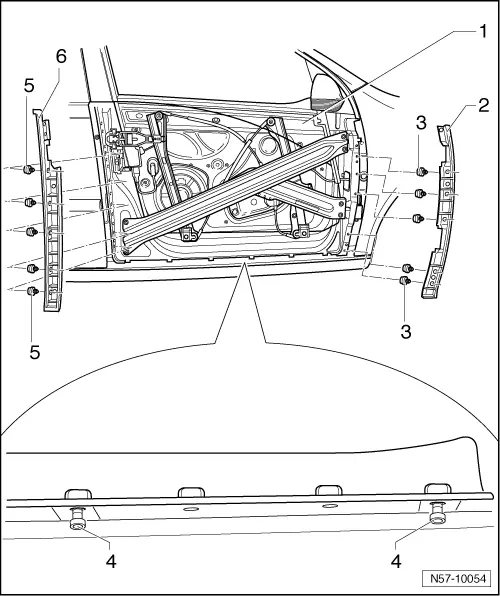
| l | The old (damaged) door outer panel with retaining rails is removed → Chapter |
| – | Install front -2- and rear -6- retaining rails to door inner part. For this use “bolt without point with thick washer”. |
| Specified torque for bolts -3- and -5-: 10 Nm. |
| – | Fit two guide bolts in lower edge of door inner part. |
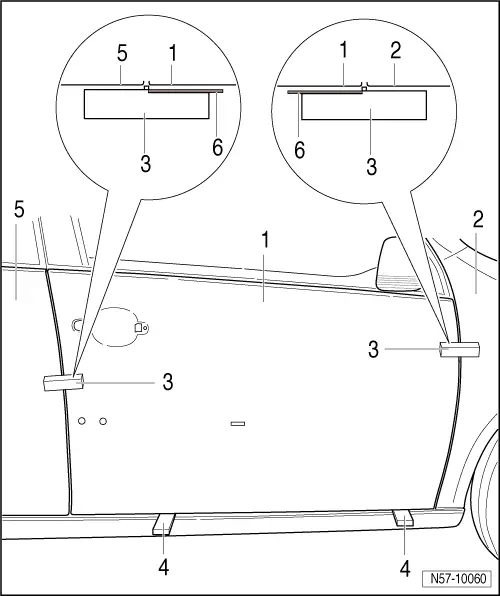
| The painted door outer panel is first offered up without bonding agent. |
| Assembly block from assembly tool set -T 10237- is required to offer up the door outer panel. A strip of “Tesa Power Strips large”-6- is applied on the lower side. The pin has the minimum dimension for the gap width. The non bonded surface is brought into position with the adjacent component. |
| – | Bond assembly block -3- on door outer panel. |
| – | Guide door outer panel -1- over guide bolts in lower edge of door inner part. |
| – | Adjust gap to side member and door outer panel height using wedges -4- from assembly tool set -T 10237-. |
| – | Place door outer panel with assembly blocks on surrounding components -2 and 5-. |
| – | Check gap dimension using setting gauge -3371- → Rep. Gr.00. |
| – | If gap dimension cannot be adjusted further, door inner part must be adjusted → Chapter |
| – | Remove door outer panel again. |
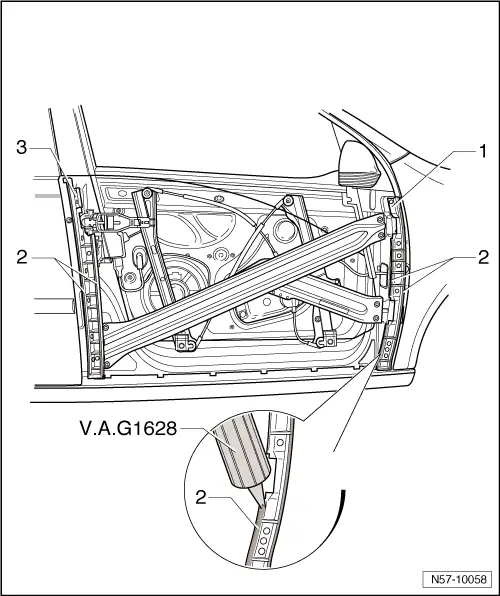
| – | Apply a bead of adhesive material -2- using cartridge gun -V.A.G 1628- to front -1- and rear -3- retaining rails. |
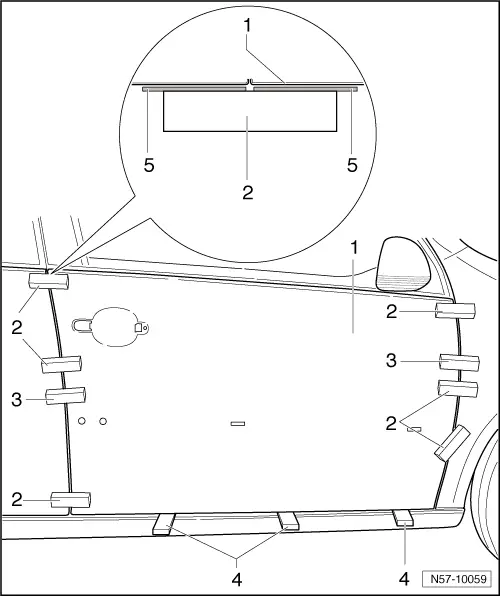
| Use fixing block from assembly tool set T10237 to insert door outer panel. Two strips of “Tesa Power Strips large”-5- are bonded to the contact surfaces. |
| – | Guide door outer panel -1- over guide bolts in lower edge of door inner part. |
| – | Bring door outer panel with assembly blocks -3- into contact with surrounding components. |
| – | Adjust the gap to side member and adjust door outer panel height using wedges -4- from assembly tool set. |
| – | Check gap dimensions using setting gauge -3371- → Rep. Gr.00. |
| – | Bond short fixing block -2- evenly on the replacement door and the adjacent components. |
Note
|