
Golf Mk5
|
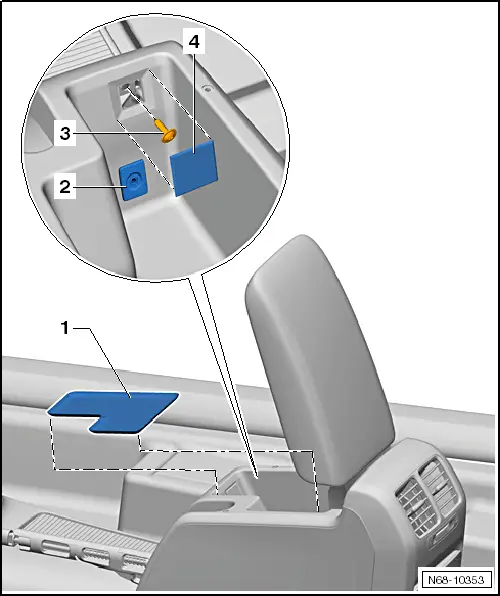
| Vehicles without CD changer |
| – | Remove lining mat -1- from storage compartment. |
| – | If fitted, remove „AUX IN socket“-2- → Communication; Rep. gr.91 |
| – | Unclip cover -4- from fasteners in storage compartment. |
| – | Unscrew bolt -3- (1.5 Nm). |
| Vehicles with a CD changer |
| – | Remove CD changer -1- → Communication; Rep. gr.91. |
| – | Remove lining mat -2- from storage compartment. |
| – | Unscrew bolt -3- (1.5 Nm). |

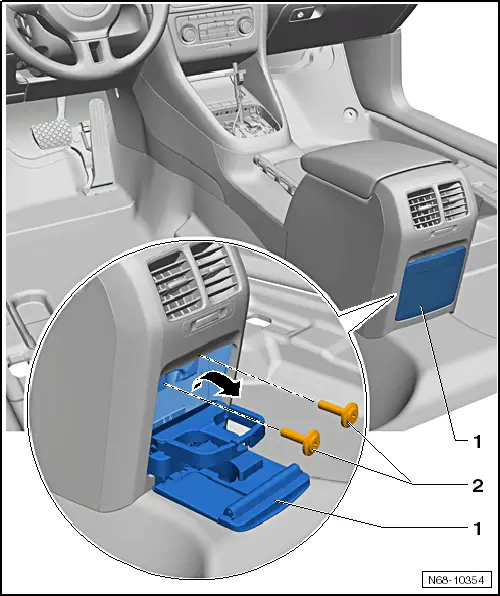
| All vehicles |
| – | Open cup holder -1- and remove the two bolts -2- (1.5 Nm). |
| – | Pull cup holder out of centre console. |
 Note
Note| When installing, close cup holder and insert cup holder bottom first into centre console. Then open cup holder and install the two bolts -2-. |
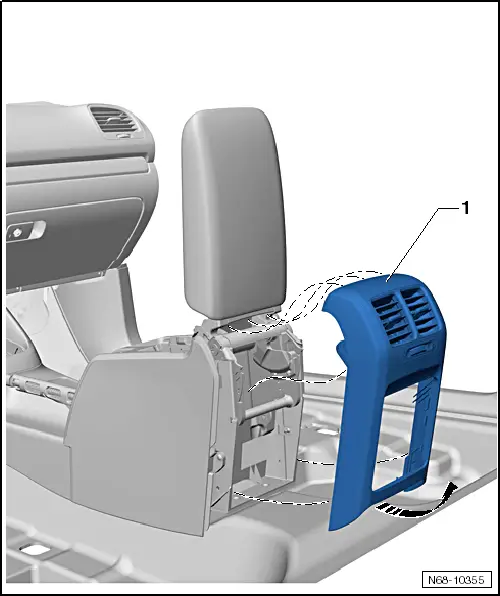
| – | Pull lower section of trim -1- out of mountings -arrow-. |
| – | Take upper section of trim out of mountings in centre console. |
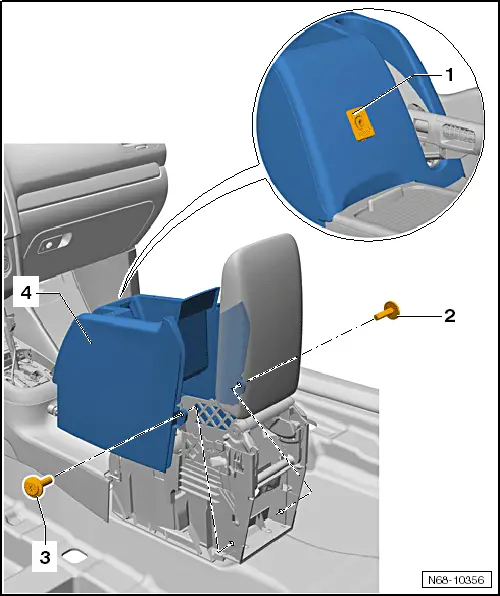
| – | If fitted, remove „AUX IN socket“-1- → Communication; Rep. gr.91. |
| – | Remove bolts -2- and -3- (1.5 Nm). |
| – | Release lower end of extension -4- from fasteners. |
| – | Release gearstick insulation -3- from centre console (only vehicles with a gearstick). |
| – | Remove the two bolts -2- (1.5 Nm). |
| – | Release ashtray unit -1- from centre console and disconnect wiring harness (dependent on vehicle equipment). |
Note| A storage compartment may be installed instead of an ashtray -1-, but the removal is identical. |

| – | Unscrew bolt -1- (1.5 Nm). |
| – | Pull left footwell trim -2- out of mountings. |
Note| t | Removal of right footwell trim is identical. |
| t | When installing, first insert footwell trim -2- into mounting -3-. |

| – | Remove lining mat -4- from storage compartment. |
| – | Unscrew bolt -5- (1.5 Nm). |
| – | Remove the two bolts -3- (1.5 Nm). |
| – | Remove the two bolts -2- (1.5 Nm). |
| – | Pull centre console cover -1- out in direction of -arrow-. |
Note| When installing, bolts must be installed in sequence -2-, -5- and -3-. |

| – | Remove centre console -1- from vehicle. |
Note| When installing, ensure centre console -1- locks into mountings -arrows- of dash panel. |

| – | Remove bolts -1-, -2-, -3- and -4- (1.5 Nm). |
| – | Remove centre console trim carrier -5- from vehicle. |
