volkswagen Workshop Repair Guides

Volkswagen Workshop Service and Repair Manuals

Brakes, hydraulics, regulator, servo > < Brake light switch, old version
Brake light switch, new version
  Note
t  Use only new brake light switches.
   
t  
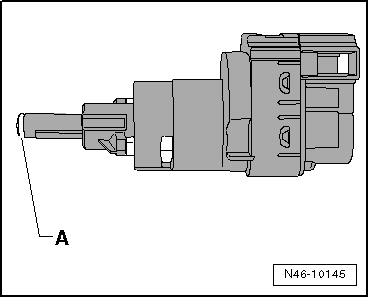
The most noticeable difference to the old brake light switch is the new, bright tip of the plunger -A-.
Removing
–  Remove trim on driver's side → General body repairs, interior; Rep. gr.70
–  If necessary, remove footwell vent → Heater, air conditioning system; Rep. gr.80.
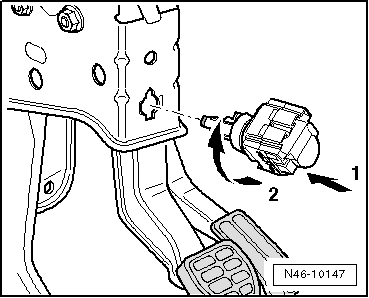
–  Pull connector off brake light switch.
The brake light switch may be removed only while operating rod is pressed in (brake pedal is not operated), or the locking mechanism of the brake light switch will be damaged.
–  Remove brake light switch by turning 45° to left.
Installing, adjusting and locking
Before assembling the brake light switch, grease the bright tip of the plunger head with polycarbamide grease G 052 142 A2.
l  The brake pedal must remain at rest position while the brake light switch is being installed. The brake pedal must not be touched by anything but the plunger head throughout the entire installation.
  N46-10145
–  Guide brake light switch through fitting hole -arrow 1- and press it against pedal with head of plunger. Then turn brake light switch 45° to right -arrow 2- until it can be felt to engage.
–  Fit brake light switch connector.
–  Check function of brake light.
–  Install footwell vent → Heating and air conditioning system; Rep. gr.80.
–  Install trim on driver's side → General body repairs, interior; Rep. gr.70
  N46-10147

Brakes, hydraulics, regulator, servo > < Brake light switch, old version