volkswagen Workshop Repair Guides

Volkswagen Workshop Service and Repair Manuals

Removing and installing rear final drive, Golf 2004 ? > < Assembly overview - propshaft
Removing and installing propshaft
  Note
t  If possible, use a twin pillar lifting platform when working on the propshaft.
t  Before removing, mark positions of all parts relative to each other. Reinstall in the same position otherwise imbalance will be excessive, the mountings could be damaged causing rumbling noises.
t  Keep propshaft straight; store and transport fully extended only.
t  Do not let propshaft »hang« during removal; always support it.
t  Always pull propshaft from or push it onto drive flange horizontally .
Special tools and workshop equipment required
t  Torque wrench -V.A.G 1332-
t  Engine and gearbox jack -V.A.G 1383 A-
   
t  Counterhold -T10172-
Removing
–  Remove noise insulation → General body repairs, exterior; Rep. gr.50.
  W00-10637
–  Unscrew bolts -1- and -2- of pendulum support.
  N39-10232
–  Press »engine and gearbox« forwards and secure with an appropriate piece of wood -A-.
–  Support front section of exhaust system with engine and gearbox jack -V.A.G 1383 A-.
  N39-10233
–  Disconnect exhaust system at clamp -arrows- and remove rear part of exhaust system → Rep. gr.26.
–  Remove tunnel cross piece.
  V26-0733
–  Loosen intermediate bearing bolts -arrows- two turns.
–  Loosen, but do not remove, front and rear propshaft bolts.
  N39-10215
–  Counterhold at rear final drive when loosening or tightening propshaft.
  N37-10410
To prevent later noise due to imbalance:
  N01-0453
–  If there are no markings -arrows-, mark position of propshaft relative to final drive flange.
–  Also mark position of propshaft relative to bevel box flange.
–  Unbolt propshaft from rear final drive and rest it on engine and gearbox jack -V.A.G 1383 A-.
  N39-0836
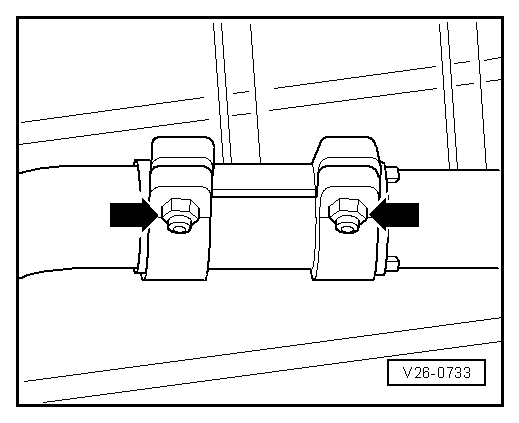
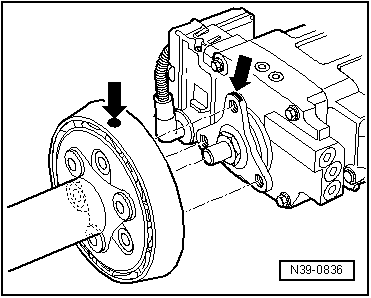
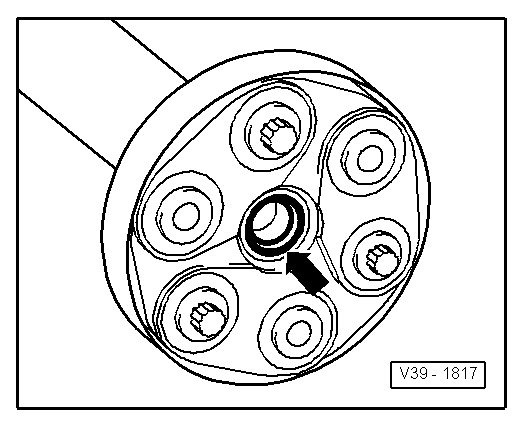
–  When pulling off or pushing on propshaft, always ensure that sleeve -arrow- is not damaged.
  Note
A second mechanic is required for the further removal of the propshaft.
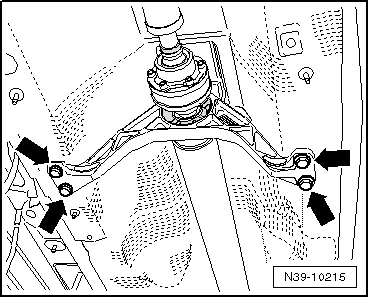
–  Unbolt propshaft from bevel box.
  WARNING
To avoid damaging the protective boot in the centre bearing, remove, store and install the propshaft with the joint as straight as possible.
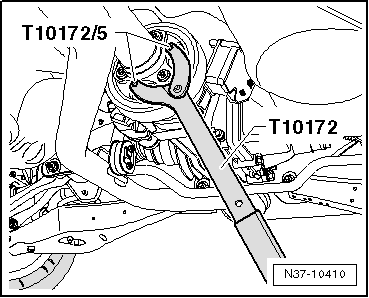
–  Unbolt intermediate bearing and remove propshaft to rear, keeping the joint as straight as possible.
Installing
Install in the reverse order of removal, observing the following:
–  Install all parts which were marked in relation to each other in their original positions.
–  Tighten propshaft bolts. Torque settings → Chapter.
  V39-1817
–  Bolt on pendulum support using »new« bolts. Torque settings → Running gear, axles, steering; Rep. gr.40.
–  Install exhaust system → Rep. gr.26.
–  Install noise insulation → General body repairs, exterior; Rep. gr.50.
–  Install tunnel cross piece → General body repairs, exterior; Rep. gr.50.
  N39-10232

Removing and installing rear final drive, Golf 2004 ? > < Assembly overview - propshaft