volkswagen Workshop Repair Guides

Volkswagen Workshop Service and Repair Manuals

Cylinder block, sealing flange > < Assembly overview - part II, cylinder block
Removing and installing poly V-belt
Only vehicles with air conditioner compressor
Special tools and workshop equipment required
   
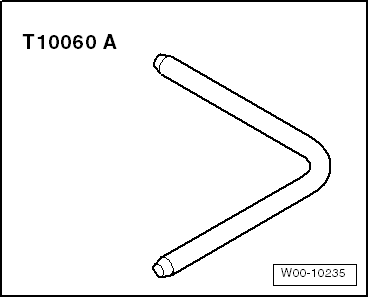
t  Locking pin -T10060 A-
t  Spanner
Removing
–  Remove engine splash protection.
–  Remove front right wheel housing liner → General body repairs, exterior; Rep. gr.66.
–  Mark direction of rotation of poly V-belt.
  W00-10235
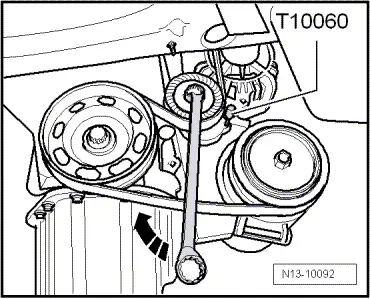
–  To slacken poly V-belt, swing tensioning element with spanner in -direction of arrow-.
–  Lock tensioning element using locking pin -T10060 A-.
–  Remove poly V-belt.
Installing
–  Fit poly V-belt first over crankshaft belt pulley. Slide poly V-belt onto tensioning roller last.
Further assembly is basically the reverse of the dismantling sequence.
  Note
t  Ensure, before installing poly V-belt, that all ancillaries (alternator, air conditioner compressor) are secured tightly.
t  When installing poly V-belt, check direction of belt rotation and proper seating of belt in pulleys.
After completing repairs always:
–  Start engine and check that belt runs properly.
Poly V-belt routing
  N13-10092
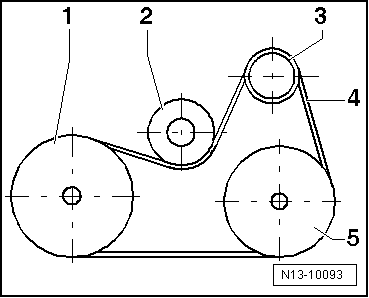
Belt drive with air conditioner compressor
1 - Crankshaft pulley
2 - Tensioning roller
3 - Alternator pulley
4 - Poly V-belt
5 - Air conditioner compressor
  N13-10093

Cylinder block, sealing flange > < Assembly overview - part II, cylinder block