volkswagen Workshop Repair Guides

Volkswagen Workshop Service and Repair Manuals

Removing and installing headlight range control motor (headlight manufacturer: Hella) > < Removing and installing headlight range control motor
Removing and installing headlight range control motor (headlight manufacturer: Automotive Lighting)
Removing:
  Note
t  If control motors are removed and reinstalled or renewed, the headlight adjustment must be checked and adjusted as necessary → Booklet38.
t  The illustrations show the renewal of the headlight range control motor on the right headlight. If the left headlight range control motor is removed and installed, two assembly openings with predetermined breaking points must be opened to gain access to the securing bolts (these are not shown on the following illustrations).
–  Remove headlight → Chapter.
   
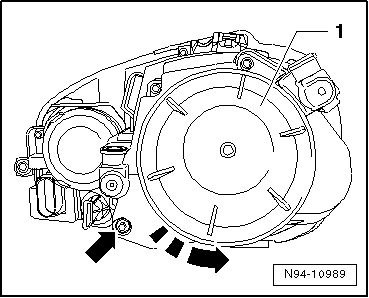
–  Turn cover cap -1- in -direction of arrow- and remove it.
  Note
To gain access to the second securing bolt of the headlight range control motor, break open the assembly opening at the predetermined breaking point -arrow- on the back of the headlight housing. This opening must be sealed on completion of repairs with separately available sealing plug.
  N94-10989
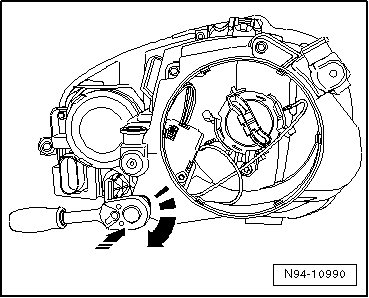
–  Insert a 5 mm socket on the plastic hexagon on the back of the headlight housing.
–  Press and turn the plastic hexagon out of the headlight housing to break open the assembly opening.
  Note
The broken open sealing piece must not remain in the headlight. Remove it from the headlight housing if necessary.
  N94-10990
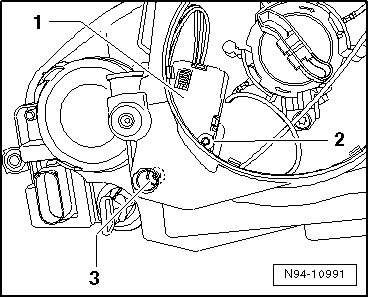
–  Unscrew T20 securing bolts -2- and -3- from headlight range control motor-1-.
  N94-10991
–  Lift dipped beam reflector -2- in headlight slightly and turn the headlight range control motor-1- in -direction of arrow- on to stop.
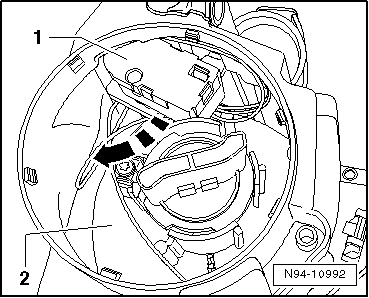
  N94-10992
–  Lift dipped beam reflector in headlight slightly and turn the ball head of the control motor -1- so that it can be slid out of the ball head mounting -2- in -direction of arrow- to the rear.
–  Take the headlight range control motor out of the headlight as far as the connected wiring allows.
  N94-10993
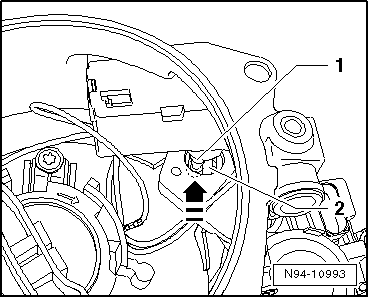
–  Disconnect connection -1- and remove headlight range control motor-2-.
Installing:
Installation is carried out in the reverse order. When installing observe the following:
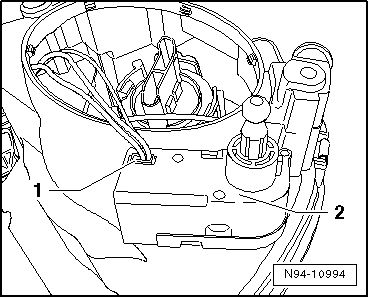
  N94-10994
–  Reconnect connector -1- on headlight range control motor-2-.
  N94-10994
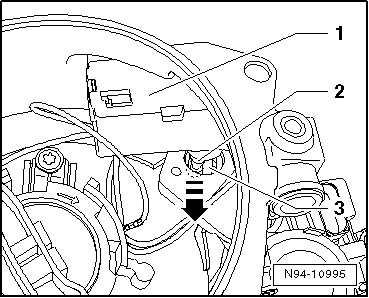
–  Insert headlight range control motor-1- in headlight in position as shown in illustration.
–  Lift dipped beam reflector in headlight slightly and turn the ball head of the control motor -2- so that it can be slid into the ball head mounting -3- in -direction of arrow-.
  N94-10995
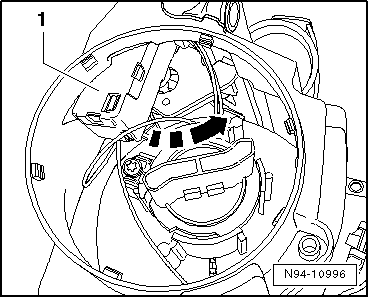
–  Lift dipped beam reflector in headlight slightly and turn the headlight range control motor-1- in -direction of arrow- on to stop.
–  Insert both securing bolts into the headlight range control motor and tighten, and install the cover cap.
  Caution
When installing cover cap, ensure cap is seated correctly. The ingress of water will lead to permanent damage to the headlight.
  N94-10996
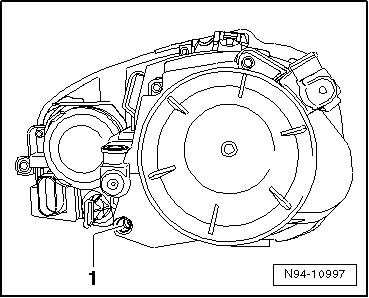
–  Seal the broken-open assembly openings -1- using a separately ordered sealing plug → ETKA (electronic parts catalogue).
–  Check headlight functions.
–  Check headlight setting and adjust headlight as necessary → Booklet38.
  N94-10997

Removing and installing headlight range control motor (headlight manufacturer: Hella) > < Removing and installing headlight range control motor