volkswagen Workshop Repair Guides

Volkswagen Workshop Service and Repair Manuals

Adjusting headlight installation position > < Removing and installing headlight GT, GTI with headlight cleaning system and R32
Removing and installing headlight GT, GTI without headlight cleaning system
  Note
t  There is no requirement to remove the bumper cover or disconnect the battery earth strap.
t  
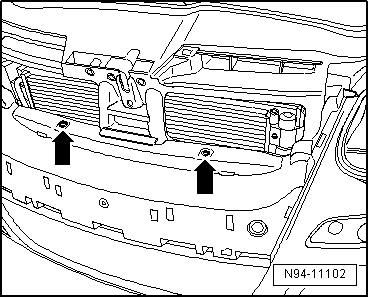
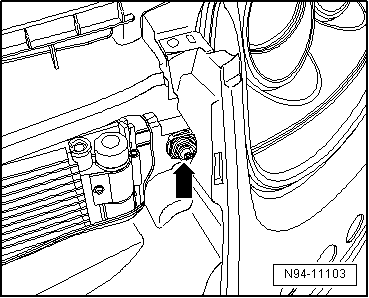
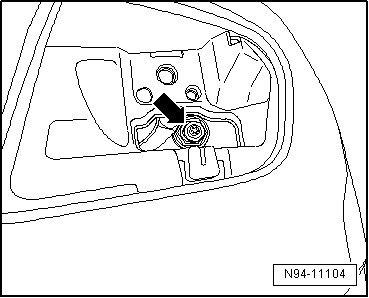
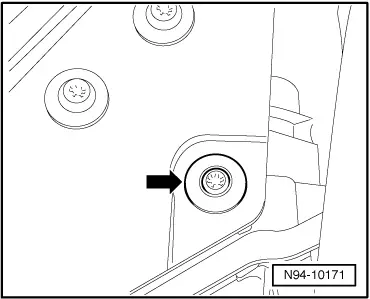
The illustrations show removal and installation of the left headlight.
t  If a headlight is removed, it should always be adjusted following installation → Booklet38.
t  If a headlight with gas discharge bulbs is removed, the basic setting of the headlight should always be checked when reinstalling → Booklet38.
Removing:
–  Switch off ignition and all electrical consumers and remove ignition key.
–  Remove the radiator grille at front → General body repairs, exterior; Rep. gr.66.
–  Remove the protective trim underneath the headlight → General body repairs, exterior; Rep. gr.63.
–  Remove the ventilation grille → General body repairs, exterior; Rep. gr.63.
   
–  Disengage and separate the multi-pin connector -arrow- on the rear of the headlight.
  N94-10170
–  Unscrew upper bolts -arrows- on bumper cover.
  N94-11102
–  Unscrew securing bolt -arrow- on inner part of headlight.
  N94-11103
–  Remove lower securing bolt -arrow- behind the protective trim.
  N94-11104
–  Remove securing bolt -arrow- on top of headlight.
  Caution
t  Protect the upper side of the bumper from damage!
t  When working on body components made of plastic, please note that excessive forming (e.g. by bending) can cause permanent deformation, cracks and paint damage.
t  When bending plastic parts, ensure that the components are at room temperature (approx. 15° to 20°). Low temperatures will render the material brittle and could cause cracks and paint damage when bending the component.
  N94-10171
–  Pull the top of the bumper cover -arrow- on the headlight inside to the front until the inner securing point of the headlight can be guided past the bumper cover.
  N94-11105
–  Turn the headlight to the front until the inner cover -arrow- can be guided past the lock carrier.
  N94-11106
–  Guide the headlight in the body aperture up carefully until the lower securing lug can be guided past the bumper cover and remove it the headlight from the body aperture.
Installing:
Installation is carried out in the reverse order. When installing observe the following:
–  Tighten securing bolts on headlight to specified torques → Chapter.
–  Check headlight installation position is central, i.e. shut lines/gaps are equal around headlight.
If the shut lines/gaps around the headlight are uneven, the installation position must be adjusted → Chapter.
–  Check headlight functions.
  Note
If a headlight is removed, it should always be adjusted following installation.
–  Check headlight setting and adjust headlight as necessary → Booklet38.
  N94-11107

Adjusting headlight installation position > < Removing and installing headlight GT, GTI with headlight cleaning system and R32