volkswagen Workshop Repair Guides

Volkswagen Workshop Service and Repair Manuals

Roof front latch for electrohydraulic and manually operated convertible roof - Assembly overview > < Removing
Installing
Installing
–  Tie an approx. 92 cm long strap to cord shoe.
   
–  Insert retaining plate with strap inside headliner -arrow-.
  Note
t  To help introducing retaining plate in headliner use a strong flexible wire (long enough to introduce it in headliner) with a “Y” form at the end of the wire.
t  When doing this observe the original installation position of retaining plate.
  M61-0172
–  Push retaining clips -1- of retaining plate outwards from the headliner.
  Note
When using a new retaining plate with cords, remove new relay from cords. Use new relays only when already installed relays are damaged.
  M61-0166
–  Guide the lower cord -1- first through the centre relay -2- and then through the lower relay -3-.
  M61-0167
–  Guide the upper cord -1- through the upper relay -2- and then through the liner hand holds -3- in -direction of arrow-.
  M61-0198
–  Tie both cords to retaining plate with cord and tie knots -1- to original position.
  Note
t  The knots must be tied on the rear side of the retaining plate with cords.
t  Tie the knots as close to the end of the cord as possible.
  M61-0197
–  Secure pendulum guide -1- to reinforcing plate -2- using clips -3-.
  M61-0199
–  Attach retaining plate with cords -1- to reinforcing plate -2- (inside liner). When doing this press retaining clips -3- carefully with pliers. Ensure that the retaining clips seat correctly in the holes of the retaining plate with cords.
  Note
Ensure that the cords are not trapped between the retaining plate with cords and the reinforcement plate.
  M61-0196
–  Insert guide -1- into pendulum guide -2- and secure the lower guide point to the roof frame -4- with a rivet -arrow-.
  Note
Ensure that the lower cord -3- is guided in front of the frame -4-.
  M61-0200
–  Secure the upper guide point -1- and cord shoes -2- to roof frame -3- with a rivet -arrow-.
  Note
t  Observe that guide -1- is mounted in upper and lower points, on the inner side of the frame -3- and cord shoes -2- are mounted on the outer side of the frame.
t  Observe cord shoes original position.
  M61-0201
–  Guide the upper cord -2- behind cross frame -1- and over the extended frame -3-.
  Note
Guide the cord through highest and rearmost point.
  M61-0174
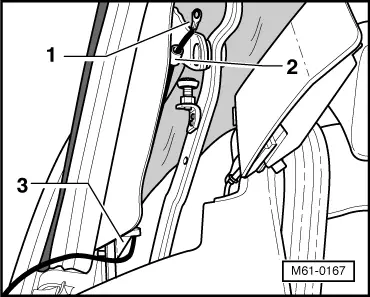
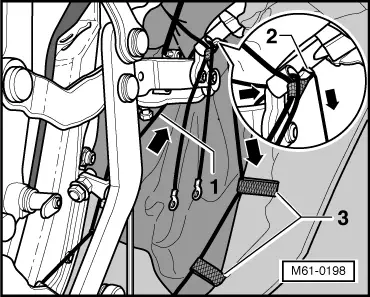
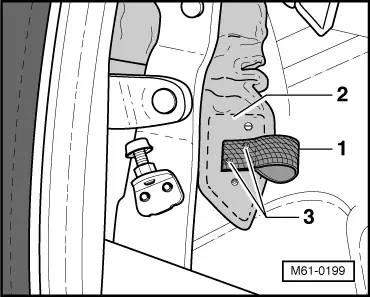
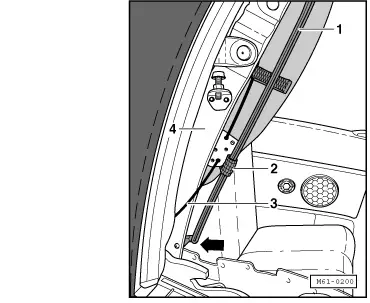
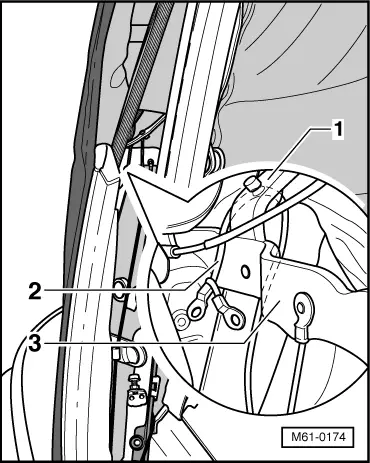
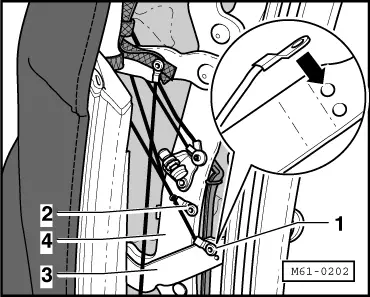
–  Guide the upper cord -1- with movable cord shoe -2- to inclined frame -3-.
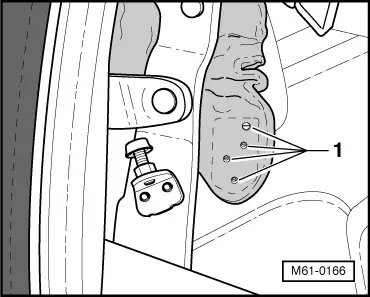
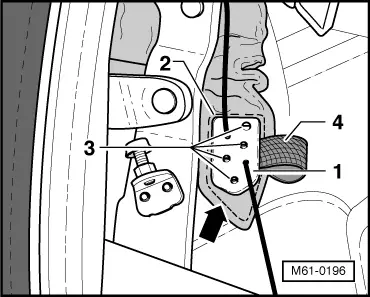
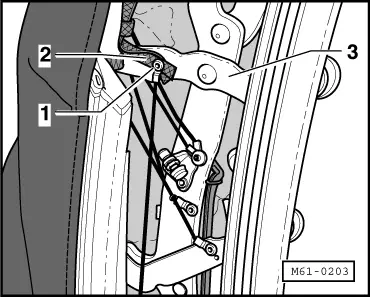
–  Rivet sliding cord shoe -2- (with flat side cord shoe towards frame) to vertical standing frame -4- an angle of approx. 45° to horizontal line of vehicle.
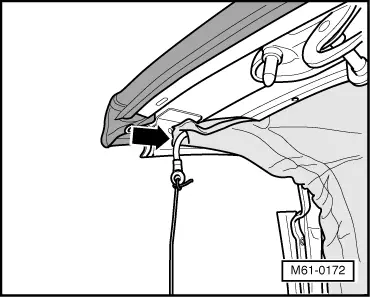
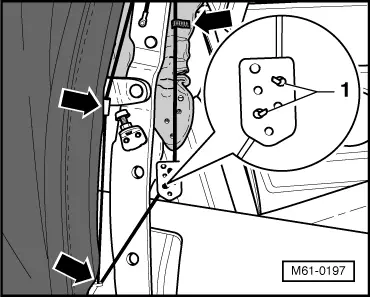
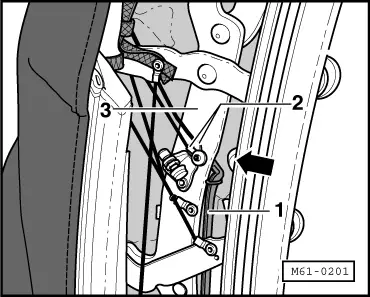
–  Rivet -arrow- upper cord shoe -1- (with flat side cord shoe towards frame) to inclined frame -3- at an angle of approx. 45° to horizontal line of vehicle.
  WARNING
t  Care must be used when inserting a rivet into the lower hole, otherwise the cord will be damaged.
t  Fit both cord shoes with flat side towards the frame, otherwise malfunction may result.
  M61-0202
–  Rivet lower cord shoe -1- and pendulum guides -2- to the frame -3-.
  Note
Note that the pendulum guides are mounted between the frame -3- and the cord shoes -1-.
  M61-0203
–  Pull on the belt secured to the cord shoe until the eye is reached -arrow-.
–  Screw cord shoe in.
–  Release belt from cord shoe.
–  Open/close convertible roof to verify correct operation.
–  On completion of procedures, install roof leading edge in liner tensioning system → Chapter
–  Install rear side trim panel → General body repairs, interior; Rep. Gr.70
  M60-0021

Roof front latch for electrohydraulic and manually operated convertible roof - Assembly overview > < Removing