
Passat L4-1984cc 2.0L DOHC (1991)
- remove clutch pulley 12 using puller US 1078
- loosen clutch field coil wire clamp 10 and connector holder, if equipped
- remove clutch field coil retainer snap ring 11 with snap ring pliers (Mastercool tool No.90903 or equivalent)
- remove clutch field coil 9
Installing
- install clutch field coil 9
-
clutch field coil flange protrusion must match hole in front of compressor housing to prevent coil movement and to correctly locate power leads
for attachment
- install clutch field coil retainer snap ring 11 with snap ring pliers
- attach field coil wire clamp 10 and connector holder, if equipped
- support compressor in bench vise on mounting tabs at base of compressor
- align pulley 12 on front housing hub squarely
- place driver kit VW 519 on pulley
-
ensure outer edge of driver ring rests firmly on inner race of pulley bearing
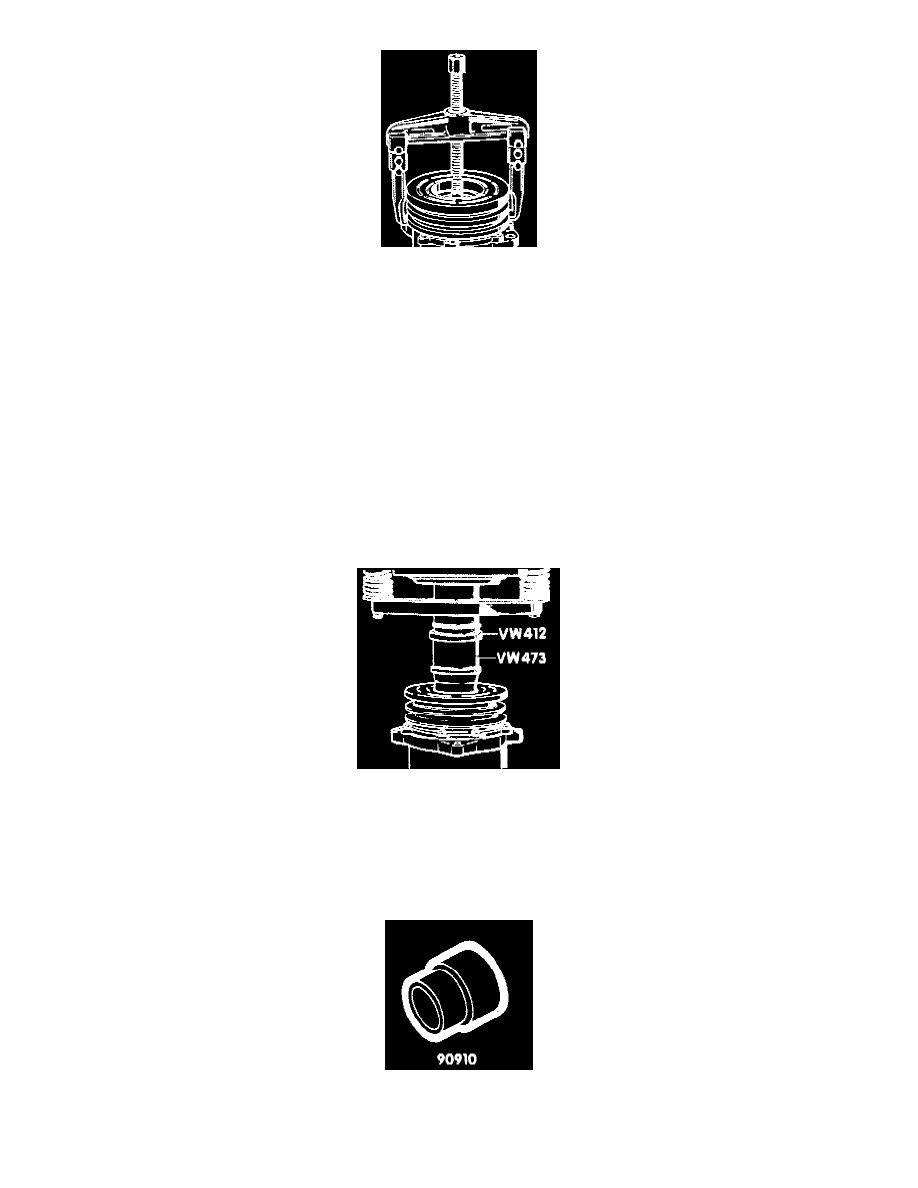
- while guiding pulley 12 to prevent binding, tap end of VW 519 with small hammer until pulley bottoms out against compressor front housing hub
- as an alternate method, press pulley onto compressor shaft using spacers VW 412 and VW 473
- install snap ring 13 with snap ring pliers (Mastercool tool No.90903 or equivalent)
- install shims 14, 15, 16
- install shaft key 17 using small hammer and screwdriver
- install bearing dust cover, if equipped
- align front clutch plate keyway to compressor shaft key 17
- install front clutch plate 18 onto compressor shaft
- install shaft protector (Mastercool tool No.90910 or equivalent) onto compressor shaft and tap with a small hammer until clutch plate 18 bottoms on
shims 14, 15, 16