
Passat Wagon V6-2792cc 2.8L DOHC (1994)
Battery: Service and Repair
Removal and Installation
Battery, Removing/Installing
WARNING:
-
Battery acid can cause severe burns. When working with electrolyte always wear goggles, rubber gloves, and apron. If electrolyte is
spilled skin or clothing, flush at once with large quantities of water for several minutes and call a doctor.
-
Batteries produce explosive gases. Keep flames and sparks away from batteries. DO NOT smoke near batteries.
Note:
-
Some early production vehicles are equipped with batteries 190 mm (7.5 in.) in height. Later production vehicles are equipped with batteries 175
mm (6.9 in.)
-
Batteries with a height of 190 mm (7.5 in.) are no longer available. If battery replacement is necessary, replace the 190 mm (7.5 in.) battery with
the 175 mm (6.9 in.) battery.
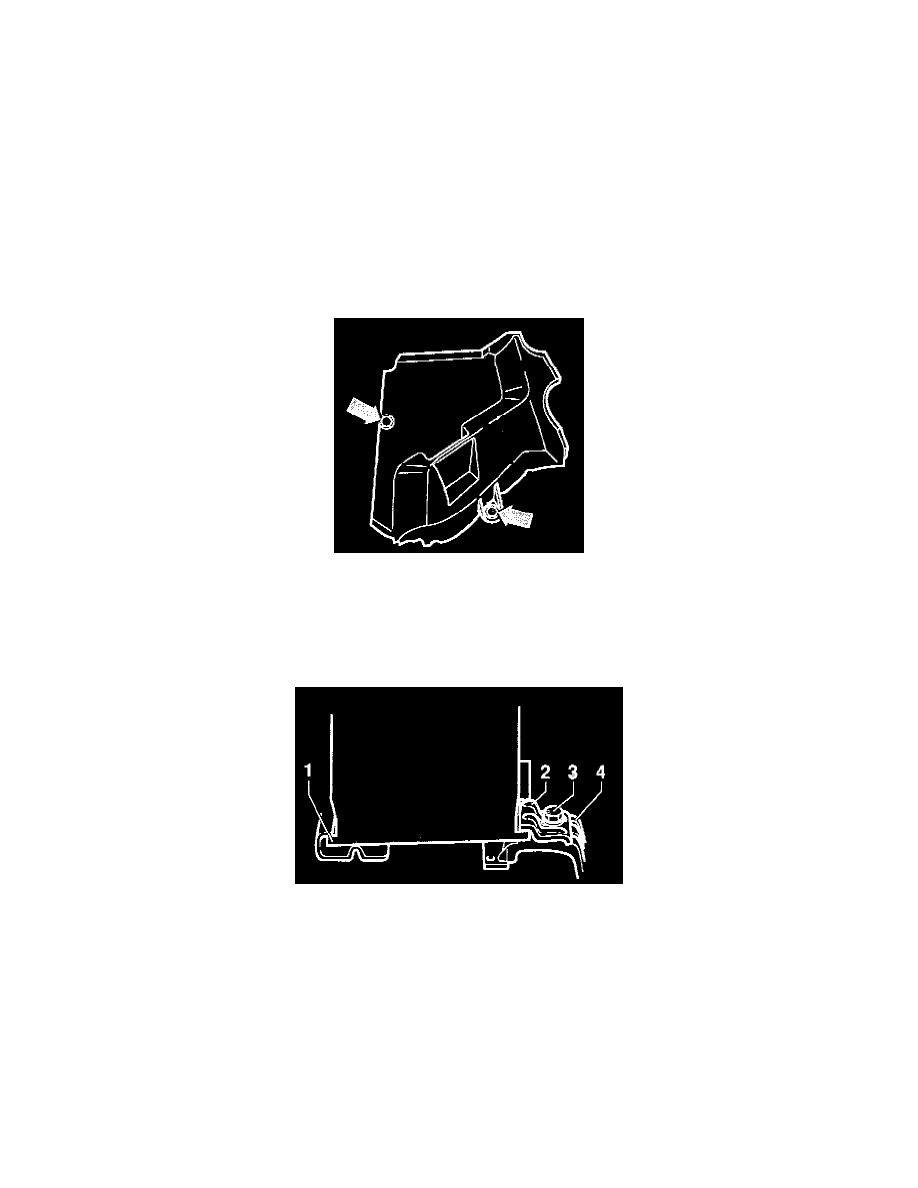
Remove bolts M6x15 10 Nm (88 in. lb) -arrows- and remove battery cover.
Removing
- Disconnect battery cable at negative (-) terminal.
- Disconnect battery cable at positive (+) terminal.
- Remove battery hold-down nut -3- and clamp -2-.
- Remove battery.
Installing
- Position battery.
-
Seat lower lip -1- in clamping strip, as shown
- Retain other lip of battery at battery securing pedestal -4- using hold-down -2- and M8 x 25 hex bolt -3-.
- Tighten hex bolt -3-.
-
Tightening torque: 20 Nm (15 ft lb)
- Connect battery positive (+) cable and negative (-) cable or Ground (GND) strap.
-
Tightening torque (terminal clamping bolt): 5 Nm (44 in. lb).