
Polo Mk4
| Differential - dismantle and assemble |
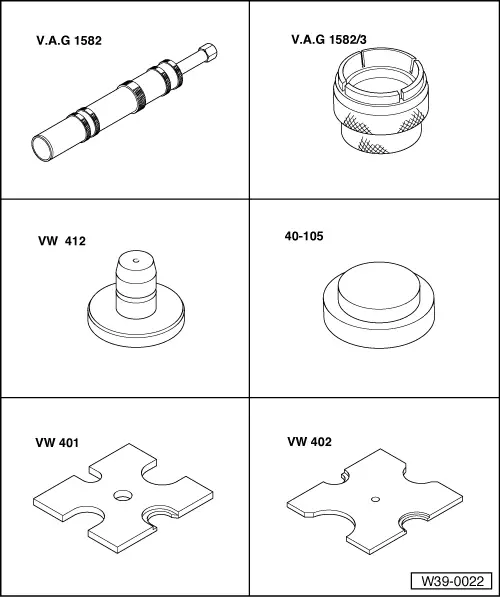
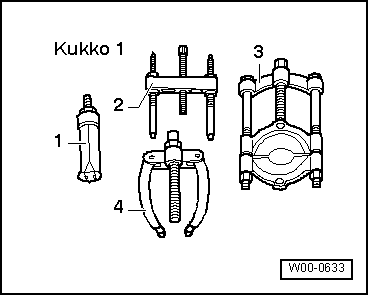
| Special tools and workshop equipment required |
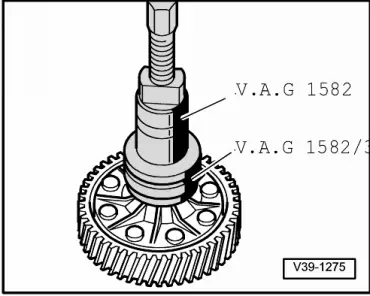
| t | Puller -VAG 1582- |
| t | Clamp -VAG 1582/3- |
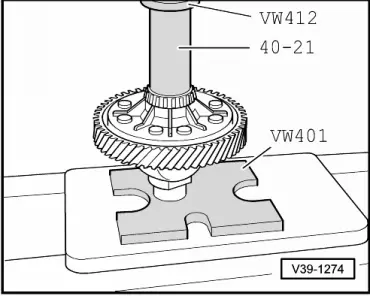
| t | Pressure disc -VW 412- |
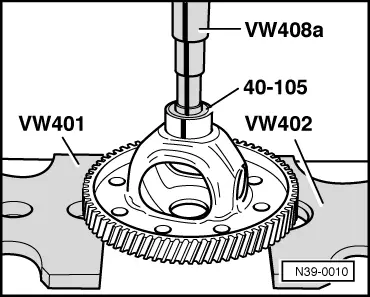
| t | Installation disc -40-105- |
| t | Plate -VW 401- |
| t | Plate -VW 402- |

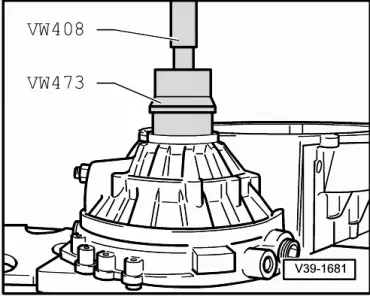
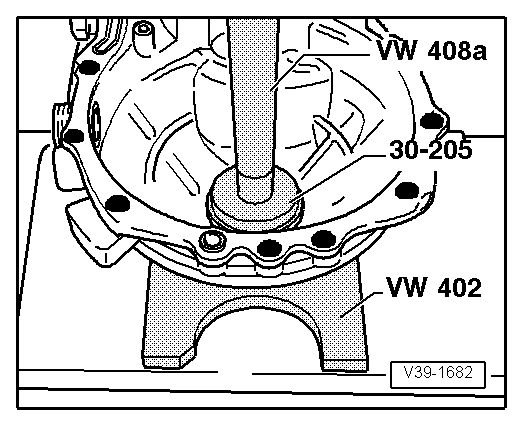
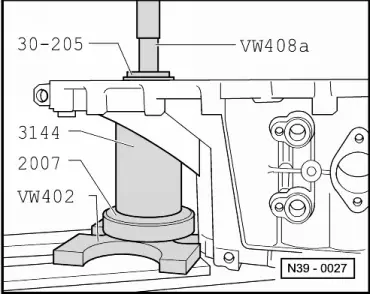
| t | Pressure pin -VW 408A- |
| t | Placer -VW 473- |
| t | Pressure base -30-205- |
| t | Sleeve -3144- |
| t | Disc -2007- |
| t | 40- 200 Nm Torquemeter -VAG 1332- |
 Note
Note
|
|
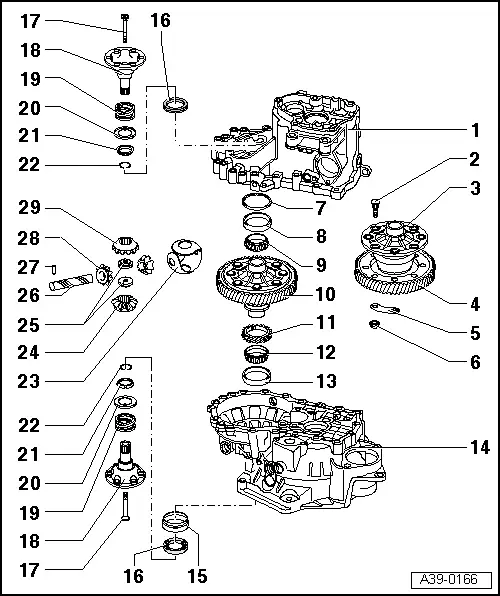
| 1 - | Gearbox housing |
| 2 - | Screw |
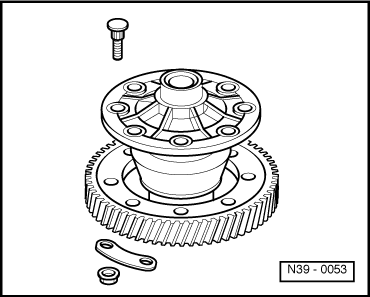
| 3 - | Differential case |
| q | Bolt to final drive gear. |
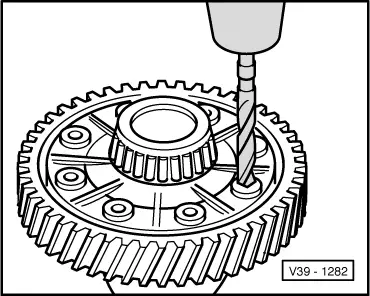
| 4 - | Final drive gear |
| q | Rivetted in production. |
| q | Is paired with output shaft, only renew as a set. |
| q | Remove → Fig. |
| q | Installation position → Fig. |
| q | Heat to 212°F, before installation. |
| q | Fit to differential housing → Fig. |
| q | Secure → Fig. |
| 5 - | Backing plate |
| 6 - | Nut; 70 Nm |
| 7 - | Adjustment shim |
| q | For differential. |
| q | Check thickness → Chapter |
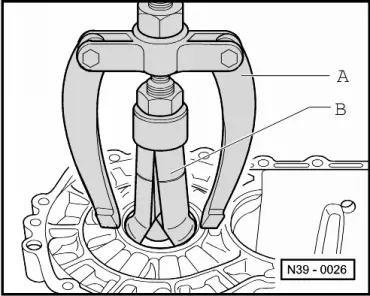
| 8 - | Outer race/taper roller bearing |
| q | Remove → Fig. |
| q | Install → Fig. |
| 9 - | Taper roller bearing inner race |
| q | Remove → Fig. |
| q | Install → Fig. |
| 10 - | Differential housing |
| q | With rivetted final drive gear. |
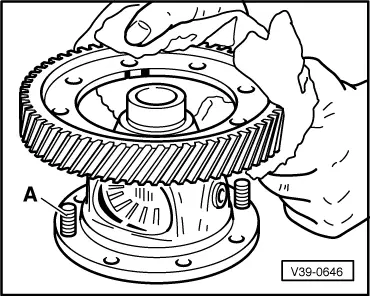
| q | When renewing final drive gear drill out rivet heads → Fig. |
| q | Attach final drive gear with bolts → Fig. |
| 11 - | Speedometer drive wheel |
| q | Fit onto differential housing as far as stop before pressing on inner race. |
| 12 - | Taper roller bearing inner race |
| q | Remove → Fig. |
| q | Install → Fig. |
| 13 - | Outer race/taper roller bearing |
| q | Remove → Fig. |
| q | Install → Fig. |
| 14 - | Clutch housing |
| 15 - | Bushing |
| q | To accept oil seal ( → Item) |
| q | Remove and install → Fig. |
| 16 - | Seal |
| q | Renew with gearbox installed → Chapter. |
| 17 - | Countersunk head bolt, 25 Nm |
| q | Bolt into threaded piece ( → Item). |
| 18 - | Flange shaft |
| q | Remove and install → Chapter. |
| 19 - | Spring for flanged shaft |
| q | Installed behind flanged shafts. |
| 20 - | Thrust washer |
| q | Installation position: Shoulder towards spring, tongue to tapered ring. |
| 21 - | Tapered ring |
| q | With grooves to secure thrust washer. |
| q | Installation position: Taper towards differential housing. |
| 22 - | Circlip |
| q | Ensures that taper ring, thrust washer and spring are held in position when flange shaft is removed. |
| 23 - | One-piece thrust washer |
| q | Install with gearbox oil. |
| 24 - | Sun wheel |
| q | Install → Fig. |
| 25 - | Threaded piece |
| q | Install → Fig. |
| 26 - | Planet pinion axis shaft |
| q | Knock out with drift. |
| q | Install → Fig. |
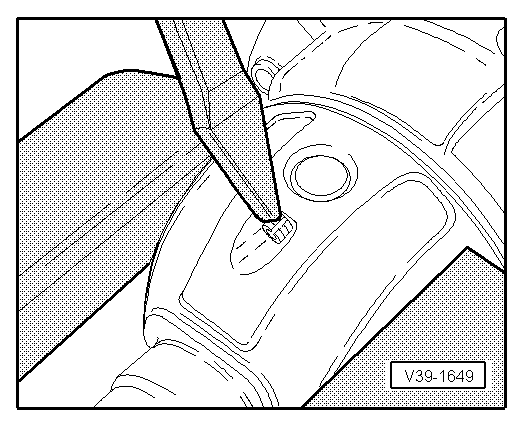
| 27 - | Spring pin |
| q | For securing planet pinion axis shaft. |
| q | Remove and install → Fig. |
| 28 - | Planet pinion |
| q | Install → Fig. |
| 29 - | Sun wheel |
| q | Install → Fig. |
|
|
|
|
Note
|
|
|
|
|
|
Note
|
|
|
|
|
|
|
|
|
|
|
|