
Polo Mk4
 Note
Note
|
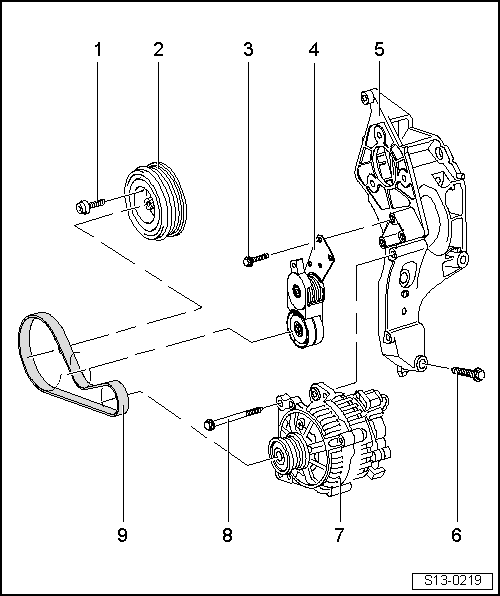
| 1 - | 10 Nm + 90 ° |
| 2 - | Pulley/vibration cushioning |
| q | Installation is only possible in one position - distant holes- |
| 3 - | 25 Nm |
| 4 - | Tension element for Poly-V belt |
| 5 - | Compact support |
| q | During installation, pay attention to centralization of coupling guides |
| q | To the alternator |
| q | In case of additional accessories with air conditioning compressor |
| 6 - | 45 Nm |
| 7 - | Alternator |
| 8 - | 25 Nm |
| 9 - | Poly-V belt |
| q | Before removal, mark rotation direction |
| q | Check wear |
| q | Do not fold |
| q | Remove and install → Chapter. |
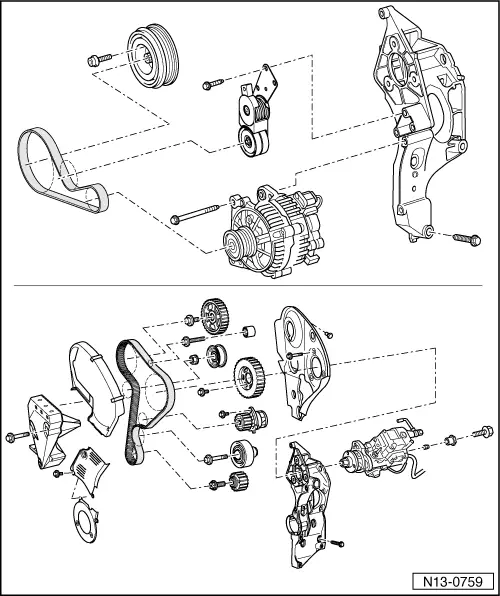
|
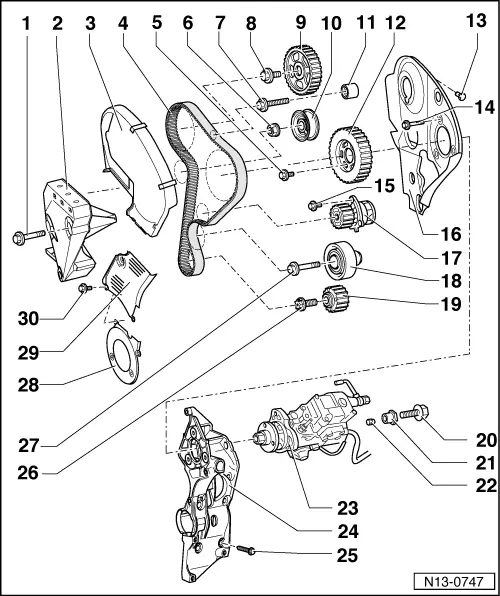
| 1 - | 45 Nm |
| 2 - | Engine support |
| 3 - | Top part of mechanical distribution protection |
| 4 - | Indented belt |
| q | Before removal, mark rotation direction |
| q | Verificar quanto ao desgaste |
| q | Do not fold |
| q | Remove and install, adjust → Chapter. |
| 5 - | 25 Nm |
| 6 - | 25 Nm |
| q | Adjust indented belt → Chapter, Remove and install indented belt, adjust |
| 7 - | 20 Nm |
| 8 - | 45 Nm |
| 9 - | Valve command shaft gear |
| q | Remove → Chapter, remove and install indented belt - adjust |
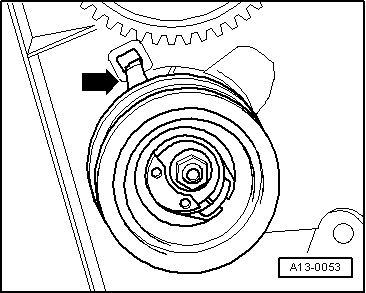
| 10 - | Tension poulley |
| q | Installation position → Fig. |
| q | Check semi-automatic tension pulley of indented belt → Chapter. |
| 11 - | Offset pulley |
| 12 - | Injection pump gear |
| 13 - | 10 Nm |
| 14 - | 30 Nm |
| 15 - | 15 Nm |
| 16 - | Mechanical distribution rear protector |
| 17 - | Water pump |
| q | Remove and install → Chapter. |
| 18 - | Offset pulley |
| 19 - | Crank shaft gear |
| 20 - | 30 Nm |
| 21 - | Glove |
| 22 - | Fastening nut |
| 23 - | Injection pump |
| q | Remove and install → Chapter. |
| 24 - | Compact support |
| 25 - | 45 Nm |
| 26 - | 120 Nm + 90 ° |
| q | Replace |
| q | To tighten and loosen, use counter-support 3415 |
| q | Do not additionally lubricate or grease thread and flange |
| q | Additional torque may be applied in steps |
| 27 - | 40 Nm + 90 ° |
| 28 - | Lower part of mechanical distribution protection |
| 29 - | Protector |
| 30 - | 10 Nm |
|
|