
Polo Mk4
| Pistons and rods - disasemble and assemble |

| 1 - | Segment rings |
| q | Displace opening in 120 ° |
| q | Remove and install with ring plier |
| q | Reference “TOP” turned to piston head |
| q | Check opening between points → Fig. |
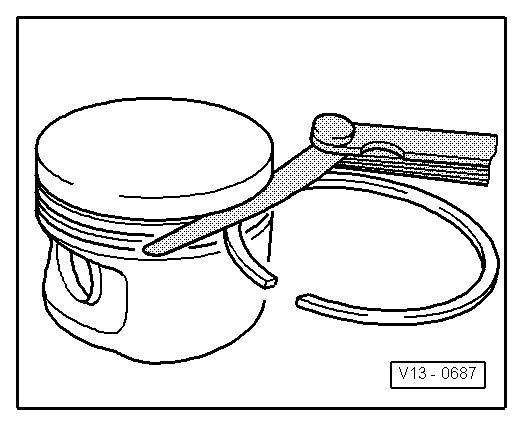
| q | Check ring play on piston groove → Fig. |
| 2 - | Piston |
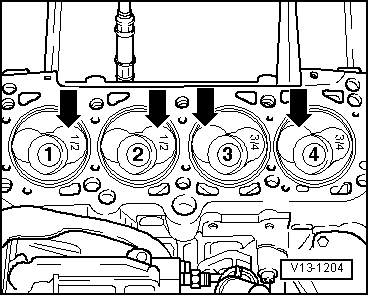
| q | With combustion chamber |
| q | Mark assembly position and correspondence to cylinder |
| q | Piston/cylinder installation position → Fig. |
| q | -Arrow- on piston head points to the belt pulley side |
| q | Install rings |
| q | Replace piston in case it is cracked |
| q | Check piston position on upper part → Chapter. |
| 3 - | Piston pin |
| q | In case of blocking, heat piston to 60°C |
| q | Remove and Drift -VW 222A- |
| 4 - | Block |
| 5 - | Rod |
| q | Mark position to cylinder -A- |
| q | Installation position: Markings -B- point to belt pulley side |
| q | Replace only in sets |
| 6 - | Caps |
| q | Pay attention to installation position |
| q | Pay attention to finishing: upper cap (towards piston) made of a more wear-resistant material Identification characteristic: black lining on sliding surface, in separation area |
| q | Do not invert caps used |
| q | Place caps centralized |
| q | Ensure proper seating on retaining slots |
| q | Axial play wear limit: 0.37 mm |
| q | Measure radial play with “Plastigage”: wear limit: 0.08 mm Do not turn crankshaft during measurement of radial play |
| 7 - | Engine block |
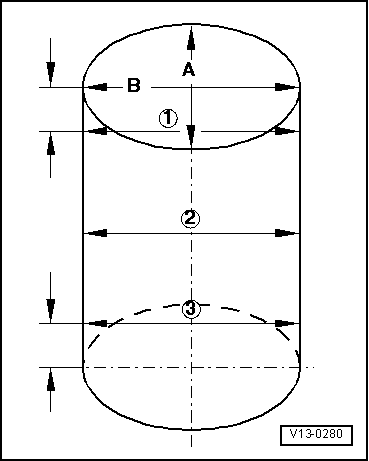
| q | Check cylinder diameter → Fig. |
| q | Piston and cylinder measurement → Chapter. |
| 8 - | Rod cap |
| q | Pay attention to installation position |
| q | Due to separation process (breaking) of rods, cap only seats in one position and matches only the pertaining rod |
| 9 - | Oil ejector |
| q | For piston cooling |
| 10 - | 25 Nm |
| q | Install without sealing |
| 11 - | Rod screw 30 Nm +90 ° |
| q | Replace |
| q | Lubrificate thread and support surface |
| q | Measure radial play with a used screw |
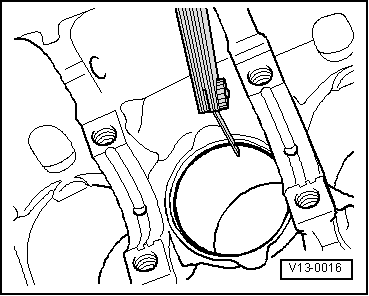
| Piston ring Measures in mm | New | Wear limit |
| 1. Compression ring | 0,20...0,40 | 1,0 |
| 2. Compression ring | 0.20...0.40 | 1.0 |
| Oil scraper ring | 0.25...0.50 | 1.0 |
|
|
| Piston ring Measures in mm | New | Wear limit |
| 1. Compression ring | 0.06...0.09 | 0.25 |
| 2. Compression ring | 0.05...0.08 | 0.25 |
| Oil scraper ring | 0.03...0.06 | 0.15 |
 Note
Note
|
|
Note
|
|