volkswagen Workshop Repair Guides

Volkswagen Workshop Service and Repair Manuals

B-Install Assembly tool T10017 with flange on the crank shaft > < Introduce flange under pressure with rotor
A-Install flange with rotor on Assembly toolT10017
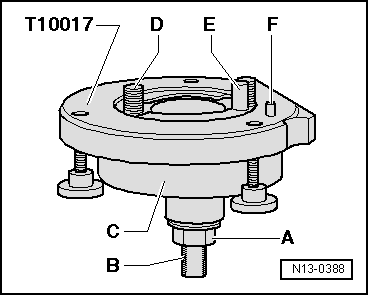
A-Install flange with rotor on Assembly tool -T10017-
   
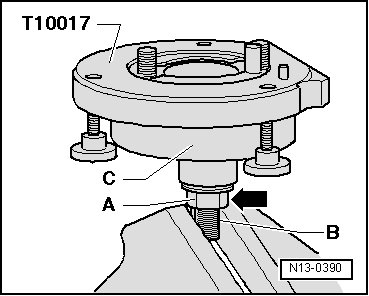
–  Move six-sided nut -A- until it reaches flat surface -B- of threaded fuse.
  N13-0388
–  Fix Assembly tool -T10017-, tightening it with bench bolt to surface -B- of threaded fuse.
–  Press assembly body -C- downward, so that it rests on the six-sided nut -A--arrow-.
  Note
Internal part of assembly device and assembly body must be on the same level.
  N13-0390
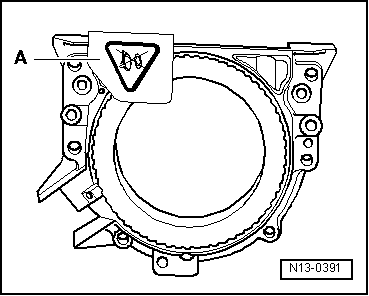
–  Remove safety seal -A- of new flange.
  Note
Do not remove rotor from flange and do not change its position in relation to the latter.
  N13-0391
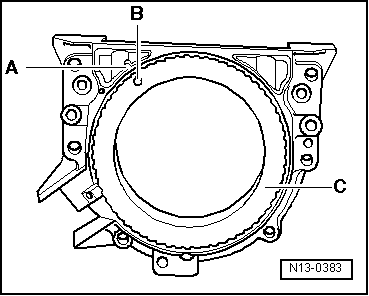
1. Fixing hole  -B- of rotor  -C- must be aligned with mark -A- of flange.
  N13-0383
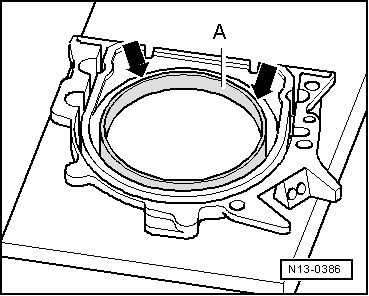
–  Place flange on a flat and clean surface. Support side of engine body turned upwards.
–  Press seal lip support ring -A- in downward -arrow- direction, until it seats onto the flat surface.
  N13-0386
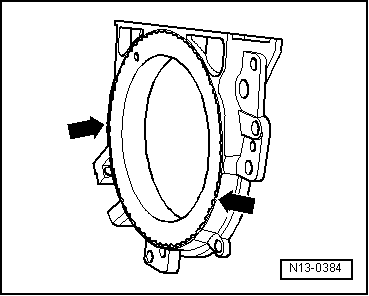
Rotor surface and flange edge must meet on the same plane -arrows-.
  N13-0384
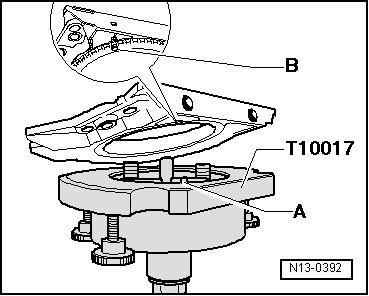
–  Position flange front part on Assembly tool -T10017-, so that guide pin -A- enters the port -B- of rotor.
  Note
Ensure the flange completely rests on the assembly device.
  N13-0392
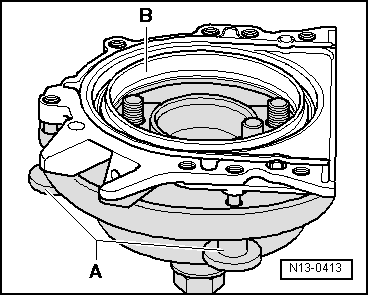
–  When tightening the three bolts -A- on the assembly device surface, press seal lip support ring -B-, so that guide pin does not come out of rotor port.
  Note
Ensure the rotor is fastened to assembly device when installing the flange.
  N13-0413

B-Install Assembly tool T10017 with flange on the crank shaft > < Introduce flange under pressure with rotor