volkswagen Workshop Repair Guides

Volkswagen Workshop Service and Repair Manuals

Heat exchanger (Behr box) - remove and install|Installation > < Heat exchanger (Behr box) - remove and install
Removal
Removal
  Note
It is not necessary to remove the dash panel and the plenum chamber in order to remove and install the heat exchanger.
   
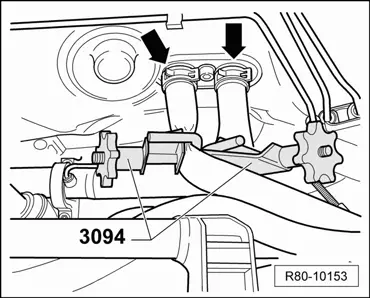
–  Close the coolant hoses in engine compartment by using the Clamps (diam. 25 mm) -3094-
–  Release the clamps -arrows- with the Standard-type clamp pliers -VW 5162 (VWB) - ou - VAS 5024A- and remove the hoses.
–  Install a compressed air hose on one of the heat exchanger outlets. At the other outlet, place a container to collect coolant.
–  Use a compressed air pistol to remove the coolant from the heat exchanger.
  R80-10153
–  Remove fastening screw -2- and flange -1-.
–  Remove lower console → General body repairs, interior; Rep. gr.68
  R80-10051
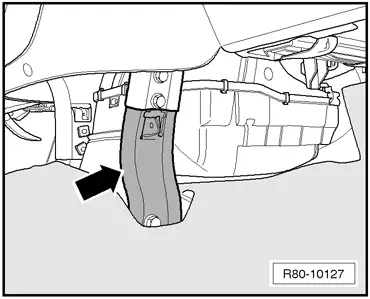
–  Remove the lower part of the right support for the panel bracket -arrow- → Body - Internal assembly works; Rep. gr.70.
  R80-10127
–  Remove coupling for rear air duct -arrow-.
–  Set aside the carpet and the noise insulation.
  R80-10053
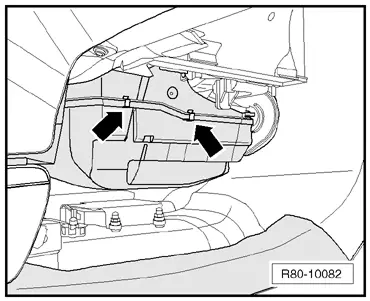
–  Remove the side locks -arrows- (right and left) on the heat exchanger housing.
  R80-10082
–  Release front locks and remove carefully lower part of plenum chamber to the right, as indicated.
  R80-10054
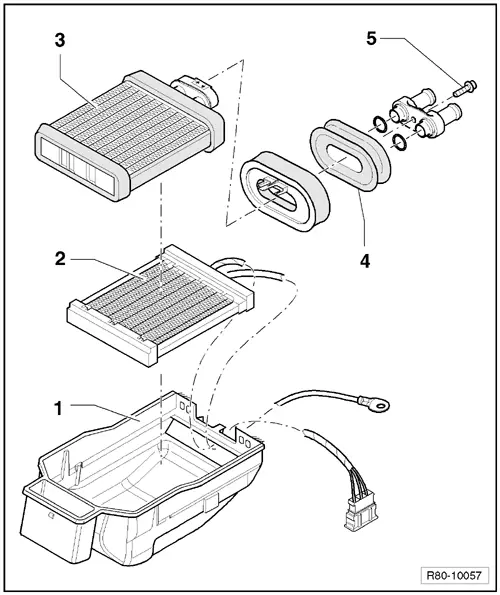
–  Remove the lower part of the plenum chamber -1-.
–  Remove heat exchanger -3-.
  Note
The Auxiliary heating resistance -Z35--2- only exists for certain models. Removal and installation → Chapter.
  R80-10057

Heat exchanger (Behr box) - remove and install|Installation > < Heat exchanger (Behr box) - remove and install