volkswagen Workshop Repair Guides

Volkswagen Workshop Service and Repair Manuals

Reverse brake -B1-: disassemble and assemble > < Reverse clutch -K2-: disassemble and assemble
3rd and 4th gear clutch -K3-: disassemble and assemble
When disassembling it, bear in mind the number of discs and their assembly position → Fig.
Check if the clutch works → Fig.
   
1 - Sealing ring
q   Remove making a lever with a screwdriver
2 - Bearing disc
q   Assemble → Fig.
q   Determine the thickness → Fig.
3 - Internal disc
q   Assemble → Fig.
q   Quantity → Chapter
4 - External disc
q   Assemble → Fig.
q   Quantity → Chapter
5 - Sealing ring
q   Disassemble and assemble → Fig.
6 - Spring holder plate
q   With springs
7 - Retainer
q   Always replace
8 - Retainer
q   Always replace
9 - Plunger
q   Allocate the spare due to the distinctive letters in the transmission
q   Assemble → Anchor
10 - Clutch bellhousing

   
Fig.1 - Disassemble the sealing ring -arrow-
–  Press the plunger cover carefully downward until the sealing ring can be assembled.
  N38-0099
Fig.2 - Bear in mind that the number and assembly position of the discs is different.
l - K3- with 3 internal discs
ll - K3- with 4 internal discs
A - Sealing ring
  N38-0185
Fig.2 - Assemble the external and internal discs
–  Assemble the external discs -4- and the internal discs -3- in the clutch bellhousing.
–  Place the bearing disc -2- over the last internal disc.
–  Put the sealing ring -1- in the clutch bellhousing notch.
  N38-0100
Fig.4 - Determine the bearing disc thickness.
–  With a gauge "A", measure the oscillation between the bearing disc and the sealing ring.
  N38-0102
ComponentGapWearing limit
Clutch K31,8 ... 2.2 mm2.4 mm

–  If the wearing limit is reached with the clutch used, the discs must be changed and a new, proper bearing disc must be selected.
–  Allocate the discs and the bearing disc due to the distinctive letters in the transmission.
   
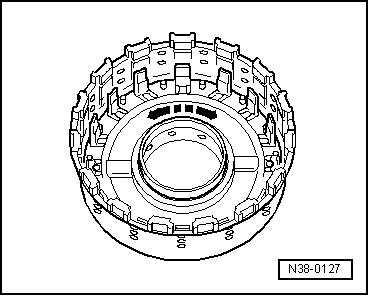
Fig.5 - Check if the clutch works
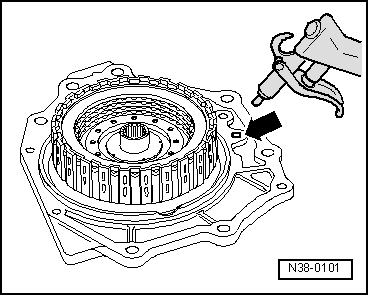
–  Before assembling the plunger, apply ATF over the sealing lips and the retainers.
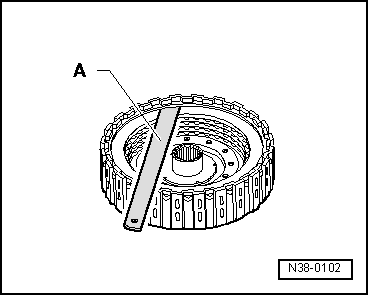
–  Slightly turn the plunger when assembling it.
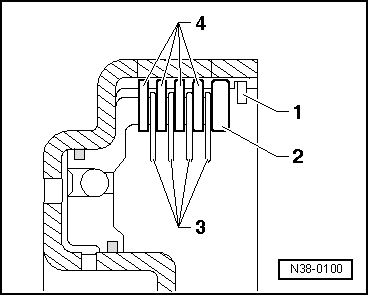
–  Once the plunger is assembled in the clutches or the brakes, it must be able to be manually turned easily in both directions -arrows-.
–  If not, the sealing lips or the retainers may not be completely inserted or are damaged.
–  Disassemble the plunger if such abnormality occurs.
–  Check if the sealing lips or the retainers are damaged and change them if necessary.
–  Assemble the plunger and review it again.
–  Place the clutch -K3- over the transmission case cover and press it downward.
  N38-0127
–  Blow compressed air into the pressure channel -arrow-.
–  The clutch plunger must compress the disc pack.
–  Let compressed air bleed. The disc pack must return to its resting position.
  N38-0101

Reverse brake -B1-: disassemble and assemble > < Reverse clutch -K2-: disassemble and assemble