
Polo Mk5
| Removing trim panel |
 Note
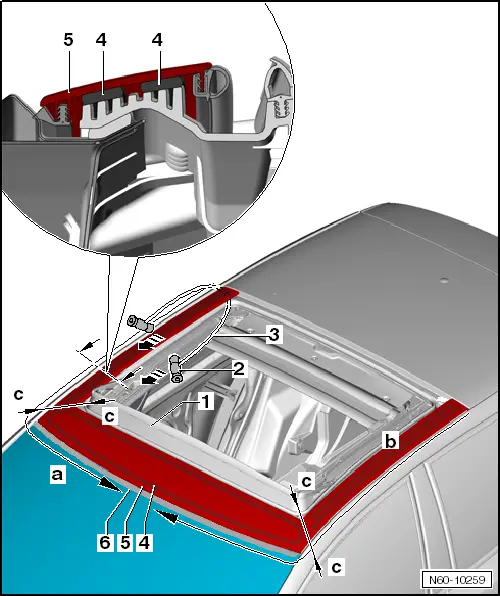
Note| The hider is damaged when it is removed and cannot be reused. |
| Carry out following work: |
| – | Remove glass panel → Chapter. |
| – | Use masking tape to cover roof rail and edge of roof in order to protect paintwork. |
| – | Glue windscreen seal -6- firmly to windscreen. |
| – | Secure a handle -2- from windscreen removal kit -V.A.G 1755- to each end of the cord -3-. |
| The cutting of the adhesive bead is only possible with the help of a second mechanic. |
Note| t | There are 2 adhesive beads on the roof cross member and increased resistance will be encountered here. |
| t | Keep the cord near to the assembly frame so that it is not cut by the surrounding edges. |
| – | The adhesive bond is cut through, starting from the rear -arrow a-, as far as the roof cross member at the front. |
| – | The cut-off part is detached -arrows c-. |
| – | Now, cut through adhesive beads -4- on roof cross member at front as far as the middle. |
| – | Move cord to other side. |
| – | The adhesive bond is cut through, starting from the rear -arrow b-, as far as the roof cross member at the front. |
| – | The cut-off part is detached -arrows c-. |
| – | Now, cut through adhesive beads -4- on roof cross member at front as far as the middle. |
| – | Remove hider -5- from assembly frame -1-. |
Note| The exact positions of the adhesive beads of the piece of trim cut out must be used for the new trim. |