Polo Mk5
 Note
Note
|

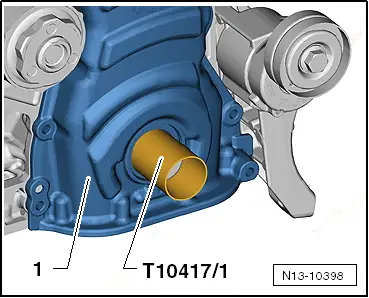
| Special tools and workshop equipment required |
| t | Assembly tool -T10417/1- |
| t | Torque wrench -VAS 6583- |
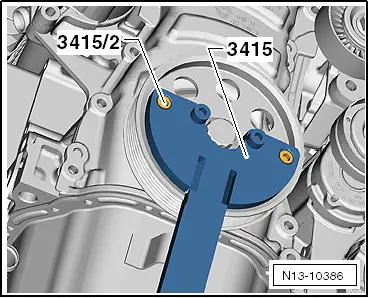
| t | Counterhold tool -3415- |
| t | Pins -3415/2- |
|
|
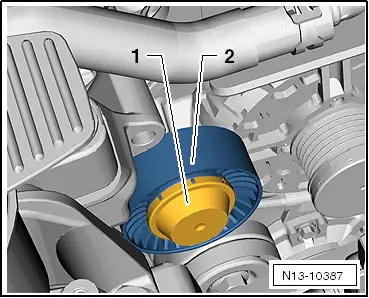
|
|
|
Note
|
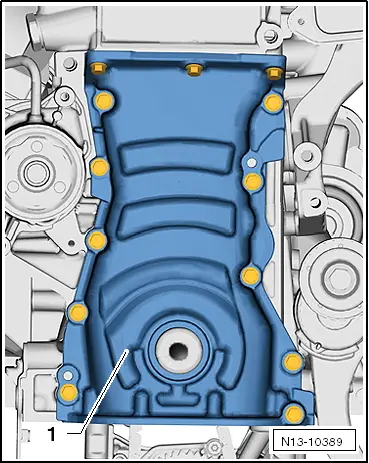
|
|
|
|
|
|
|
 Caution
|
|

Note
|
| Special tools and workshop equipment required |
| t | Assembly tool -T10417/1- |
| t | Torque wrench -VAS 6583- |
| t | Counterhold tool -3415- |
| t | Pins -3415/2- |
|
|
|
|
|
Note
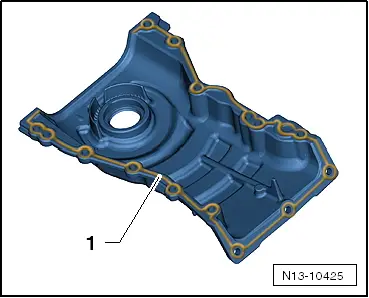
|
|
|
|
|
|
|
|
|
|