volkswagen Workshop Repair Guides

Volkswagen Workshop Service and Repair Manuals

Removing and installing lower A-pillar trim on front passenger side > < Removing and installing upper A-pillar trim
Removing and installing lower A-pillar trim on driver side
  Note
Removal and installation are described for vehicles with „High“ equipment level. Removal and installation for vehicles with „Basis“ equipment level are analogous.
Removing
–  Release sill panel moulding from body in area of overlap to lower trim of A-pillar → Chapter.
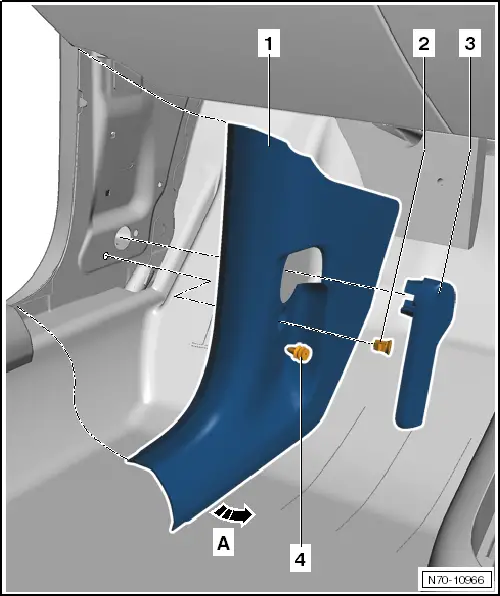
–  Remove bonnet operating lever -3- → General body repairs, exterior; Rep. gr.55.
   
–  Remove clip -2-.
–  Pull lower A-pillar trim -1- out of mounting in area of retaining clips -4-.
–  Remove trim from door seal beading.
–  Detach lower A-pillar trim -1- from bodywork in -direction of arrow A-. Remove trim from door seal beading as you do so.

Installing
  Note
t  Before installing, check all fasteners for damage and renew if necessary.
t  Following installation, ensure that trim is positioned in door seal beading.
–  Install in reverse order of removal.
   

Removing and installing lower A-pillar trim on front passenger side > < Removing and installing upper A-pillar trim