
Up!
| Renewing bonded rubber bush for axle beam |
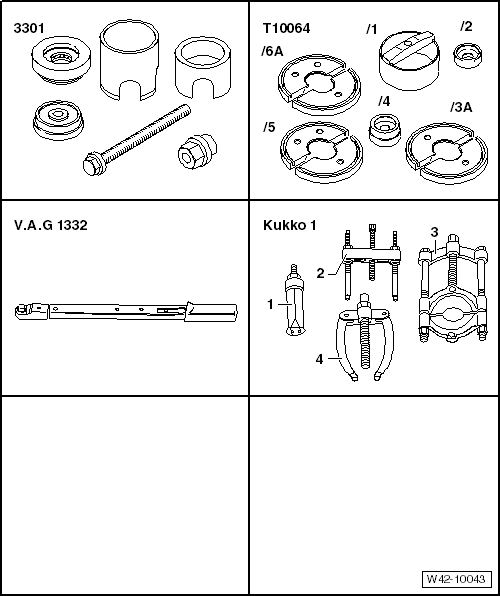
| Special tools and workshop equipment required |
| t | Assembly tool -3301- |
| t | Assembly tool -T10064- |
| t | Torque wrench -V.A.G 1332- |
| t | -2-Puller -Kukko 18-2- |
| t | -3-Splitter -Kukko 15-2- |
|
| – | Fit separating tool, e.g. -Kukko 15-2-, to collar of bonded rubber bush and tighten separating tool. |
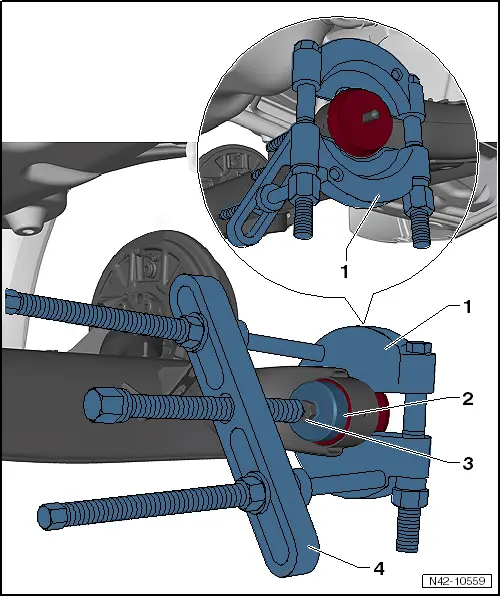
| – | Install remaining tools as shown in illustration and press out bonded rubber bush. |
| 1 - Separating tool, e.g. -Kukko 15-2- |
| 2 - Thrust piece -3292/3- |
| 3 - Axle beam bolt |
| 4 - Puller, e.g. -Kukko 18-2- |
|
|
|
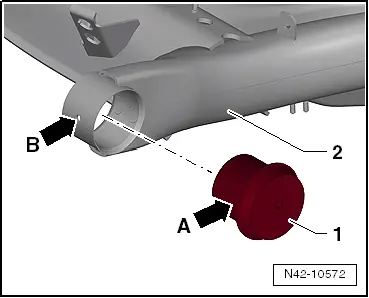
| – | Fit bonded rubber bush -2- in installation position on axle beam and fit tools as shown in illustration -I-. |
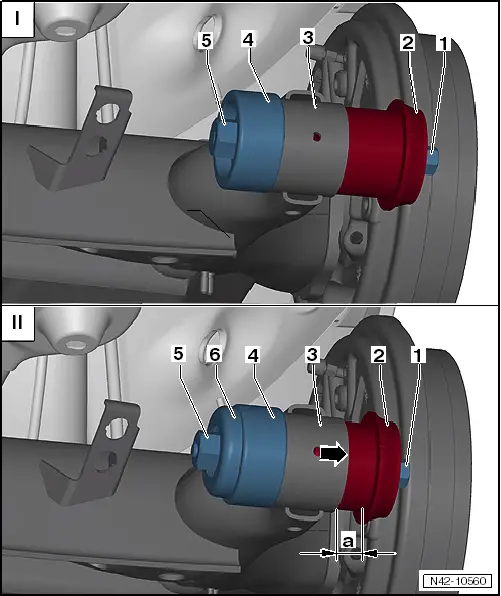
| 1 - Spindle -3301/1- |
| 2 - Bonded rubber bush |
| 3 - Axle beam |
| 4 - Thrust piece -T10064/2- |
| 5 - Nut -3301- |
| – | Draw bonded rubber bush -2- into axle beam until distance -a- has been reached. |
| a = 10 mm |
| – | Unscrew nut -3301--5- and install thrust mounting -3301--6- as shown in illustration -II-. |
| – | Draw bonded rubber bush -2- into axle beam -3- to stop -arrow-. |
|
| Specified torques |
| Component | Specified torque | ||||
Axle beam to mounting bracket
| 50 Nm + 180° further |