volkswagen Workshop Repair Guides

Volkswagen Workshop Service and Repair Manuals

Repairing shock absorber > < Assembly overview - suspension strut, shock absorber, spring
Removing and installing shock absorbers
   
Removing and installing shock absorbers
Special tools and workshop equipment required
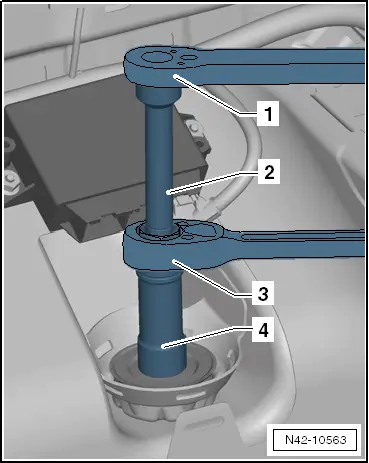
t  Shock absorber set -T10001-
t  Torque wrench -V.A.G 1331-
t  Torque wrench -V.A.G 1332-

Carry out the following work:
Removing
–  Remove side panel trim in luggage compartment → General body repairs, interior; Rep. gr.70.
Only left side for vehicles with parking aid.
   
–  Disconnect connector -1- from parking aid control unit -J446--2-.
Continuation for all vehicles
  N42-10562
–  Unscrew upper shock absorber mounting.
1 - Ratchet, commercially available
2 - -T10001/9-
3 - -T10001/11-
4 - -T10001/1-
–  Raise vehicle to working height.
  N42-10563
–  Unscrew and remove nut -1-, take out hexagon bolt -2- for shock absorber -3- from rear axle.
–  Take out shock absorber.
Installing
–  Fit shock absorber.
  M42-10008
–  Bolt shock absorber -3- to rear axle using new hexagon bolt -2- and new nut -1-.
  M42-10008
–  Bolt shock absorber to body.
1 - Torque wrench -V.A.G 1332-
2 - -T10001/9-
3 - -T10001/11-
4 - -T10001/1-
  N42-10563
Only left side for vehicles with parking aid.
–  Connect connector -1- to parking aid control unit -J446--2-.
Continuation for all vehicles
–  Tighten bolts in unladen position → Chapter.
–  Install side panel trim in luggage compartment → General body repairs, interior; Rep. gr.70.
  N42-10562
Specified torques
ComponentSpecified torque
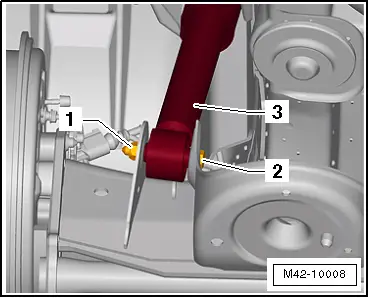
Shock absorber to rear axle
t  Use new nut and bolt.
50 Nm + 180° further
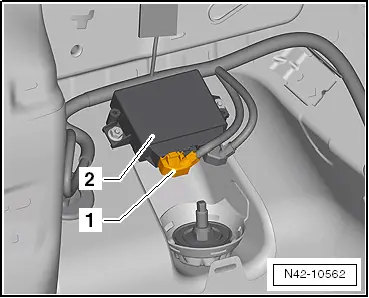
Shock absorber to body
t  Use new bolts.
20 Nm


Repairing shock absorber > < Assembly overview - suspension strut, shock absorber, spring