audi Workshop Repair Guides

Audi Workshop Service and Repair Manuals

Removing and installing coolant pipe (right-side) > < Removing and installing coolant temperature senderG62
Removing and installing thermostat housing and coolant pipe (rear)
Special tools and workshop equipment required
   
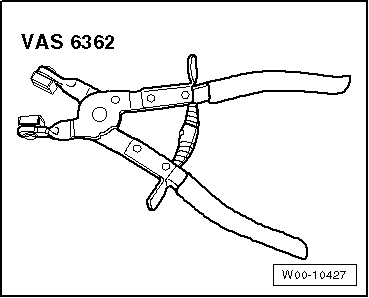
t  Hose clip pliers -VAS 6362-
  W00-10427
Removing
–  Drain coolant → Chapter.
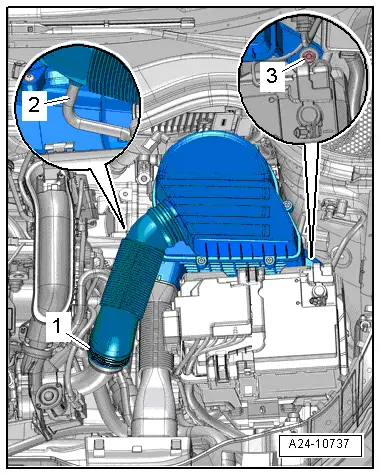
–  Remove air cleaner housing → Rep. gr.24.
  A24-10737
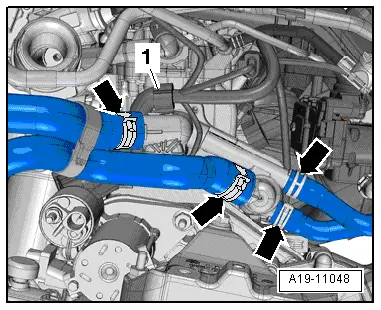
–  Release hose clips -arrows- and detach coolant hoses.
–  Move clear electrical wiring harness -1-.
  A19-11048
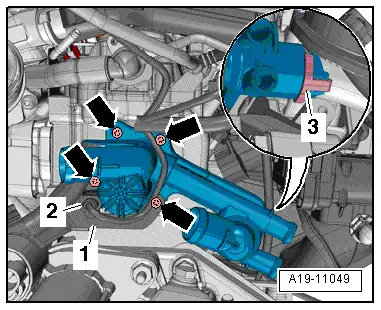
–  Unplug electrical connector -2- at coolant temperature sender -G62-.
–  Pull off retaining clip -3-.
–  Remove bolts -arrows- and move bracket -1- clear to one side.
–  Detach thermostat housing from rear coolant pipe.
  A19-11049
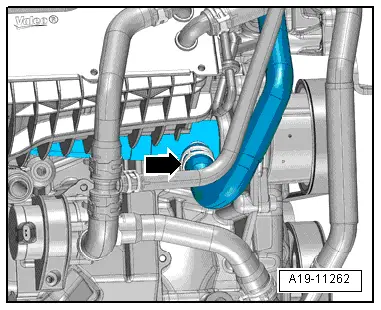
–  Release hose clip -arrow- and disconnect coolant hose from rear coolant pipe.
  A19-11262
–  Detach rear coolant pipe -1- from cylinder block -3-.
Installing
l  Tightening torques → Chapter „Housing for thermostat with rear coolant pipe - exploded view“
  Note
t  Renew gaskets, seals and O-rings.
t  Secure all hose connections with the correct type of hose clips (same as original equipment) → Electronic parts catalogue.
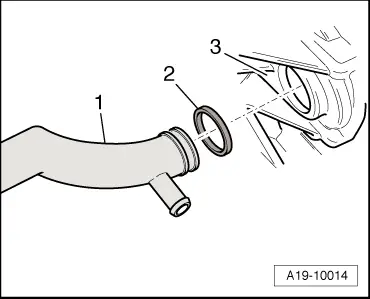
–  Clean and smoothen sealing surfaces for seal -2-.
–  Lubricate seal lightly with coolant.
  A19-10014
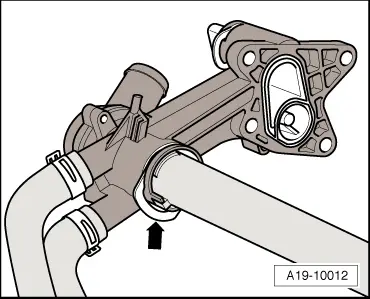
–  After securing thermostat housing, move coolant pipe up against housing as far as stop and only then insert retaining clip -arrow-.
–  Check that coolant pipe is firmly secured in thermostat housing.
Remaining installation steps are carried out in reverse sequence; note the following:
–  Install air cleaner housing → Rep. gr.24.
–  Fill up with coolant → Anchor.
  A19-10012

Removing and installing coolant pipe (right-side) > < Removing and installing coolant temperature senderG62