audi Workshop Repair Guides

Audi Workshop Service and Repair Manuals

Removing and installing vacuum unit for turbocharger > < Turbocharger - exploded view
Checking vacuum unit for turbocharger
Special tools and workshop equipment required
   
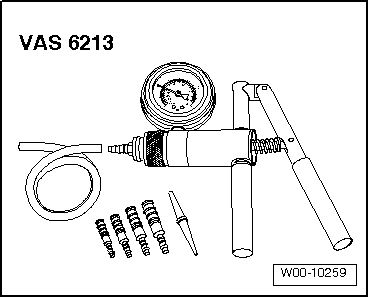
t  Hand vacuum pump -VAS 6213-
Procedure
l  Hose from turbocharger via charge pressure solenoid valve -N75- to vacuum unit must be airtight and unobstructed.
l  Charge pressure control solenoid valve -N75- OK.
  W00-10259
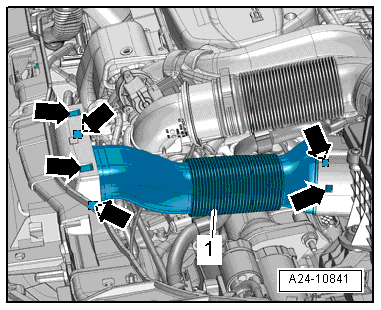
–  Release fasteners -arrows- and detach air duct -1-.
  A24-10841
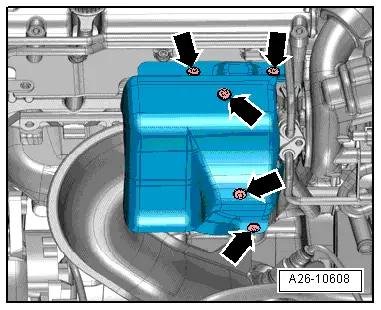
–  Remove bolts -arrows- and detach heat shield for turbocharger.
  A26-10608
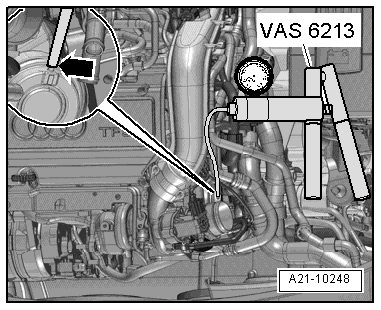
–  Disconnect vacuum hose -arrow- at vacuum unit on turbocharger and attach hand vacuum pump -VAS 6213- instead.
  A21-10248
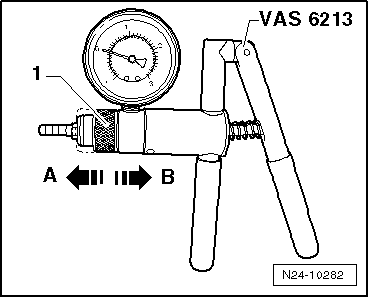
–  Move adjuster ring -1- on hand vacuum pump -VAS 6213- to position -B- to select „pressure“.
–  Operate hand vacuum pump -VAS 6213- several times.
  Caution
Risk of damage to vacuum unit on account of excessive pressure.
The pressure must not exceed 800 mbar.
  Note
  N24-10282
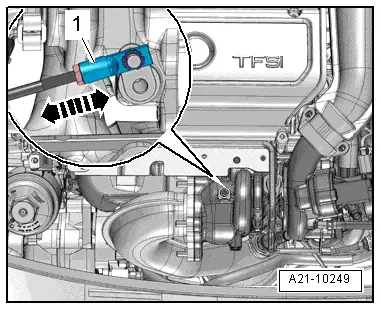
Illustration shows installation position with turbocharger removed.
–  Observe operating rod -1- of vacuum unit for turbocharger.
l  The operating rod should move at a pressure of approx. 300 mbar and above.
l  The operating rod should be at its end position at a pressure of approx. 800 mbar.
  A21-10249
–  Vent hand vacuum pump -VAS 6213--arrow A-.
l  The operating rod should move in the opposite direction.
  Note
Observe the movement of the operating rod over the complete range of travel. It should move steadily and smoothly.
Assembling
Assemble in reverse order.
Tightening torques
l  → Chapter „Turbocharger - exploded view“.
l  → Chapter „Charge air cooler - exploded view“.
  N24-10282

Removing and installing vacuum unit for turbocharger > < Turbocharger - exploded view