Audi Workshop Service and Repair Manuals
HOME
FEATURES
MENU
INDEX
ABOUT US
Installing >
< Removing and installing hydraulic lines
A2
Running gear, front-wheel drive
Steering
Power steering and hose connections: general view / moving_and_installing_hydraulic_lines/">Removing and installing hydraulic lines
Removing
Removing
Removing
Note!
t
Do not re-use hydraulic fluid which has been drained off.
t
Renew seals.
t
A small amount of hydraulic fluid remains in the motor/pump unit and steering box after extraction.
–
Remove front left wheel.
–
Remove noise insulation
→ General body repairs, exterior; Rep. Gr.50
.
–
Remove front left wheel housing liner
→ General body repairs, exterior; Rep. Gr.66
.
–
Place drip tray under motor/pump unit to collect escaping hydraulic fluid.
–
Remove screw cap
-arrow-
from fluid reservoir of motor/pump unit.
–
Extract hydraulic fluid via the filler neck with a commercially available extractor bottle.
–
Place drip tray under steering box to collect escaping hydraulic fluid.
–
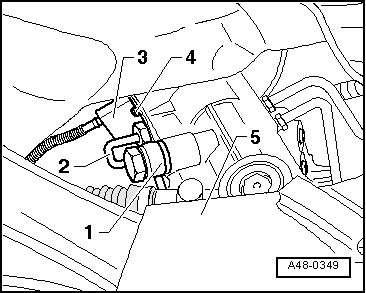
Disconnect expansion hose
-1-
and return line
-2-
from steering box and seal off with a plastic bag and adhesive tape.
–
Seal tapped holes on steering box (e.g. with plastic screw plugs).
3 -
Power steering sensor -G250- (if fitted)
4 -
Socket head bolt
5 -
Subframe
–
Detach motor/pump unit from longitudinal member.
Vehicles without headlight washer system
–
Remove bolts
-1-
and
-2-
.
Vehicles with headlight washer system
–
Remove bolts
-1-
and nuts
-3-
.
Note!
We recommend using a socket wrench set with 3/8" square drive for removing and installing nuts
-3-
.
Vehicles with TDI engine
–
Release cable tie
-2-
securing return line
-3-
to guard plate
-1-
for drive shaft
-6-
.
4 -
Expansion hose
5 -
Longitudinal member
All vehicles (continued):
–
Tie up motor/pump unit, do not remove.
–
Place drip tray under motor/pump unit to collect escaping hydraulic fluid.
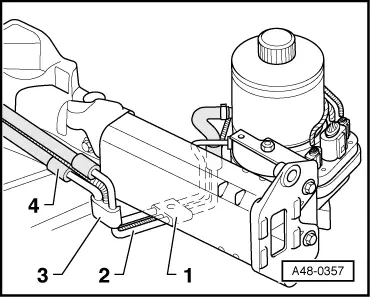
–
Remove expansion hose
-4-
and return line
-2-
from spacer bracket
-1-
.
–
Detach spacer
-3-
.
–
Detach expansion hose and return line from motor/pump unit.
–
Seal tapped hole and connection on motor/pump unit.
Running gear, front-wheel drive
Steering
Power steering and hose connections: general view / moving_and_installing_hydraulic_lines/">Removing and installing hydraulic lines
Removing
Installing >
< Removing and installing hydraulic lines
 Note!
Note!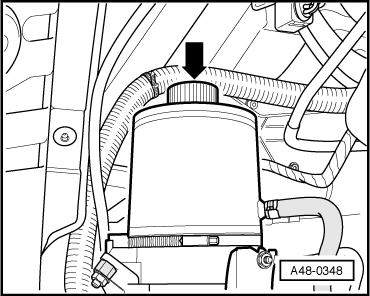
 Note!
Note!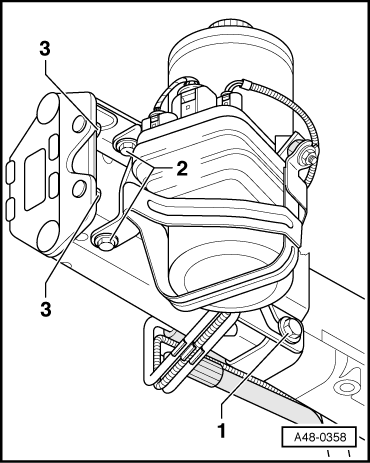

 Note!
Note!
Note!
Note!