audi Workshop Repair Guides

Audi Workshop Service and Repair Manuals

Wheel housing liners > < Removing and installing end cap (S3)
General Body Assembly Exterior (Repair groups 50, 55, 57, 58, 60, 63, 64, 66)
Protective strips
Removing and installing sill panel (S3)
 
A66-0248
  • Sill panel
  • ◆ Removing
    • ‒ Unclip sill panel and detach from body.
  • ◆ Installing

Notes:

  • ◆ Clean bonding surface with petrol, treat with silicone remover and rub dry.
  • ◆ Body temperature: Room temperature
  • ◆ Before installing, heat sill panel to approx. 40 °C using hot-air blower.
  • ◆ Do not remove protective film until just before installing the sill panel.
 
A66-0248
    • ‒ Clean the bonding surface on body from adhesive residues, dust and grease.
    • ‒ Heat the sill panel to approx. 40 °C.
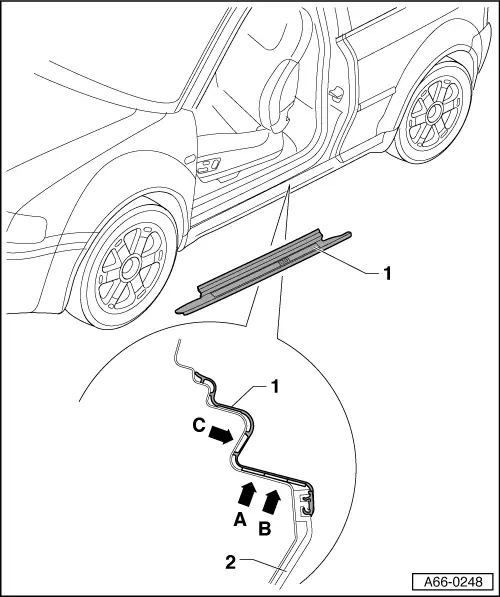
    • ‒ Remove the protective film of lower adhesive strip -arrow A- and -arrow B-.
    • ‒ Clip in the sill panel along the row of clips in the sill cladding -2-, use rubber lubricant if necessary.
    • ‒ Press down entire surface of sill panel firmly onto lower bodywork.
    • ‒ Pull off remaining protective film -arrow C-.
    • ‒ Firmly press down entire surface of sill panel.
    • After bonding on sill panel, the vehicle must be kept at room temperature for a further 2 hours.
  • Sill cladding

Wheel housing liners > < Removing and installing end cap (S3)