audi Workshop Repair Guides

Audi Workshop Service and Repair Manuals

Front door trims (5-door vehicles) > < Adjusting release button
General Body Assembly, Interior (Repair groups 68, 69, 70, 72, 74)
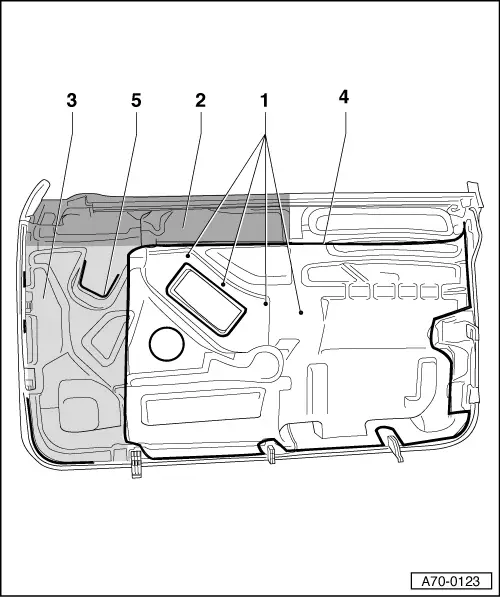
Door trims (3-door vehicles)
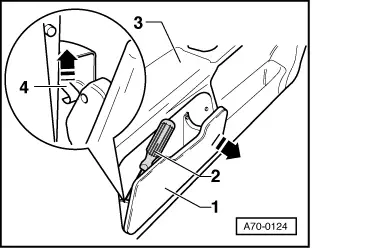
Removing and installing door trim attachments
 
A70-0123

Removing and installing upper section of grip moulding

Note:

Door trim is shown from rear for greater clarity.

  • Bolts (4x)
    • ‒ Locate position of bolts by running fingers over insulation, pierce insulation at bolt locations and remove bolts.
    • ‒ After fitting the bolts, seal holes in insulation with butyl compound (AKL 450 005 05) to close off and prevent draughts.
    • ‒ Before each stage of installation, press on insulation around adhesive bead.
 
A70-0123

Folding sections of insulation

  • Fold back to remove treble speaker
  • Fold back to remove bass speaker
  • Adhesive bead
    • ‒ Before each stage of installation, press on insulation around adhesive bead.
  • Fold back to unplug speaker connectors

Removing bass speaker

 
A70-0121
  • ‒ → Remove door trim

Note:

For greater clarity, door trim is shown from rear and without insulation.

  • ‒ Carefully fold over insulation of door trim around bass loudspeaker -1- => Page 70-8
  • ‒ Detach cable.
  • ‒ Unscrew bolts -2- (3x).
  • ‒ Press insulation firmly on after installing.

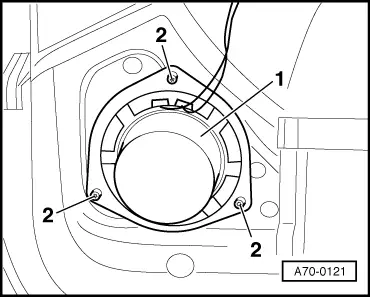
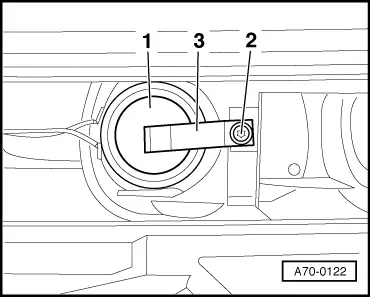
Removing treble speaker

 
A70-0122
  • ‒ → Remove door trim => Page 70-3

Note:

For greater clarity, door trim is shown from rear and without insulation.

  • ‒ Carefully fold over insulation of door trim around treble loudspeaker -1- => Page 70-8
  • ‒ Detach cable.
  • ‒ Unscrew bolt -2-.
  • ‒ Remove spring clip -3-.
  • ‒ Press insulation firmly on after installing.
 
A70-0124

Removing and installing hinged pocket

  • ‒ → Open hinged pocket -1- in door trim -3-.
  • ‒ Use offset screwdriver -2- (90°, 6-10 mm improvised) to unfasten spring clips-4- on left and right in direction of arrow and press hinged pocket in direction of arrow.
  • ‒ Lift out hinged pocket.

Note:

Magnified view shows spring clip -4- detached.

  • ‒ To install, pull up spring clips on left and right and press hinged pocket in until the two spring clips engage.

Front door trims (5-door vehicles) > < Adjusting release button