audi Workshop Repair Guides

Audi Workshop Service and Repair Manuals

Dismantling and assembling output shaft > < Dismantling and assembling input shaft
Circlips available
Circlips available
   
Measured value (mm)Circlip thickness (mm)Axial clearance (mm)
0.05 ... 0.102.00.05 ... 0.15
0.15 ... 0.202.10.05 ... 0.15
0.25 ... 0.302.20.05 ... 0.15
0.35 ... 0.402.30.05 ... 0.15
0.45 ... 0.502.40.05 ... 0.10

   
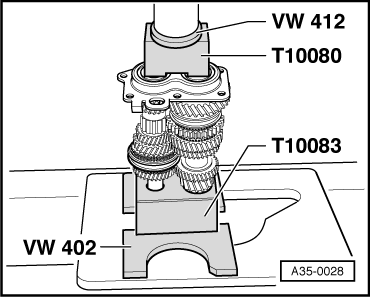
Pressing on bearing mounting with grooved ball bearing
–  Heat bearing mounting to approx. 100°C before pressing on.
  WARNING
Wear protective gloves.
  A35-0028
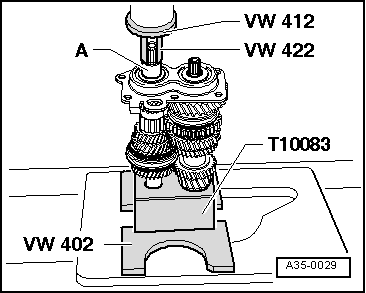
Pressing on sleeve -A- for 5th gear needle roller bearing
  A35-0029
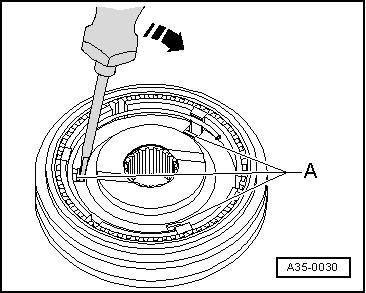
Detaching check ring
–  Unclip hooks -A- of check ring from synchronising hub using a screwdriver.
  A35-0030
Dismantling and assembling 5th gear locking collar and synchronising hub
1 - Spring
2 - Locking piece
3 - Synchronising hub
 - Installation position: the groove on the top -arrow A- and the wide collar -arrow B- face the 5th gear
4 - Locking collar
5 - Check ring
–  Push locking collar over synchronising hub.
The deeper recesses -arrow C- for the locking pieces in the synchronising hub must align with the recesses -arrow D- in the locking collar.
  A35-0031
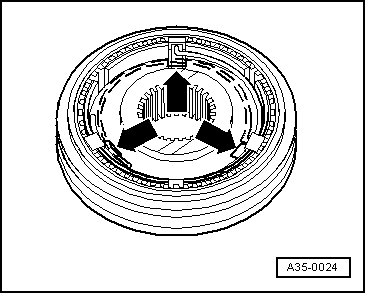
Assembling 5th gear locking collar/synchronising hub
l  Locking collar is pushed over synchronising hub.
–  Insert locking pieces in the deeper recesses -arrows- and install springs 120° off-set. Angled end of spring must locate in hollow locking piece.
  A35-0024
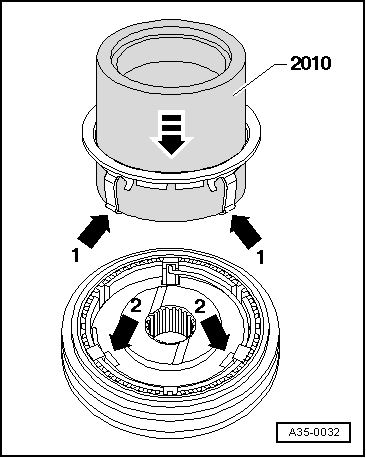
Installing check ring
–  Press check ring onto tube 2010.
–  Insert check ring together with tube 2010 into 5th gear synchronising hub/locking collar (observe installation position → Fig.).
Hooks -arrow 1- engage in slots -arrow 2- for locking pieces in synchronising hub.
–  Push check ring downwards until hooks engage.
  A35-0032

Dismantling and assembling output shaft > < Dismantling and assembling input shaft