audi Workshop Repair Guides

Audi Workshop Service and Repair Manuals

Gearbox mechanics,operation, construction,diff. > < Servicing clutch release mechanism
6-Speed manual gearbox 02M, Front-wheel drive
Servicing clutch
Servicing clutch
  • ● Gearbox removed

Special tools and workshop equipment required

 
W00-1137
  • ◆ T10097 Centralizing mandrel

 
W00-0026
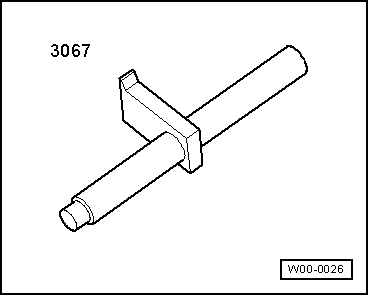
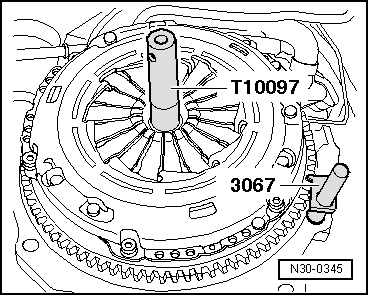
  • ◆ 3067 Counter-hold tool
  • ◆ Grease G 000 100

Notes:

  • ◆ Before renewing the clutch plate and pressure plate

=> Fault-finding No. 9 - Defects on the clutch and clutch mechanism

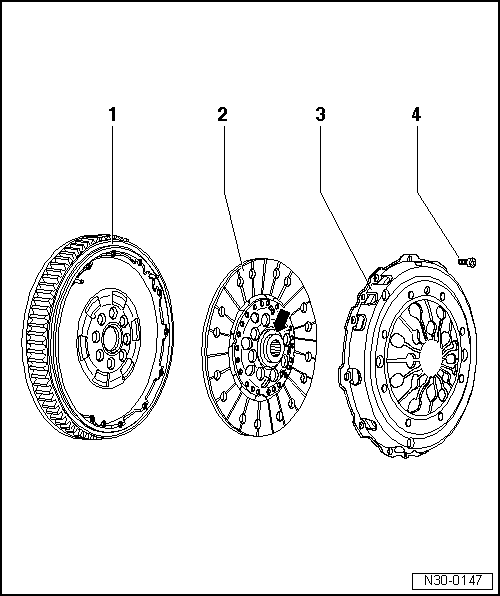
  • ◆ Replace clutch plates and pressure plates with damaged or loose rivets.
  • ◆ Clean input shaft splines and on used clutch plates, the hub splines, remove corrosion and apply only a very thin coating of grease Part No: G 000 100 to the input shaft splines. Then move clutch plate to and fro on input shaft until hub moves freely on shaft. Excess grease must be removed.
  • ◆ Select the correct clutch plate and pressure plate according to engine code:

=> Parts catalogue

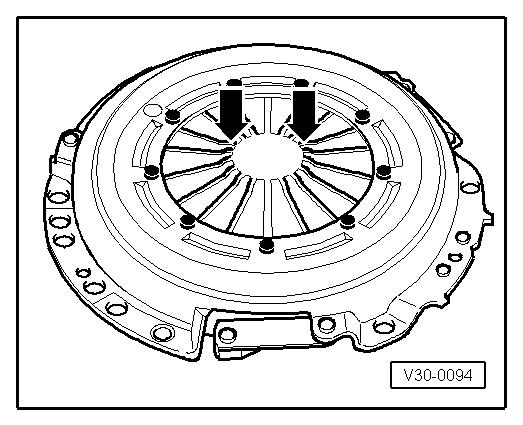
  • ◆ Pressure plates have an anti-corrosion coating and are greased. Only the contact surface may be cleaned, otherwise the service life of the clutch will be considerably reduced.
  • ◆ If the clutch has burnt out, thoroughly clean the bellhousing, flywheel and parts of the engine facing the gearbox to reduce the smell of burnt linings.
 
N30-0147
  • Dual-mass flywheel (two-part flywheel)
    • ◆ Ensure centring pins are a tight fit
    • ◆ Contact surface for clutch lining must be free of grooves, oil and grease
    • ◆ Removing and installing

=> 4-Cylinder TDI®engine, Mechanics; Repair group 13; Removing and installing dual-mass flywheel or drive plate

  • Clutch plate
    • ◆ Diameter
      =>Page 00-3
    • ◆ Installation position on two-part flywheel: Shorter hub end (arrow) points towards pressure plate
    • ◆ Installation position with single piece flywheel: spring cage faces the pressure plate
    • ◆ Centring => Fig.1
 
N30-0147
  • Pressure plate
    • ◆ Removing and installing => Fig.1
    • ◆ Check ends of diaphragm spring
      => Fig.2
  • Bolt M 8
    • ● 22 Nm
    • ◆ Loosen and tighten gradually and diagonally
    • ◆ Allocate using parts catalogue
 
N30-0345

→ Fig.1    Centring clutch plate and removing and installing pressure plate

  • ‒ Loosen and tighten bolts gradually and diagonally.
  • ‒ Reverse position of retainer 3067 when removing.

Note:

Pressure plate contact surface and clutch plate must make full contact with flywheel. Tighten bolts diagonally and evenly to prevent damage to the centralising holes in the pressure plate housing and the centralising pins in the flywheel.

 
V30-0094

→ Fig.2    Checking ends of the diaphragm spring

  • ● Wear up to half the thickness of the diaphragm spring is permitted.

Note:

When performing repairs always match up clutch pressure plate and clutch plate by checking engine code (see parts catalogue).

Gearbox mechanics,operation, construction,diff. > < Servicing clutch release mechanism