audi Workshop Repair Guides

Audi Workshop Service and Repair Manuals

Clutch, control > < General repair instructions
6-Speed manual gearbox 02M, Front-wheel drive
General repair instructions
Contact corrosion
  • ◆ The housing of the 02M gearbox in the A3 is made of a magnesium alloy.
  • ◆ Bolts and other components coming into direct contact with the gearbox housing have a surface which is matched to the magnesium gearbox housing.
  • ◆ If the incorrect components (bolts, nuts, washers, etc.) are used, this will cause contact corrosion. The gearbox housing will be damaged.
  • ◆ Always fit new components if you are in any doubt about whether a component can be used again.
Warning
  • ◆ Use only Genuine Audi Parts.
  • ◆ Damage resulting from contact corrosion is not covered by the warranty.

Special tools

For a complete list of special tools used in this Workshop Manual

=> Booklet; Special tools, Workshop equipment

Gearbox

  • ◆ When installing ensure that the dowel sleeves between the engine and gearbox are correctly located.
  • ◆ When assembling mounting brackets as well as other waxed components the contacts surfaces must be cleaned. Contact surfaces must be free of grease and wax.
  • ◆ When changing a gearbox fill with gear oil to the lower edge of the filler hole.
  • ◆ Capacities and specifications .

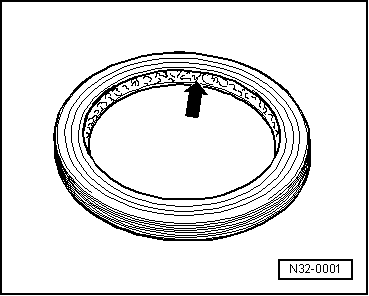
O-rings, seals, gaskets

  • ◆ Always renew O-rings, seals and gaskets.
  • ◆ After removing gaskets and seals, always inspect the contact surface on the housing or shaft for burrs resulting from removal or for other signs of damage.
  • ◆ Thoroughly clean joint surfaces and apply sealant AMV 188 200 03.
  • ◆ Apply sealant uniformly but not too thick.
 
N32-0001
  • ◆ → Before installing radial shaft oil seals, lightly oil outer circumference and fill space between sealing lips -arrow- about half full with grease G 052 128 A1.
  • ◆ The open side of the oil seals faces toward the side with fluid filling.
  • ◆ When replacing oil seals, always vary the point at which the sealing lips make contact (use insertion depth tolerances).
  • ◆ Checking oil level in manual gearbox
    .

Locking devices

 
A34-0149
  • ◆ Do not overstretch circlips.
  • ◆ Always renew circlips which have been damaged or over-tensioned.
  • ◆ Circlips must locate properly in the groove.
  • ◆ → Renew spring pins. Position: slit -A- should be in line with the line of force -arrow-.

Bolts and nuts

  • ◆ Tighten and loosen bolts and nuts for securing covers and housings in a diagonal sequence.
  • ◆ Especially delicate parts, such as clutch pressure plates, must not be distorted. Loosen and tighten nuts and bolts in stages in a diagonal sequence.
  • ◆ Tightening torques as specified are for unoiled bolts and nuts.
  • ◆ Renew self-locking bolts and nuts.
  • ◆ Ensure with screwed connections that the areas of the contact surfaces as well as the visible surfaces of nuts and bolts are rewaxed after assembly, if necessary.

Bearings

  • ◆ Install new taper roller bearings as supplied without additional lubrication.
  • ◆ Lubricate all gearbox bearings (except taper roller bearings) with gearbox oil before installing.
  • ◆ Taper roller bearings fitted to one shaft must be renewed as a set. Use same make of bearings.
  • ◆ Heat inner races of taper roller bearings to approx. 100 °C before installing. Press in onto stop when installing so there is no axial clearance.
  • ◆ Do not interchange outer or inner races of bearings of the same size. The bearings are matched in pairs.
  • ◆ Install needle bearings with lettered side (thicker metal) towards fitting tool.

Shims

  • ◆ Measure shims at several points with a micrometer. Tolerance variations make it possible to find the exact shim thickness required.
  • ◆ Check for burrs and damage.
  • ◆ Only install perfect shims.

Synchronizer rings

  • ◆ Do not interchange. When reusing always fit to the same gear.
  • ◆ Check for wear and renew if necessary.
  • ◆ Coat with gear oil before installing.

Gear wheels

  • ◆ Before installing clean and heat on a hot plate to approx. 100 °C.
  • ◆ Temperature can be checked with temperature tester V.A.G 1558.

Sliding gears

  • ◆ After installing, check axial clearance of 1st to 5th speed sliding gears. The gears should have a small amount of axial clearance and should rotate freely.

Clutch mechanism

  • ◆ Ensure that the pressure plate is kept straight: loosen and tighten bolts in a diagonal sequence and in several gradual stages.
  • ◆ To reduce odour caused by a burnt clutch, thoroughly clean the clutch bellhousing, the flywheel and the parts of the engine facing the gearbox.

Clutch, control > < General repair instructions