
A3 Mk1
| Exploded view - freewheel with piston “B1” |

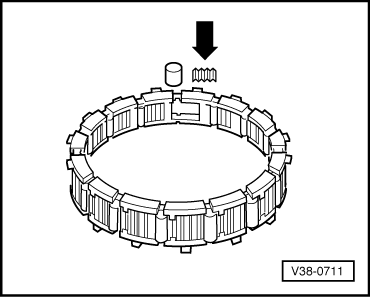
| 1 - | Rollers |
| q | Installing → Fig. |
| 2 - | Springs |
| q | Installing → Fig. |
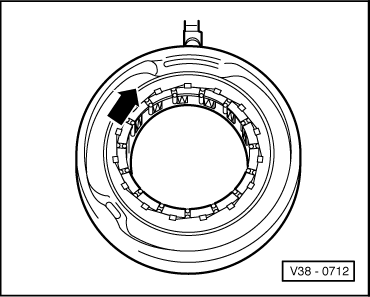
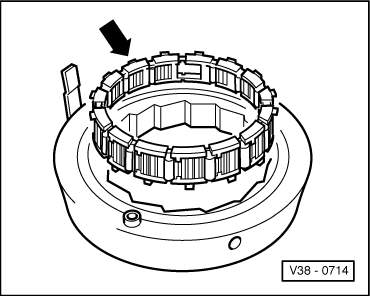
| 3 - | Cage |
| q | Removing and installing → Fig. |
| q | Installation position → Fig. |
| 4 - | Outer race |
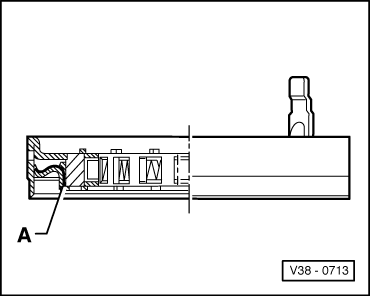
| 5 - | Piston |
| q | Sealing lips are vulcanised to piston |
| q | To remove, prise out of outer race by applying screwdriver at several points |
| q | Moisten sealing lips with ATF before installing |
| q | Installation position → Fig. |
| q | Turn piston slightly when installing |
|
|
|
|
|
|
|
|