A3 Mk1
|
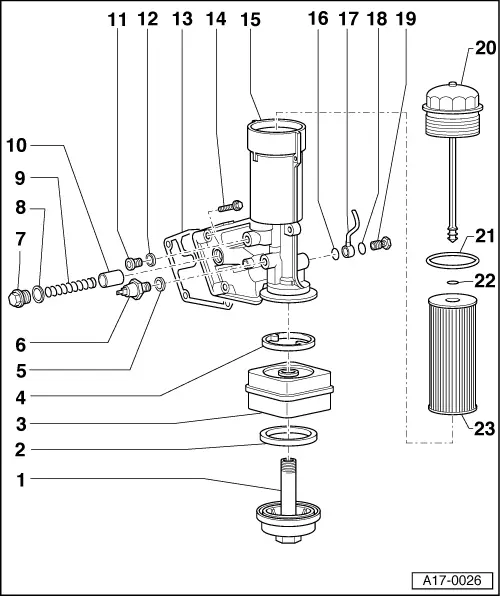
Removing and installing parts of the lubrication system
Part II
|
 |
|
|
|
|
|
|
=> Maintenance Manual |

|
Removing and installing parts of the lubrication system
Part II
|
|
|
|
|
|
|
|
=> Maintenance Manual |