audi Workshop Repair Guides

Audi Workshop Service and Repair Manuals

Removing and installing crankshaft > < Removing and installing dual-mass flywheel
Removing and installing drive plate
Special tools and workshop equipment required
   
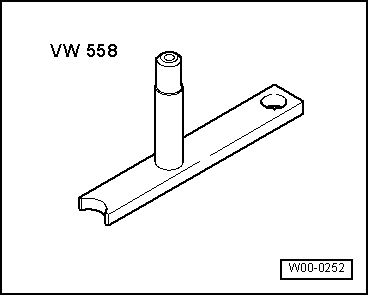
t  Counterhold tool -VW 558-
t  Depth gauge
t  Hexagon bolt M8x45 and hexagon nut M10 (2x)
  W00-0252
Removing
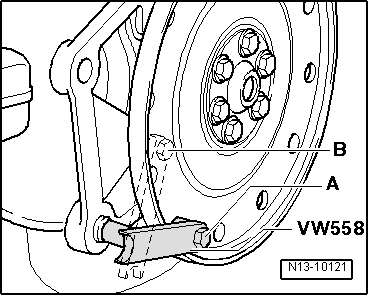
–  Insert counterhold tool -VW 558- in hole on cylinder block and use hexagon bolt M8x45 to secure to drive plate (fit two M10 nuts between counterhold tool and drive plate).
A - Installation position for counterhold tool when loosening bolts
B - Installation position for counterhold tool when tightening bolts
–  Mark installation position of drive plate on crankshaft.
–  Unbolt drive plate.
  N13-10121
Installing
Installation is carried out in the reverse order; note the following:
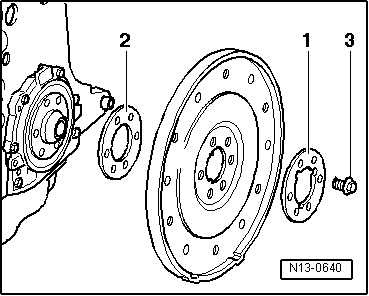
–  Fit drive plate using washer with notches -1-.
–  Use new bolts for securing.
–  Tighten bolts to 30 Nm.
  N13-0640
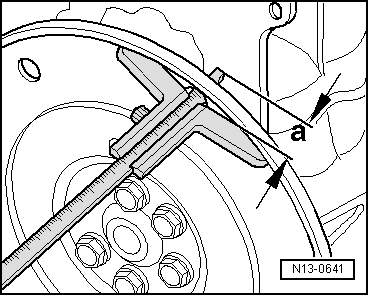
–  Measure depth -a- at three points (measurement is taken through the hole in the drive plate to the machined surface of the cylinder block).
–  Calculate average value.
l  Specification: 19.5 … 21.1 mm.
  N13-0641
If the value is below specification:
–  Remove drive plate again and re-fit with shim -2-.
–  Tighten bolts to 30 Nm.
–  Repeat measurement.
If the specification is obtained:
–  Tighten bolts for drive plate.
Tightening torque
  N13-0640
ComponentNm
Drive plate to crankshaft60 + 90° 1)2)
l  1) Renew bolt.
l  2) 90° = one quarter turn.


Removing and installing crankshaft > < Removing and installing dual-mass flywheel