audi Workshop Repair Guides

Audi Workshop Service and Repair Manuals

Checking secondary air pump relay J299 and secondary air pump motor V101 > < Principle and function
Checking secondary air inlet valveN112
   
Checking secondary air inlet valve -N112-
Special tools and workshop equipment required
t  Hand-held multimeter -V.A.G 1526 C- or -V.A.G 1526 A-
t  Voltage tester -V.A.G 1527 B-
t  Auxiliary measuring set -V.A.G 1594 C- or -V.A.G 1594 A-
t  Adapter cable -V.A.G 1598/31- (test box)
t  Vehicle diagnosis, testing and information system -VAS 5051-

   
Procedure
  Note
The secondary air inlet valve -N112- and the wiring connections are monitored by the engine control unit.
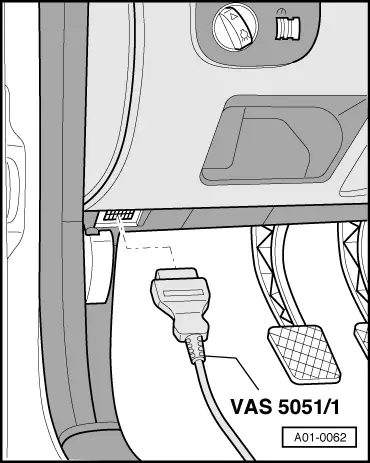
–  Connect up vehicle diagnostic, testing and information system -VAS 5051- with diagnosis lead -VAS 5051/1-, press vehicle self-diagnosis button and select vehicle system “01 - Engine electronics”. When doing this, the engine must be running at idling speed.
  A01-0062
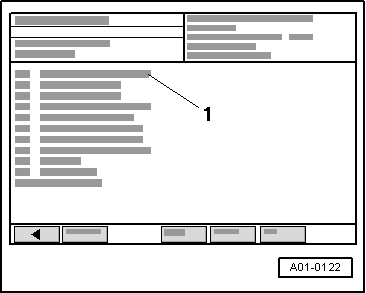
Display on -VAS 5051-:
–  From list -1-, select diagnosis function “02 - Interrogate fault memory”.
If a fault relating to secondary air inlet valve -N112- is displayed:
–  Terminate function “02 - Interrogate fault memory” by touching key.
–  Press function “06 - End output” and switch off ignition.
  A01-0122
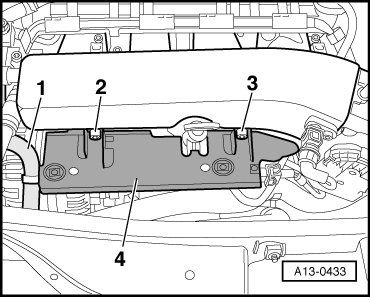
–  Remove cover in front of intake manifold.
–  Remove bolts -2- and -3- and detach retaining plate -4- from dipstick guide tube.
–  Disengage coolant hose -1- from retaining plate.
–  Detach hoses from secondary air inlet valve -N112-; leave electrical connector attached.
  A13-0433
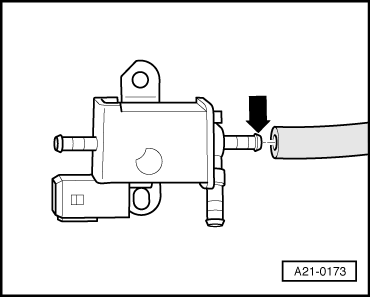
–  Connect test hose to connection on secondary air inlet valve -N112- marked with an -arrow-.
  A21-0173
–  Switch on ignition and select vehicle system “01 - Engine electronics”.
Display on -VAS 5051-:
–  From the menu -1- select the diagnostic function “03 - Final control diagnosis”.
  A01-0122
–  Press the key repeatedly until the following display appears:
Display on -VAS 5051- (example):
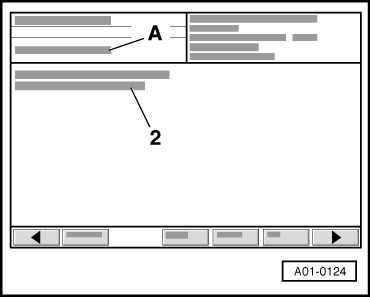
A - 2nd control element being tested
2 - Secondary air inlet valve -N112-
l  The valve should click and open and close (check by blowing into the test hose).
–  Press the key to exit from function “03 - Final control diagnosis”.
–  Press function “06 - End output” and switch off ignition.
If valve clicks but does not open or close correctly:
–  Renew secondary air inlet valve -N112-.
If valve does not click:
  A01-0124
Checking internal resistance
–  Detach electrical connector at secondary air inlet valve -N112-.
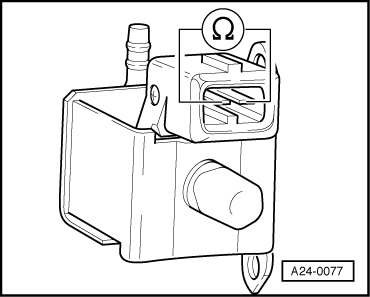
–  Connect hand-held multimeter -V.A.G 1526 C- to measure resistance between contacts on secondary air inlet valve -N112-.
l  Specification: 25 ... 35 Ω.
If the specification is not attained:
–  Renew secondary air inlet valve -N112-.
If specification is obtained:
Checking voltage supply
l  Fuse for secondary air inlet valve -N112- OK → Current flow diagrams, Electrical fault finding and Fitting locations.
l  Fuel pump relay -J17- OK → Current flow diagrams, Electrical fault finding and Fitting locations.
  Note
The secondary air inlet valve -N112- is supplied with power via the fuel pump relay -J17-.
  A24-0077
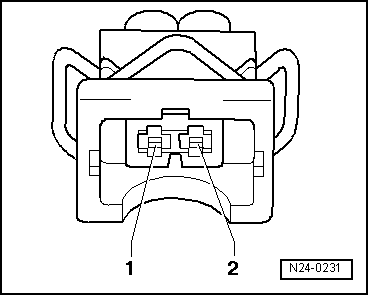
–  Connect voltage tester -V.A.G 1527 B- between contact -1- of connector for secondary air inlet valve -N112- and earth “–”.
–  Operate the starter briefly.
l  The LED should light up.
If LED does not light up:
–  Repair wiring from contact -1- of connector for secondary air inlet valve -N112-, via fuse, to fuel pump relay -J17- → Current flow diagrams, Electrical fault finding and Fitting locations.
If the LED lights up:
  N24-0231
Checking activation
–  Connect voltage tester -V.A.G 1527 B- between contact -1- and -2- of connector for secondary air inlet valve -N112-.
–  Switch on ignition and select vehicle system “01 - Engine electronics”.
–  Repeat function “03 - Final control diagnosis”.
  N24-0231
–  Press the key repeatedly until the following display appears:
Display on -VAS 5051- (example):
A - 2nd control element being tested
2 - Secondary air inlet valve -N112-
l  The LED should flash.
–  Press the key to exit from function “03 - Final control diagnosis”.
–  Press function “06 - End output”.
–  Switch off ignition and unplug diagnostic connector.
  A01-0124
If the LED does not flash:
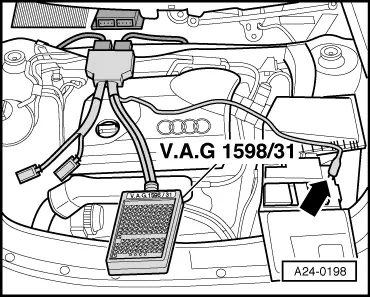
–  Connect adapter cable -V.A.G 1598/31- (test box) to connectors of wiring harness; do not connect engine control unit. Connect earth clip of test box to earth -arrow- → Rep. Gr.24.
  Caution
To prevent damage to electronic components, select appropriate measuring range before connecting measuring leads and observe test requirements.
  A24-0198
–  Check for open circuit and short to positive or earth in the following wiring:
  N24-0231
Connector
Contact
-V.A.G 1598/31-
Socket
-2-9

–  Repair wiring connection if necessary.
Assembling
Installation is carried out in the reverse order; note the following:
  Note
Secure all hose connections with the correct type of hose clips (same as original equipment) → Parts catalogue.
   

Checking secondary air pump relay J299 and secondary air pump motor V101 > < Principle and function