-
‒ Removing drive unit protection plate:
=> General body repairs, exterior; Repair group 50; Front body; Noise insulation - Assembly overview
Continuation for all vehicles
-
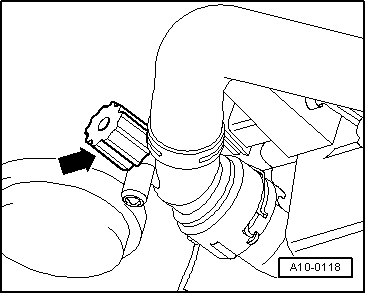
‒ → To drain coolant from radiator remove drain plug -arrow-.
Note:
Observe disposal regulations!
Filling
Notes:
-
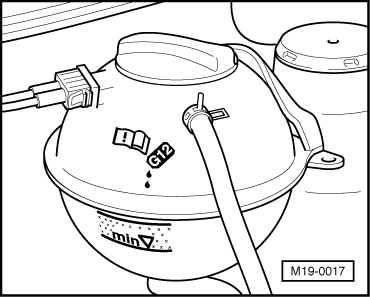
◆ Only use coolant additive G 12 in accordance with TL VW 774 D.
Distinguishing feature: coloured red
-
◆ On no account must G 12 be mixed with other coolant additives!
-
◆ If the fluid in expansion tank is brown, G 12 has been mixed with another coolant. In this case the coolant must be changed.
-
◆ G 12 and coolant additives marked "In accordance with TL VW 774 D" prevent frost and corrosion damage, scaling and also raise boiling point of coolant. For this reason the system must be filled all year round with frost and corrosion protection additives.
-
◆ Because of its high boiling point, the coolant improves engine reliability under heavy loads, particularly in countries with tropical climates.
-
◆ Protection against frost must be assured to about -25 °C (in countries with arctic climate down to about -35 °C).
-
◆ The coolant concentration must not be reduced by adding water even in warmer seasons and in warmer countries. The anti-freeze ratio must be at least 40 %.
-
◆ If for climatic reasons a greater frost protection is required, the amount of G 12 can be increased, but only up to 60 % (frost protection to about -40 °C), as otherwise frost protection is reduced again and cooling effectiveness is also reduced.
-
◆ The refractometer T10007 is recommended for determining the current anti-freeze density.
-
◆ If radiator, heat exchanger, cylinder head or cylinder head gasket is replaced, do not reuse old coolant.
Recommended mixture ratios:
|
|
|---|
|
Frost pro- tection to
|
Anti-freeze amount
|
G 121)
|
Water1)
|
|
-25 °C
-35 °C
|
40 %
50 %
|
2.0 ltr.
2.5 ltr.
|
3.0 ltr.
2.5 ltr.
|
1) The quantity of coolant can vary depending upon the vehicle equipment.
-
‒ Screw drain plug into radiator and secure coolant hose on oil cooler connection.
|