audi Workshop Repair Guides

Audi Workshop Service and Repair Manuals

Removing and installing sealing flanges and flywheel > < Dismantling and assembling engine
4-Cylinder engine (2-valve, roller rockers), Mechanics
Dismantling and assembling engine
Removing and installing ribbed belt
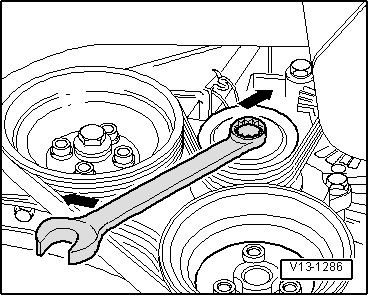
Removing

  • ‒ Remove noise insulation tray:

=> General body repairs, exterior; Repair group 50; Front body; Noise insulation - Assembly overview

Vehicles with drive unit protection plate

  • ‒ Remove drive unit protection plate:

=> General body repairs, exterior; Repair group 50; Front body; Noise insulation - Assembly overview

Continuation for all vehicles

  • ‒ Mark ribbed belt direction of rotation.
 
V13-1286
  • ‒ → To slacken ribbed belt turn tensioning element with a 16 mm spanner in direction of arrow.
  • ‒ Remove ribbed V-belt.

Installing

  • ‒ Place ribbed V-belt onto crankshaft pulley first. Slide belt onto tensioning roller last.

The rest of the assembly is basically a reverse of the dismantling sequence.

Notes:

  • ◆ Ensure, before installing ribbed belt, that all ancillaries (alternator, air conditioner compressor) are secured tightly.
  • ◆ When fitting the ribbed belt observe belt direction of rotation and that the belt is seated correctly in the belt pulleys.

After completing repairs always:

  • ‒ Start engine and check that belt runs properly.

Ribbed belt routing

 
N13-0242

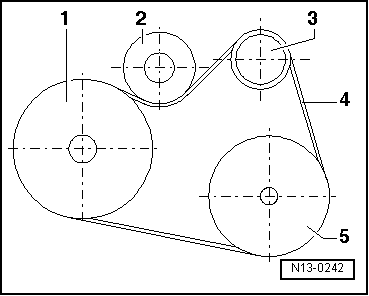
→ Belt drive without air conditioner compressor

  •     1 -    Pulley - Crankshaft
  •     2 -    Tensioner
  •     3 -    Pulley - Alternator
  •     4 -    Ribbed belt
  •     5 -    Pulley - P.A.S. vane pump

 
N13-0158

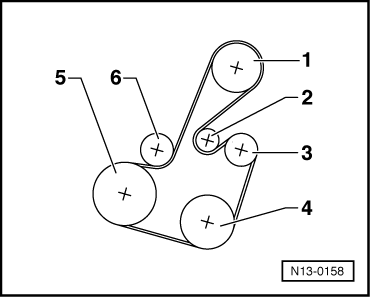
→ Belt drive with air conditioner compressor

  •     1 -    Pulley - P.A.S. vane pump
  •     2 -    Idler roller
  •     3 -    Pulley - Alternator
  •     4-     Air conditioner compressor
  •     5-     Pulley - Crankshaft
  •     6 -    Tensioner

Removing and installing sealing flanges and flywheel > < Dismantling and assembling engine