audi Workshop Repair Guides

Audi Workshop Service and Repair Manuals

Overview of components: fuel delivery unit and fuel gauge senders > < Draining fuel tank
Fuel supply system - Diesel engines
Fuel supply system - four-wheel drive
Removing and installing fuel tank with attachments
 
W00-0120

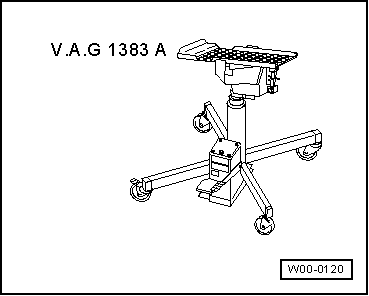
Observe safety precautions.

Observe rules for cleanliness => Page 20-3.

Special tools and workshop equipment required

  • ◆ V.A.G 1383 A and V.A.G 1359/2

Removing

  • ● To avoid unnecessary weight, the fuel tank must be empty when it is removed. Drain the tank if necessary. Procedure for draining fuel tank => Page 20-45.
  • ‒ Remove rear seat bench.

=> General body repairs, Interior; Repair group 72; Rear seats

  • ‒ Fold back floor covering under rear seat bench.
  • ‒ Detach cover for flange on fuel tank under rear seat bench (right side).
 
A20-0378
  • ‒ → Release and unplug electrical connector -arrow-.

 
A20-0776
  • ‒ Clean area around tank filler neck.
  • ‒ → Open tank flap and (if fitted) detach loop -1- on tank flap.
  • ‒ Lever out clamping ring -arrow- in rubber cup (on filler neck).

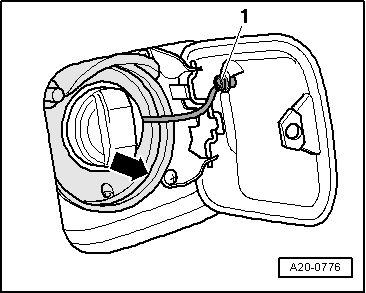
Note:

Do not remove filler cap.

  • ‒ Press rubber cup through to the inside.
  • ‒ Remove rear right wheel.
  • ‒ Remove rear right wheel housing liner:

=> General body repairs, Exterior; Repair group 66; Removing and installing rear wheel housing liner

 
A20-0395
  • ‒ → Unscrew bolts -arrows- securing fuel filler neck.
  • ‒ Remove rear section of exhaust system:

=> Engine Mechanics; Repair group 26

  • ‒ Remove propshaft:

=> Manual gearbox; Repair group 39

=> Automatic gearbox; Repair group 39

  • ‒ Remove rear axle:

=> Running gear, Front-wheel drive and four-wheel drive; Repair group 42; Servicing rear axle (four-wheel drive vehicles)

Warning
  • ◆ The fuel system is under pressure. Place a cloth over the connection before opening the system. Then open the connection carefully to relieve pressure.

  • ◆ In extreme cases the fuel pipes/hoses or the fuel can reach a temperature of 100 C on vehicles with unit injector engine. Allow the fuel to cool down before disconnecting the pipes/hoses - acute danger of scalding.

  • ◆ Wear protective gloves.
  • ◆ Wear protective goggles.
 
A20-0092
  • ‒ → Press release catches -arrows- and disconnect black fuel supply line and blue fuel return line at front of fuel tank (right side).

Vehicles with auxiliary heater

  • ‒ In addition, disconnect supply hose for auxiliary heater.
  • ‒ Position engine/gearbox hoist V.A.G 1383 A below vehicle to support tank.
 
A20-0377
  • ‒ → Slacken bolted connections in following order:
    • ‒ Retaining lugs: -1- and -5-
    • ‒ Reinforcement panel: -3- and -7-
    • ‒ Securing straps: -2-, -4-, -6- and -8-
  • ‒ Lower fuel tank with V.A.G 1383 A.
 
A20-0864

Installing

Install in reverse sequence; note the following points:

  • ‒ → Check position of earth connection:
    • ‒ Ensure connector -2- is seated properly on metal ring -1-
    • ‒ Make sure earth wire is in retainer -3-
    • ‒ The contact -4- must be hooked into the fuel tank -6- and secured with the spacer bush -5-
  • ‒ Check that supply pipe and return pipe are clipped onto front right of fuel tank.
 
A20-0377
  • ‒ Position fuel tank with securing straps and carrier plate on underside of vehicle using engine/gearbox jack V.A.G 1383 A.
  • ‒ → Secure fuel tank by tightening bolted connections to 26 Nm in following order:
    • ‒ Securing straps: -2-, -4-, -6- and -8-
    • ‒ Reinforcement panel: -3- and -7-
    • ‒ Retaining lugs: -1- and -5-
 
A20-0395
  • ‒ → Tighten bolts -arrows- to 11 Nm.
Caution
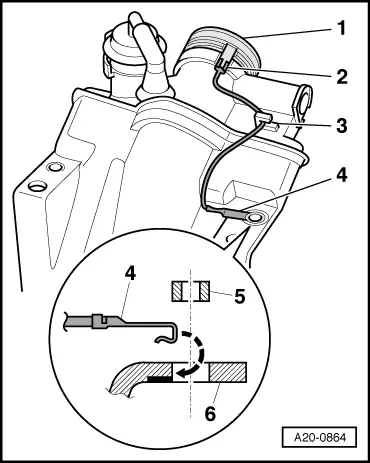
After installation, use an ohmmeter to check the electrical connection between the metal ring on the fuel filler neck and a bare metal part on the body:
  • ◆ Specification: approx. 0ω.

 
A20-0092
  • ‒ → Connect black fuel supply line and blue fuel return line at front of fuel tank (right side -arrows-).
  • ‒ Install rear axle:

=> Running gear, Front-wheel drive and four-wheel drive; Repair group 42; Servicing rear axle (four-wheel drive vehicles)

  • ‒ Install rear right wheel housing liner:

=> General body repairs, Exterior; Repair group 66; Removing and installing rear wheel housing liner

  • ‒ Install propshaft:

=> Manual gearbox; Repair group 39

=> Automatic gearbox; Repair group 39

  • ‒ Install rear section of exhaust system:

=> Engine Mechanics; Repair group 26

  • ‒ Plug in electrical connectors.
  • ‒ Install cover for flange on fuel tank under rear seat bench (right side).

Tightening torques

Component

Nm

Securing straps for fuel tank to body

26

Fuel tank to body

26

Fuel filler neck to wheel housing

11

Overview of components: fuel delivery unit and fuel gauge senders > < Draining fuel tank