audi Workshop Repair Guides

Audi Workshop Service and Repair Manuals

Replacing wishbone bonded rubber bushes > < Removing and installing ball joint
Running gear, Front-wheel drive and four-wheel drive
Servicing front suspension
Removing and installing front wishbone
 
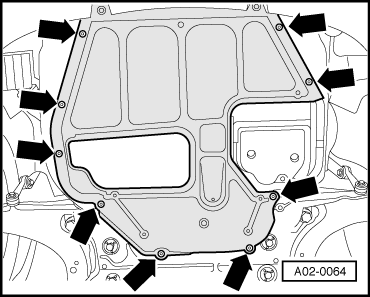
A02-0064

Removing

  • ‒ Remove wheel.
  • ‒ → If necessary, remove centre noise insulation -arrows-.
  • ‒ Unfasten headlight range control unit at wishbone on left
    =>Page 40-16.

 
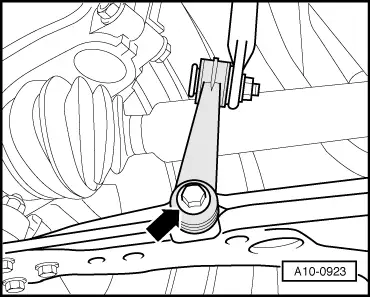
A10-0923

Front-wheel drive vehicles:

  • ‒ → Unscrew connecting link from wishbone -arrow-.
 
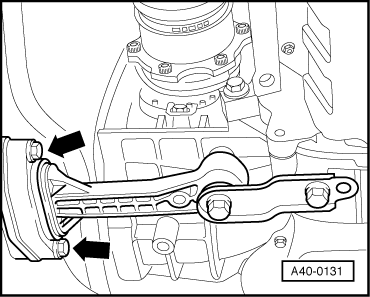
A40-0131

Vehicles with automatic gearbox:

  • ‒ → Screw out bolts -arrows-.

 
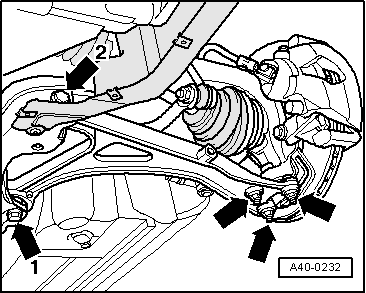
A40-0232

All models:

  • ‒ → Unfasten wishbone/ball joint connection at lower bolted joint
    -arrows-.
  • ‒ Screw out hexagon bolts -1- and -2- and take out wishbone.

Note:

Bolt -1- is secured from above with a nut.

 
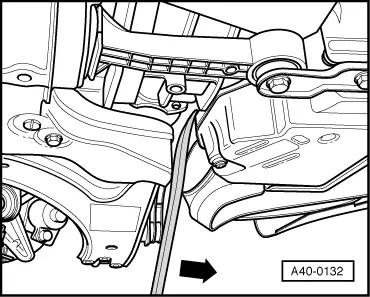
A40-0132

Vehicles with automatic gearbox:

  • ‒ → To take out wishbone, use tyre iron to press engine/gearbox assembly in direction of travel -arrow-.

Installing

Install in reverse order.

Tightening torques

Component

Nm

Ball joint to

Bolts M8

20 + 90° 1)2)

wishbone

Nuts M10

75 2)

Wishbone to subframe

70 + 90° 1)2)

Pendulum support to subframe

20 + 90°1)2)

Connecting link to wishbone (FWD)

15 + 90° 1)2)

    1)    90°corresponds to quarter turn

    2)    Replace nuts/bolts

Bolted joints with bonded rubber bushes must be tightened when vehicle is standing on its wheels.

Perform wheel alignment after installation.

Replacing wishbone bonded rubber bushes > < Removing and installing ball joint