audi Workshop Repair Guides

Audi Workshop Service and Repair Manuals

Adjusting headlights (halogen headlights) > < Exploded view of gas-discharge headlight
Electrical system
Servicing headlights - as of Model Year 2001
Removing and installing headlights
 
A10-1254

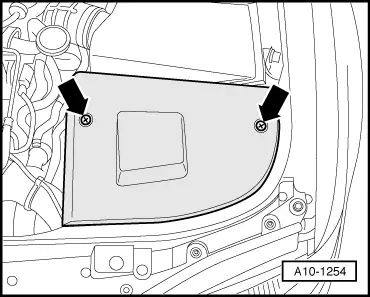
Removing

Left headlight:
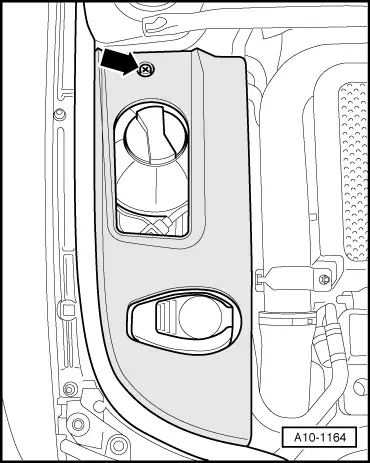
  • ‒ → If fitted, remove front left cover -arrows-.

 
A10-1164

Right headlight:

  • ‒ → If applicable, screw out bolt -arrow- and remove cover over expansion tank.
 
A94-0403

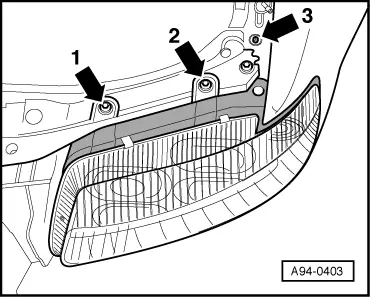
Both sides (continued):

  • ‒ Remove front bumper cover.

=> General Body Repairs, Exterior; Repair Group 63; Front Bumper

  • ‒ → Screw out bolts -arrow 1- and -arrow 2-.
  • ‒ Guide long TORX socket wrench through recess -arrow 3- and screw out retaining bolt at bottom of headlight housing.

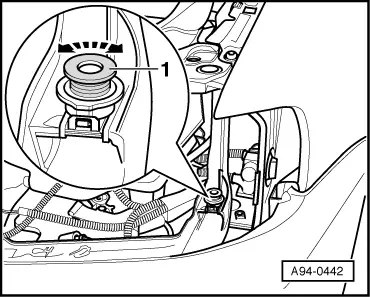
Note:

If necessary, apply small quantity of body sealant to bolt to affix it to TORX wrench.

 
A94-0404

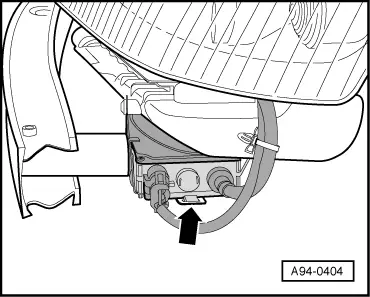
Vehicles with gas-discharge headlights:

  • ‒ → Release clip -arrow- and pull starter unit sideways out of mount.

All models:

  • ‒ Take headlight to front out of body.
  • ‒ Unplug connectors.
 
A94-0442

Installing

Install in reverse order, paying attention to the following:

Notes:

  • ◆ All cable ties unfastened or cut open on removal are to be re-attached in same position on installation.
  • ◆ → Headlight can be aligned with bumper contour by screwing adjusting nut -1- in or out. Adjusting nut can only be turned after removing headlight.

 
A94-0053
  • ‒ → Engage lug -1- of headlight in guide -2- in centre area.
  • ‒ Align headlight with body contours (gap widths) and secure.
 
A94-0403
  • ‒ → Tighten bolts -arrows 1 ... 3-.
  • ‒ Install front bumper cover.

=> General Body Repairs, Exterior; Repair Group 63; Front Bumper

  • ‒ Following installation, adjust headlights .

Tightening torque

Component

Nm

Headlight to lock carrier

6

Adjusting headlights (halogen headlights) > < Exploded view of gas-discharge headlight