
A4 Cabriolet Mk2
| Servicing conventional clutch |
 Note
Note| The gearbox has to be removed before working on the clutch → Chapter „Removing gearbox - vehicles with 4-cyl. petrol engine“. |

| 1 - | Dual-mass flywheel |
| q | Ensure that dowel pins fit tightly |
| q | Contact surface for clutch lining must be free of grooves, oil and grease |
| q | Removing and installing → Rep. Gr.13 |
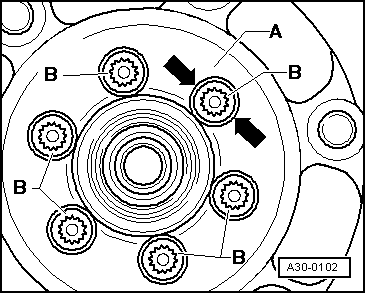
| q | Do not use a pneumatic wrench or impact wrench to remove bolts → Fig. |
| 2 - | Bolt |
| q | Tightening torque for bolt length 22.5 mm: 60 Nm + 90° further |
| q | Tightening torque for bolt length 43 mm: 60 Nm + 180° further |
| q | Renewing → Rep. Gr.13 |
| 3 - | Clutch plate |
| q | Install with damper assembly (coil springs) or the word “Getriebeseite” (gearbox side) towards pressure plate and gearbox |
| q | Centralising → Anchor |
| q | Clutch plate diameter → Chapter „Code letters, allocation, transmission ratios, capacities“ |
| 4 - | Pressure plate |
| q | Removing and installing → Chapter |
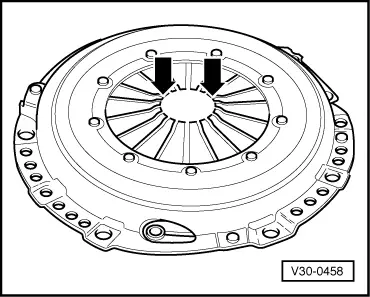
| q | Checking ends of diaphragm spring → Fig. |
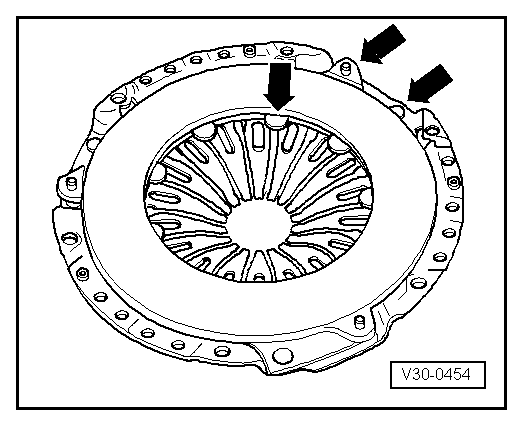
| q | Check spring connection and rivets → Fig. |
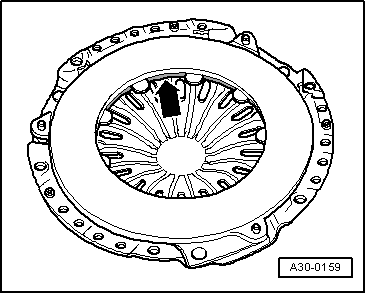
| q | Checking wire ring → Fig. |
| 5 - | Bolt, 22 Nm |
| Observe tightening sequence → Anchor |
| 6 - | Needle bearing |
| q | Removing and installing → Rep. Gr.13 |
Note
|
|
|
|
Note
|
|