audi Workshop Repair Guides

Audi Workshop Service and Repair Manuals

Exploded view – centre differential and centre differential housing > < Removing and installing selector shaft
Removing and installing selector shaft locking bushes (with gearbox installed)
Special tools and workshop equipment required
   
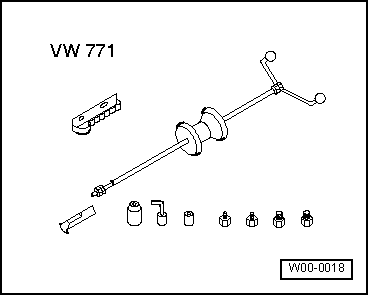
t  Multi-purpose tool -VW 771-
  W00-0018
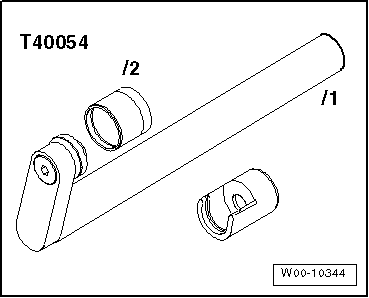
t  Puller -T40054/1 -/2-
  W00-10344
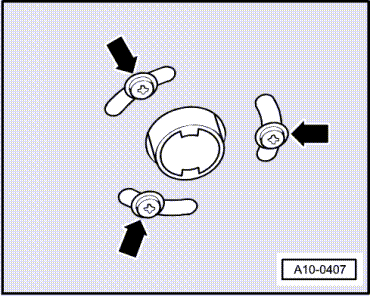
–  On vehicles fitted with auxiliary heater, remove screws -arrows- securing exhaust pipe of auxiliary/ additional heater to noise insulation.
  A10-0407
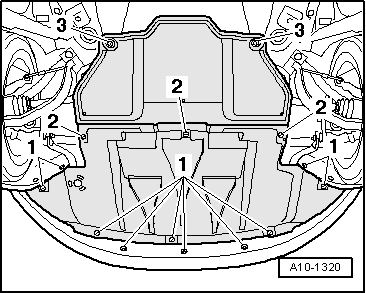
–  Open quick-release fasteners -1 ... 3- and detach noise insulation (front and rear).
  A10-1320
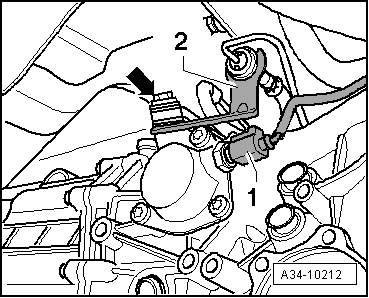
–  Unplug electrical connector -1- at reversing light switch -F4-.
–  If clutch pipe bracket -2- is fitted, remove bolt -arrow- and detach bracket.
  A34-10212
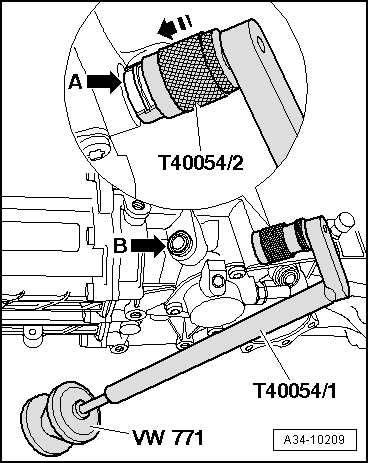
–  Screw spindle of multi-purpose tool -VW 771- into stem of puller -T40054/1 -.
–  Fit puller onto locking bush -arrow A-.
–  Secure puller by sliding on sleeve -T40054/2- onto stop in direction of -arrow-.
–  Drive locking bush out upwards using multi-purpose tool -VW 771-.
  Note
The other locking bush -arrow B- is removed in the same manner.
  A34-10209
Installing
–  Lightly oil stems of locking bushes and holes in gearbox with gear oil.
–  Place locking bush -arrow A- in puller -T40054/1- and secure it in place by sliding sleeve -T40054/2- across.
–  Use multi-purpose tool -VW 771- to drive locking bush into gearbox as far as the stop.
  Note
t  Make sure locking bushes remain in straight position when installing.
t  The other locking bush -arrow B- is installed in the same manner.
  A34-10209
–  If fitted, secure clutch pipe bracket -2- together with connecting rod -arrow-. Tightening torque → Item
–  Plug electrical connector -1- in at reversing light switch -F4-.
–  Install noise insulation panels.
  A34-10212

Exploded view – centre differential and centre differential housing > < Removing and installing selector shaft