audi Workshop Repair Guides

Audi Workshop Service and Repair Manuals

Dismantling and assembling body "II” > < Dismantling and assembling planetary drive "III”
Assembling body “I”
Assembling body “I”
   
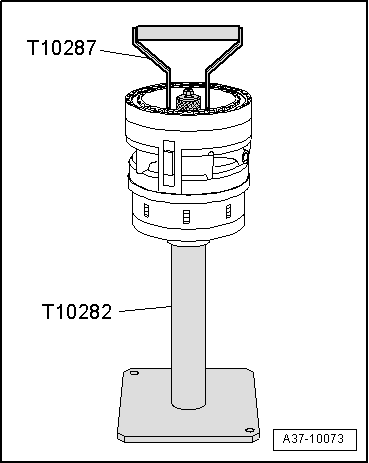
–  Place planetary drive “III”-item 1- into support element -T10282-.
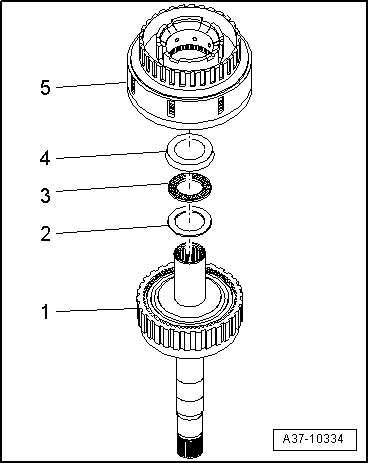
–  Fit thrust washer -2-, axial needle bearing -3- and flange washer -4- on planetary drive “III”-item 1-.
l  The flange on the flange washer faces towards the planetary drive “III”.
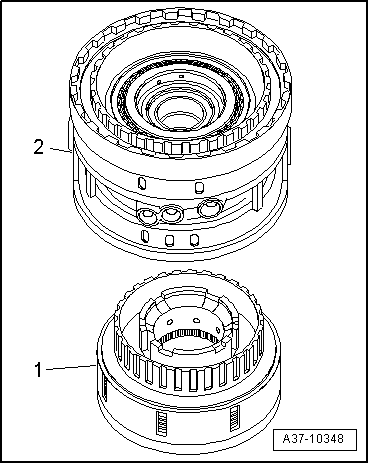
–  Fit clutch “F”-item 5- onto plate carrier of planetary drive “III”-item 1- (lift and rotate clutch slightly as required).
l  Make sure that all plates of clutch “F” mesh one after the other with the plate carrier of the planetary drive “III”.
–  Lift clutch “F” a few millimetres and then let it drop to check that the plates have meshed.
t  If you hear a metallic sound, all the plates have meshed.
t  If you only hear a muffled sound, some of the plates have not meshed.
  A37-10334
–  Fit clutch “D/G”-item 2- onto plate carrier of clutch “F”-item 1- (lift and rotate slightly as required).
l  Make sure that all plates of clutch “G” mesh one after the other with the plate carrier of clutch “F”.
–  Lift clutch “D/G” a few millimetres and then let it drop to check whether the plates have meshed.
t  If you hear a metallic sound, all the plates have meshed.
t  If you only hear a muffled sound, some of the plates have not meshed.
  A37-10348
Attach lifting tool -T10287- as follows.
–  Unscrew knurled nut on lifting tool slightly.
–  Insert lifting tool into body “I” far as it will go.
–  Tighten knurled nut on lifting tool by turning clockwise.
–  Make sure that lifting tool is securely attached in body “I”.
  A37-10073

Dismantling and assembling body "II” > < Dismantling and assembling planetary drive "III”