audi Workshop Repair Guides

Audi Workshop Service and Repair Manuals

Engine control unit > < Lambda probes - overview
Removing and installing Lambda probes
Special tools and workshop equipment required
   
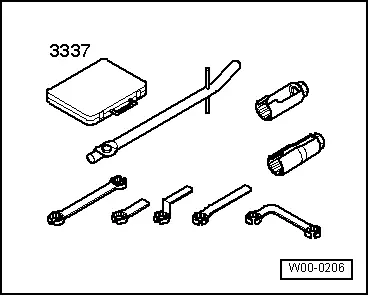
t  Lambda probe open ring spanner set -3337-
  W00-0206
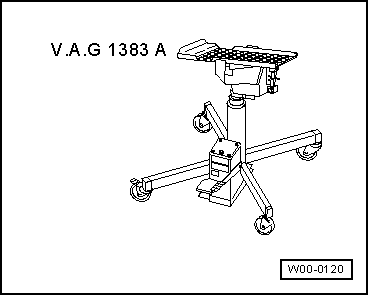
t  Engine and gearbox jack -V.A.G 1383 A-
Removing
  Note
t  All cable ties which are released or cut open when removing must be fitted in the same position when installing.
t  Fit all heat shields and heat insulation sleeves in the original positions when installing.
  Note
  W00-0120
To avoid any damage, the flexible joint in the front exhaust pipe must not be bent more than 10°.
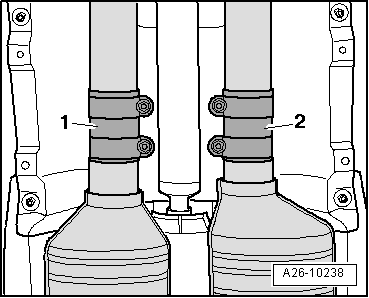
–  Separate exhaust system at clamps -1- and -2-.
  A26-10238
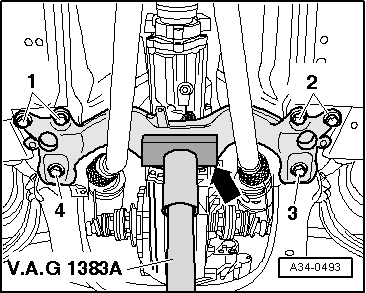
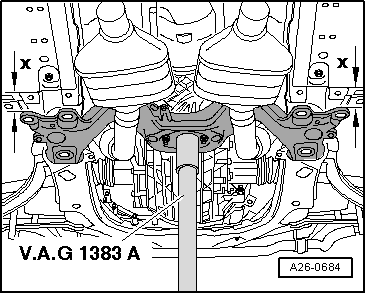
–  Position lifting column of engine and gearbox jack -V.A.G 1383 A- at cross member (rear) with a piece of wood -arrow- placed in between.
–  First unscrew bolts -1- and -2-, then bolts -3- and -4-.
  A34-0493
–  Lower rear cross member slowly with engine and gearbox jack -V.A.G 1383 A- until distance between rear cross member and body reaches dimension -x-.
l  Dimension -x- = 60 mm (maximum).
  Note
The dimension -x- must NOT be exceeded, as this could damage the propshaft joint and bulkhead wiring or other connections.
  A26-0684
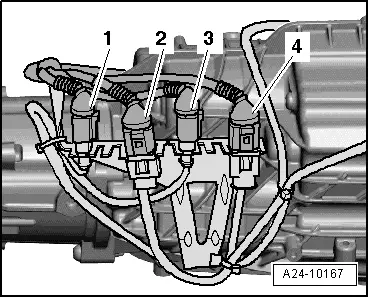
–  Detach electrical connectors from bracket on gearbox.
1 - Lambda probe after catalytic converter -G130-
2 - Lambda probe -G39- (before catalytic converter)
3 - Lambda probe 2 after catalytic converter -G131-
4 - Lambda probe 2 -G108- (before catalytic converter)
–  Unplug electrical connectors.
–  Remove heat insulation sleeve at wiring harness and move the individual wires clear.
  A24-10167
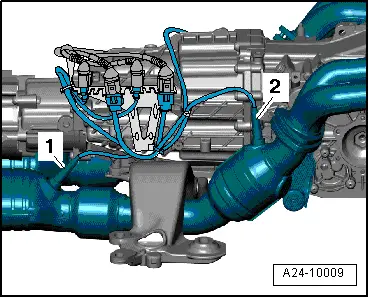
–  Unscrew Lambda probe on cylinder bank 1 (right-side) using Lambda probe open ring spanner set -3337-.
1 - Lambda probe after catalytic converter -G130-
2 - Lambda probe -G39- (before catalytic converter)
  A24-10009
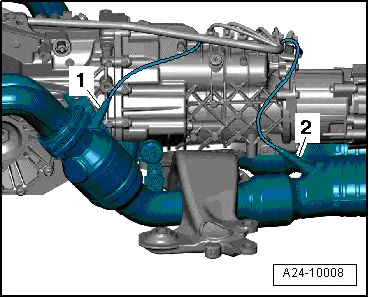
–  Unscrew Lambda probe on cylinder bank 2 (left-side) using Lambda probe open ring spanner set -3337-.
1 - Lambda probe 2 -G108- (before catalytic converter)
2 - Lambda probe 2 after catalytic converter -G131-
Installing
Installation is carried out in the reverse order; note the following:
  Note
t  New Lambda probes are coated with an assembly paste. The paste must not get into the slots on the probe body.
t  In the case of a used Lambda probe grease only the thread with high-temperature paste. The paste must not get into the slots on the probe body. High-temperature paste → Parts catalogue
t  When installing, it is important to re-attach the Lambda probe wiring at the same locations to prevent it from coming into contact with the exhaust pipe.
–  Install subframe with cross member → Rep. Gr.40.
–  Align exhaust system so it is free of stress → Rep. Gr.26.
l  Tightening torques: refer to exploded view of Lambda probes → Chapter.
  A24-10008

Engine control unit > < Lambda probes - overview