audi Workshop Repair Guides

Audi Workshop Service and Repair Manuals

Adhesive sealing materials and setting times > < Preparation for windscreen installation
General Body Assembly
Removing and installing windscreen - Assembly overview
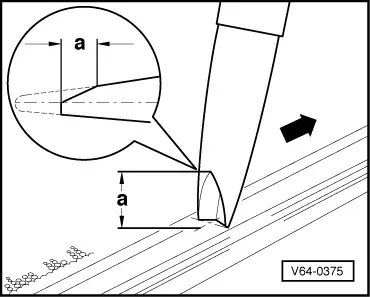
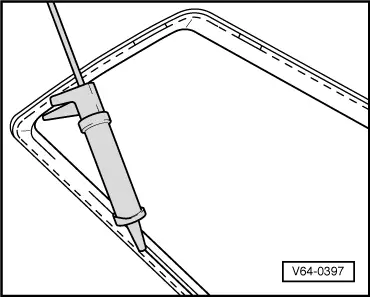
Installing windscreen
 
V64-0375
  • ‒ → After performing the preparatory work, cut the tip of the nozzle to shape as shown in illustration.
  • ‒ Dimension -a- = 12 mm.
  • ‒ Width of adhesive bead 8 mm.
  • ‒ Application direction -arrow-.

Note:

The size and shape of the adhesive bead is determined by the nozzle opening and the rate of application.

 
V64-0397
  • ‒ → Apply adhesive sealant to perimeter of windscreen as shown in illustration.
  • ‒ Spacing between centre of adhesive bead and edge of windscreen is 8 mm.
  • ‒ Using two double suction cups, install windscreen glass in windscreen opening.
Important
Windscreen must be inserted within 10 minutes, otherwise the adhesive properties of the adhesive sealant will be impaired.
  • ‒ Laterally align window.
  • ‒ Distance between windscreen trim cover and roof frame must be 4 mm.

 
A64-0010
  • ‒ → Press home rain gutter -1- into retainers -3-.
  • ‒ When pressing in, ensure sealing lip of rain gutter is positioned on windscreen and does not slip behind edge of windscreen.
  • ‒ Hollow rivet -2-.
  • ‒ Secure window glass in position in window opening with adhesive tape.

Adhesive sealing materials and setting times > < Preparation for windscreen installation