audi Workshop Repair Guides

Audi Workshop Service and Repair Manuals

Removing and installing charge-air cooling system components > < Exploded view of turbocharger removal and installation
4-Cyl. TDI®Engine, Mechanics
Servicing charge-air system with turbocharger
Removing and installing turbocharger
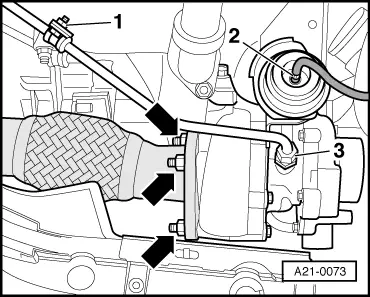
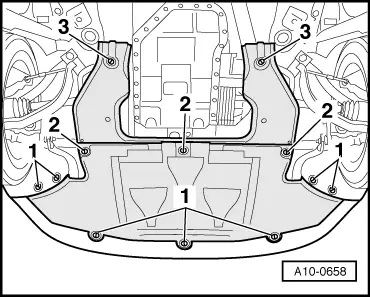
 
A10-0658

Removing

  • ‒ → Release quick-release fasteners -1- and -2- and detach front noise insulation.

 
A10-0013

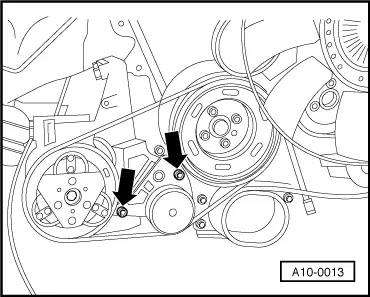
Vehicles with air conditioner:

Note:

Before removing, mark direction of ribbed belt with chalk or felt-tipped pen. Running a used belt in the opposite direction could destroy it.

  • ‒ → Slacken off bolts of tensioning roller for air-conditioner compressor ribbed belt -arrows-, slacken off ribbed belt and detach.
Attention:
Never open refrigerant circuit of air conditioner.
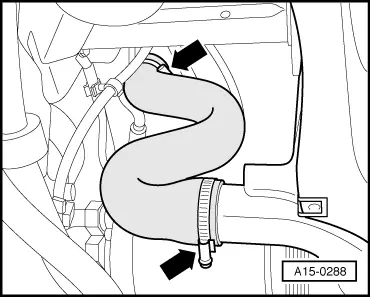
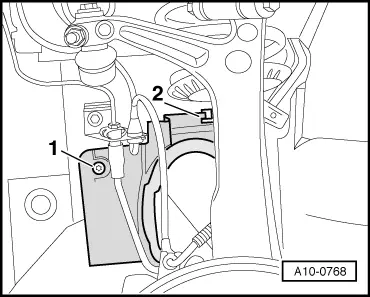
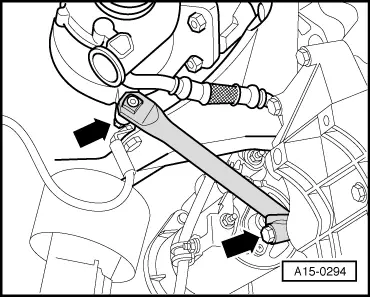
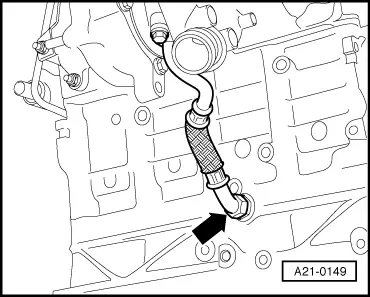
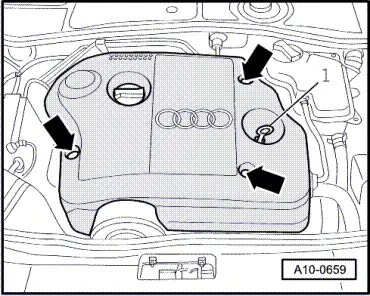
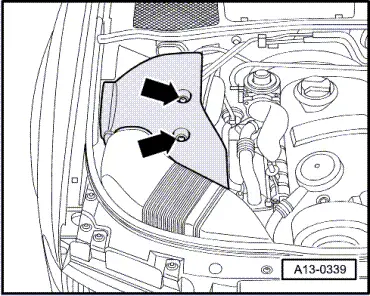
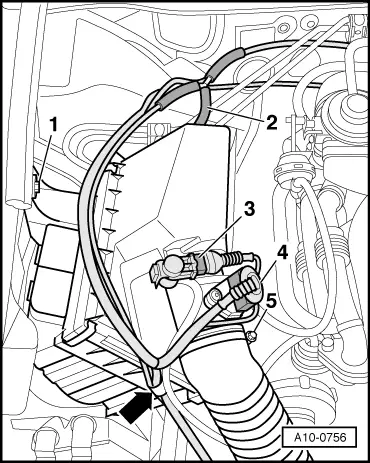
  • ‒ Detach air conditioner compressor from bracket and secure to body with wire.
 
A15-0288

All models:

  • ‒ → Remove right side air hose -arrows-.

 
A10-0768
  • ‒ → Slacken bolt -1- of soundproofing cover over right side drive shaft at front.
  • ‒ Unhook catch -2- and detach soundproofing cover.
 
A15-0294
  • ‒ → Remove bracket for turbocharger -arrows-.

 
A21-0149
  • ‒ → Detach oil return pipe from cylinder block -arrow-.
  • ‒ Screw out turbocharger/exhaust manifold nut accessible from underneath.
 
A10-0659
  • ‒ → Pull dipstick -1- out of guide tube.
  • ‒ Unclipcaps.
  • ‒ Remove nuts -arrows- and detach engine cover.
  • ‒ Remove insulation lying below.
  • ‒ Re-insert dipstick into guide tube.

 
A13-0339
  • ‒ Unclipcaps.
  • ‒ → Screw out bolts -arrows- and detach air cleaner cover.
 
A10-0746
  • ‒ → Screw out bolts -arrows-.
  • ‒ Remove air duct -1- and -2-.

 
A10-0756
  • ‒ → Disconnect vent hose -2- from air cleaner housing.
  • ‒ Unplug electrical connector -4- from air-mass meter.
  • ‒ Detach EGR valve -N18 -3- from air cleaner housing.
  • ‒ Detach wiring harness from air cleaner housing -arrow-.
  • ‒ Detach air hose -5-.
  • ‒ Screw out bolt -1-.
  • ‒ Detach air cleaner housing.

Vehicles with manual gearbox:

  • ‒ Remove EGR connecting pipe -Item26-29.

Vehicles with automatic gearbox:

  • ‒ Remove EGR system cooler =>Page 26-48.

All models:

  • ‒ Detach heat shield from exhaust manifold.
 
A21-0073
  • ‒ → Detach hose -2- from charge pressure control vacuum unit.
  • ‒ Slacken bolt -1- on holder of oil supply pipe.
  • ‒ Unbolt oil supply pipe -3- from turbocharger.
  • ‒ Screw out turbocharger/exhaust manifold nuts -arrows-.
  • ‒ Screw out top turbocharger nuts.
  • ‒ Remove turbocharger.

Installing

Install in reverse order, paying attention to the following:

Notes:

  • ◆ Secure all hose connections with standard hose clamps:

=> Parts List

  • ◆ Hose connections and hoses for charge-air system must be free from oil and grease before fitting.
  • ◆ Always replace gaskets, sealing rings and self-locking nuts.
  • ◆ Pay attention to installation position of exhaust manifold/turbocharger gasket.
  • ◆ Fill turbocharger with engine oil at oil supply pipe connection.
  • ◆ Charge-air system must be free from leaks.
  • ‒ Install EGR system cooler =>Page 26-53.
  • ‒ Perform stress-free alignment of exhaust system => Page 26-23.
  • ‒ Check oil level => Page 17-33.

Tightening torques

Component

Nm

Turbocharger to exhaust manifold

25 1)2)

Turbocharger to catalytic converter

25 1)

Bracket for turbocharger to turbocharger


20

Bracket for turbocharger to cylinder block

40

Oil supply pipe to cylinder block

30

Oil supply pipe to turbocharger

22

Oil supply pipe to holder

10

EGR connecting pipe to exhaust manifold

25

EGR connecting pipe to intake manifold

25

Heat shield to exhaust manifold

25

    1)    Replace nuts

    2)    Coat thread and head resting surface with hot bolt paste.
        Hot bolt paste

=> Parts List

Removing and installing charge-air cooling system components > < Exploded view of turbocharger removal and installation