audi Workshop Repair Guides

Audi Workshop Service and Repair Manuals

Removing sump (top section) > < Installing sump (bottom section) - engines with moulded gasket
Installing sump (bottom section) - engines with liquid gasket
Special tools and workshop equipment required
t  Electric drill with plastic brush attachment
t  Safety goggles
t  Sealant → Parts catalogue
Procedure
  Note
Renew seals.
  Caution
It is essential to use a liquid gasket again if sump (bottom section) was previously fitted with such a gasket.
   
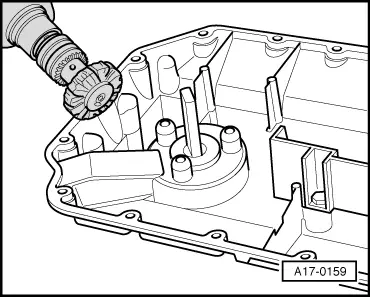
–  Remove sealant residue from bottom section of sump and top section of sump with rotating plastic brush or similar.
  WARNING
Wear safety goggles.
–  Clean sealing surfaces; they must be free of oil and grease.
  A17-0159
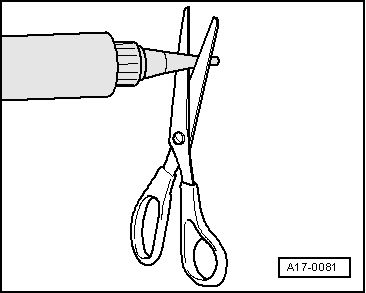
–  Cut off tube nozzle at front marking (nozzle approx. 3 mm Ø).
  A17-0081
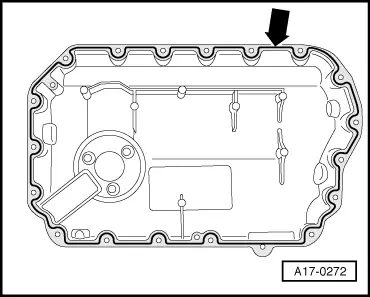
–  Apply sealant bead to clean sealing surface of bottom section of sump, as shown in illustration.
l  The bead of sealant should be approx. 1.5 mm wide -arrow-.
  Note
t  The sump (bottom section) must be installed within 5 minutes after applying sealant.
t  The sealant bead must not be thicker than specified, otherwise excess sealant could enter the sump and clog the strainer in the oil pump.
–  Fit sump (bottom section) and tighten all bolts initially to 5 Nm in diagonal sequence.
–  Tighten bolts on sump (bottom section) in diagonal sequence.
–  Fill up with engine oil and check oil level → Chapter.
Tightening torques
  A17-0272
ComponentNm
Sump (bottom section) to sump (top section)10
Oil drain plug30


Removing sump (top section) > < Installing sump (bottom section) - engines with moulded gasket