Before removing, mark direction of rotation of poly V-belt with chalk or felt-tipped pen. If the belt runs in the opposite direction when it is refitted, this can cause breakage.
–
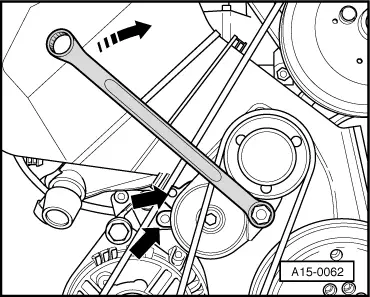
Turn the tensioner in the direction of the -arrow- using a 17 mm ring spanner to slacken the poly V-belt.
–
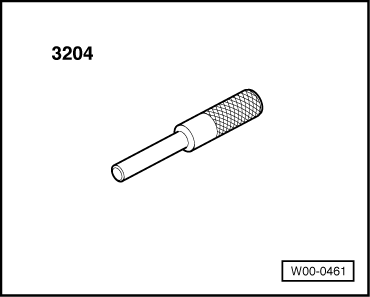
Lock tensioner in position by inserting locking pin -3204- in locating holes -arrows-.
–
Guide poly V-belt over viscous fan and detach belt.
Installing
Installation is carried out in the reverse order; note the following:
–
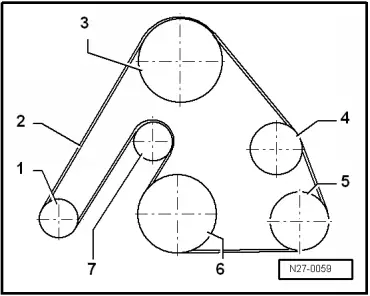
First fit poly V-belt on vibration damper. Push poly V-belt onto tensioning roller last.
1 -
Alternator
2 -
Poly V-belt
3 -
Power steering pump
4 -
Viscous fan
5 -
Air conditioner compressor
6 -
Crankshaft
7 -
Tensioning roller
Note
When installing poly V-belt, make sure it is properly seated on pulleys.
 Note
Note