audi Workshop Repair Guides

Audi A4 Workshop Service and Auto Repair Manuals

Servicing lower link > < Lower link
Running gear, Front-wheel drive and four-wheel drive
Lower link
Removing and installing lower link

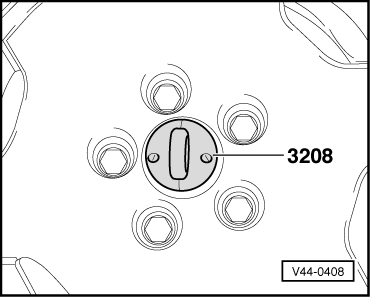
Special tools and workshop equipment required
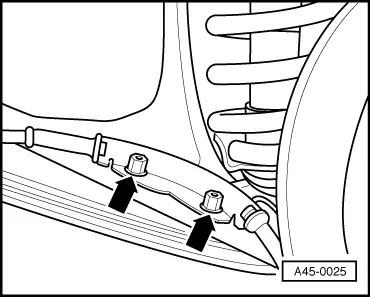
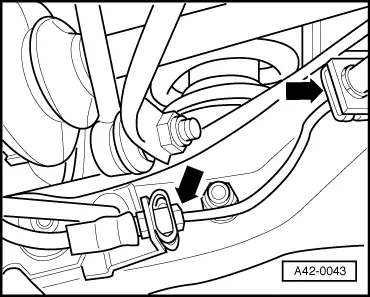
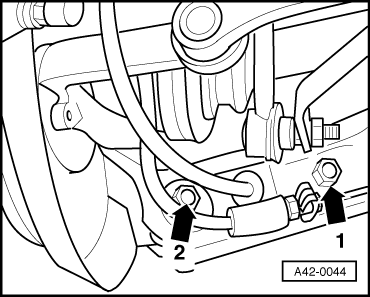
  • ◆ V.A.G 1331 Torque wrench
  • ◆ V.A.G 1332 Torque wrench
  • ◆ 3208 Suction grip

Removing

  • ‒ Vehicle standing on its wheels over lifting platform
 
V44-0408
  • ‒ → Detach wheel trim. In the case of light alloy wheels, use puller from vehicle tool kit or suction grip -3208- to remove trim cap.
  • ‒ Slacken off wheel bolts.
  • ‒ Raise vehicle.
  • ‒ Remove wheels.
 
A45-0025
  • ‒ → Unscrew speed sensor holder -arrows-.

 
A42-0043
  • ‒ Draw off brake fluid from reservoir.
  • ‒ → Unscrew brake pipe at locations marked with -arrows- in Fig.

Notes:

  • ◆ If applicable, pay attention to headlight range control .
 
A42-0044
  • ◆ Removal and installation of rear axle or lower link involves unfastening connecting link of rear left/rear right vehicle level sender -G76/ -G77 at lower link.
  • ‒ → Remove lower link/suspension strut bolted joint -arrow 1-.
  • ‒ Remove parking brake cable from link.

=> Brake System; Repair Group 46; Removing and installing handbrake cables

Note:

Do not pull on handbrake cable as this would alter handbrake setting.

 
A42-0044
  • ‒ → Remove wheel bearing housing/lower link eccentric bolt -arrow 2-.
 
V42-0921
  • ‒ → Remove both subframe/lower link bolts -arrow-.

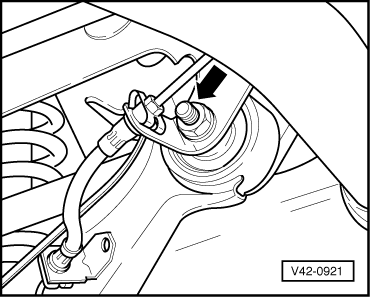
In the interests of clarity Fig. only shows one bolt.

  • ‒ Take out link.

Installing

Install in reverse order.

For bolts and nuts to be replaced as well as tightening torques, refer to .

Tightening torques for brake pipe bolted joint

=> Brake System; Repair Group 47; Brake Pipes; Tightening torques

  • ‒ Bleed brake system.

=> Brake System; Repair Group 47; Bleeding brake system

  • ‒ Pre-tighten bolted joint for wheel bearing housing/lower link and shock absorber/lower link to 20 Nm.

Wheel bearing housing/lower link and shock absorber/lower link bolted joints must be secured with vehicle standing on its wheels.

Otherwise, bonded rubber bush would be subject to torsion and its service life shortened.

  • ‒ Attach connecting link of rear left/rear right vehicle level sender -G76/ -G77 to lower link => Page 42-45.
  • ‒ Fit and secure wheels => Page 44-1.
  • ‒ Slacken off wheel bearing housing/lower link and shock absorber/lower link bolted joints.
  • ‒ Bounce vehicle several times.
  • ‒ Tighten bolted joint for wheel bearing housing/lower link and shock absorber/lower link to prescribed torque.
  • ‒ Check setting of handbrake and adjust handbrake if necessary.

=> Brake System; Repair Group 46; Removing and installing handbrake lever; Adjusting handbrake

  • ‒ Perform wheel alignment => Page 44-13.

Servicing lower link > < Lower link