
A4 Mk1
 |
|
Removing
=> General Body Repairs, Exterior; Repair Group 63; Front Bumper
=> General Body Repairs, Exterior; Repair Group 50; Front Body
=> Engine, Mechanics; Repair Group 13; Dismantling and assembling engine This operation only applies to vehicles with 4-cyl. petrol engines |
 |
|
=> 4-cyl. Engine, Mechanics; Repair Group 19; Removing and installing cooling system components
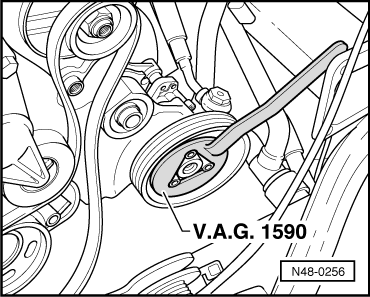
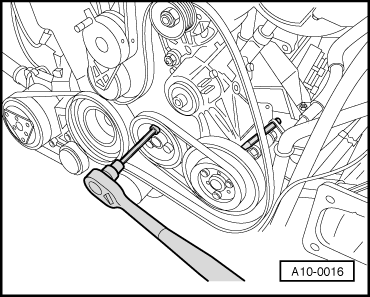
It may be necessary to file down corners of gripping wrench -V.A.G 1590-. |
 |
|
|
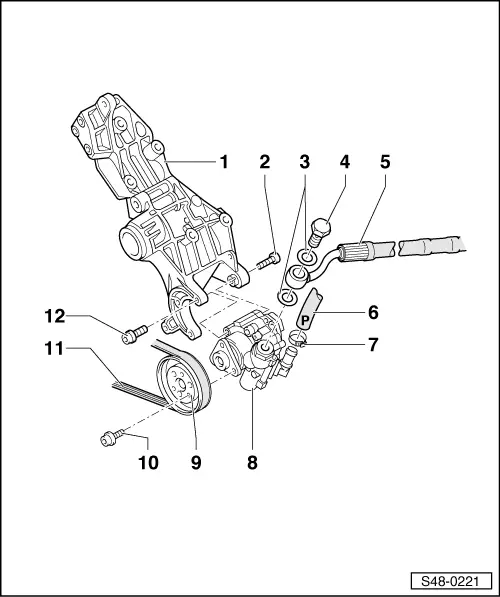
All vehicles with 4-cyl. engines (continued)
|
 |
|
|
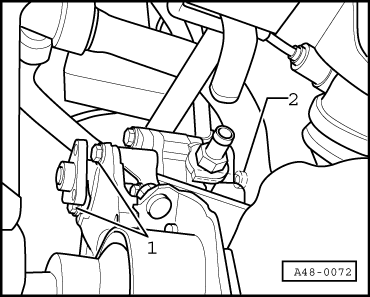
This operation only applies to vehicles up to MY '97
|
 |
|
|
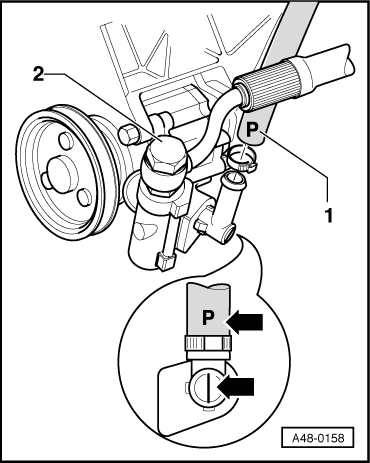
This operation only applies to vehicles as of MY '97 with new vane pump
|
 |
|
|
All vehicles with 4-cyl. engines (continued)
Installing
|
|
|
|
|
|
|
This operation only applies to vehicles up to MY '97
|
|
|
|
This operation only applies to vehicles as of MY '97 with new vane pump
All vehicles with 4-cyl. engines (continued)
|
 |
|
=> Engine, Mechanics; Repair Group 13; Dismantling and assembling engine When installing belt, make sure it is properly seated in pulleys.
=> General Body Repairs, Exterior; Repair Group 50; Front Body; Lock carrier service position
|