audi Workshop Repair Guides

Audi Workshop Service and Repair Manuals

Removing and installing central flap control motor -V70 > < Removing and installing temperature flap control motor, right -V159
Heating
Components for control of heater
Removing and installing temperature flap control motor, left -V158

Note:

This control motor moves two flaps which are interlinked by way of a connecting rod in the heater (not visible from outside). In the event of temperature control complaints, the connection between the flaps can be checked after removing heat exchanger but without having to take out heater (flap can be seen through opening for visual inspection). If applicable, check operation by reaching through slot for heat exchanger into heater and moving the flaps by way of the external lever.

 
A87-0438

Removing

  • ‒ Remove driver's storage compartment.

=> General Body Repairs, Interior; Repair Group 68

  • ‒ → Unplug connector -A-.
  • ‒ Screw out bolts -B-.
  • ‒ Detach lever -C- of control motor from connecting rod -D-.

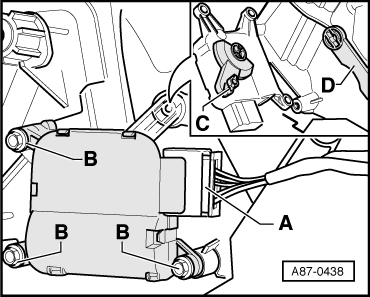
Installing

Note:

Lever at control motor is colour-coded. Lever for control motor -V158 is red (yellow for RHD).

Re-install all parts removed in reverse order, paying attention to the following:

  • ‒ Lay wiring harness so that it cannot come into contact with moving components (e.g. control motor lever).
  • ‒ Interrogate .

Note:

Operation of control motor can be checked in the following manner, for example:

Connect both contacts "5" and "6" in connector of control motor to 12V DC voltage source; control motor moves in one direction as far as stop; interchanging positive and negative alters direction of rotation. Use adapter cable for this purpose => Page 80-28.

Removing and installing central flap control motor -V70 > < Removing and installing temperature flap control motor, right -V159